
So, Dragon*Con 2010 (shameless link to an awesome recap video by my friends over at JumpKickPunch.com) loomed in the horizon and I had found myself without a costume. Long time readers may recall that last year I put together a Big Daddy costume from Bioshock, setting my own bar impossibly high for a repeat performance. The bulk of my time over the past several months has actually been invested in props for my wife's costume, while my own remained mostly undecided.
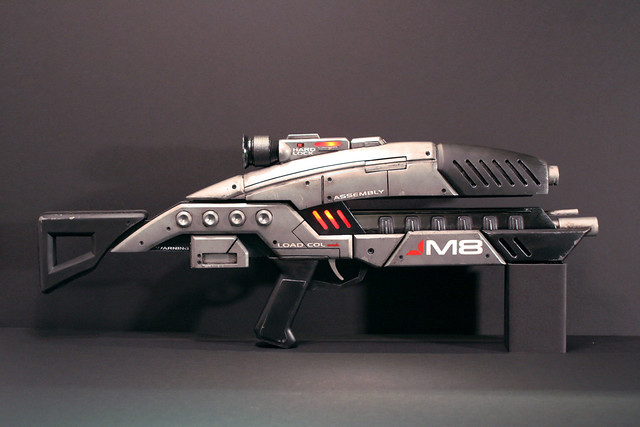
It was then that I ran across EvilFX's "Bioweapons" blog. David does some truly amazing work, and his material choices are innovative and perfect for their application. He was putting together 2 sets of N7 armor for himself and his girlfriend, to be debuted at Dragon*Con 2010. I had 16 days and an M8 rifle, so I decided to try it for myself.
Now, this entry is a bit sparse for a couple of reasons. #1, this is not my technique - if you want to know more about it, I highly suggest visiting the EvilFX blog and reading through some of the entries. #2, in a time crunch, my project detailing is not nearly as thorough as it should be.
I'll share a few tips that I ran across on my build for those interested in taking a whack at this themselves.
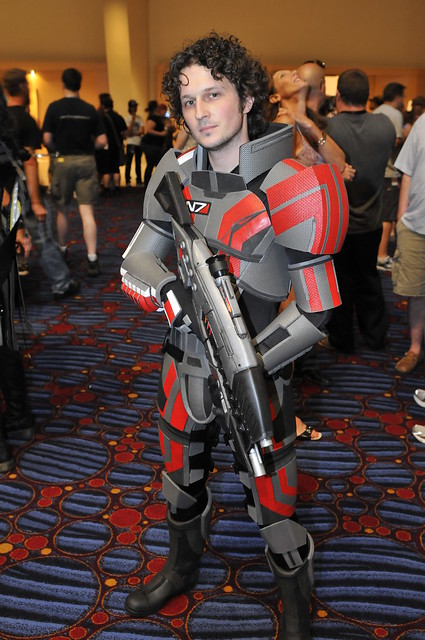
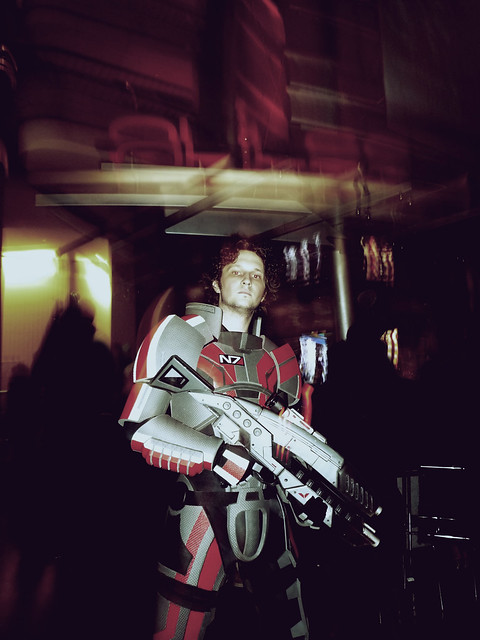 Credit for this pic goes to scenemissingmagazine on flickr
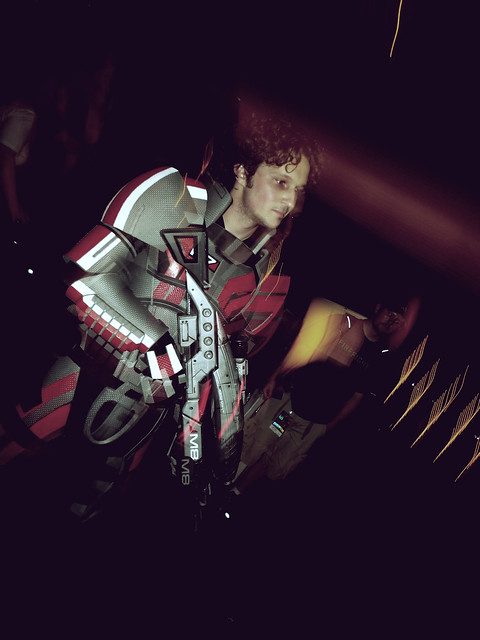
(original here - I did some touchup and erased the random con-goers from the background of the shot)
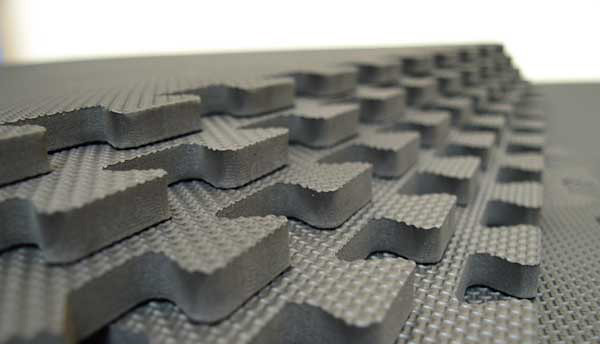
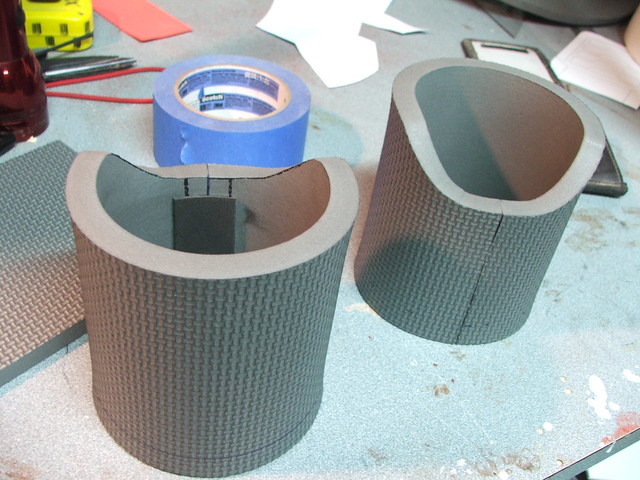
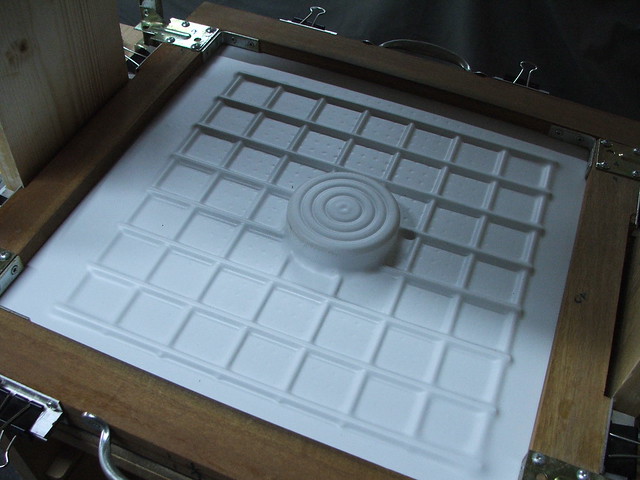
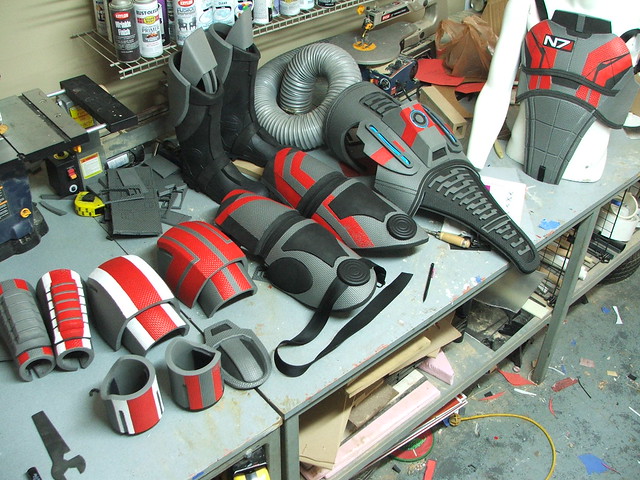
This material is called "EVA Foam" and can be purchased from industrial supply houses like McMaster-Carr. You've likely seen it used on Yoga mats and cheap flip-flops. Its durable, cheap, and comes in tons of fun colors. For this project, I used interlocking floor mats found on eBay, because their textured side simulates the "carbon fiber" look of the N7 armor fairly well. I wouldn't have time to paint the entire suit, so I ordered gray.
As with most of my builds, I did toss together a quick set of blueprints. These weren't nearly as detailed as I usually make, and only included the chest and back pieces.

The remainder of the pieces were patterned on the fly, from looking at multiple screenshots and my very best guesswork. I bought thin sheets of craft foam to make my patterns with, as these are also EVA and behave similarly to the thicker sheets.
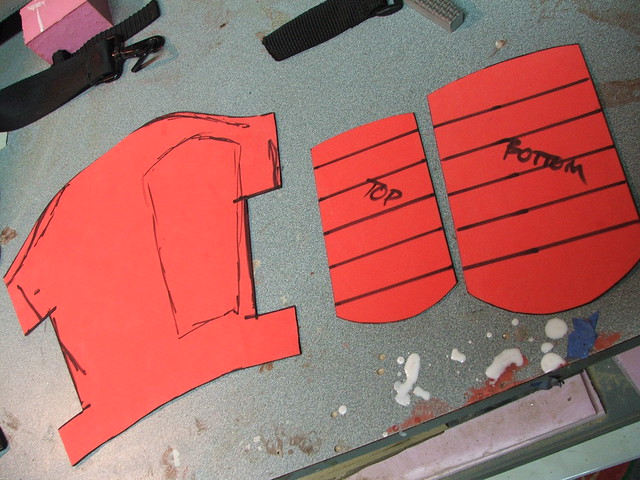
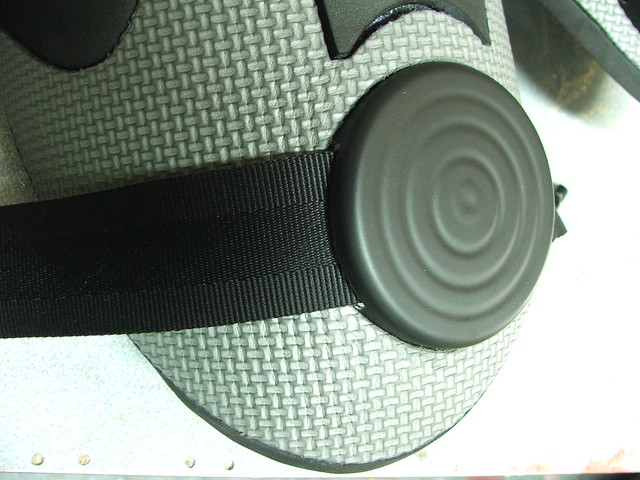
The patterns had to be increased along the circumference of their bend by about 5-10% in order to keep the same curve as the thinner templates. This took some getting used to, but after a couple pieces it started making more sense. The arm bracer here was my first complete piece.

The thinner craft foam also worked very well for inset textures. Instead of trying to sand down an interior face completely smooth, I just carved it rough to shape with my dremel, then cut a piece to fit out of some 6mm craft foam. Crisp, even faces.

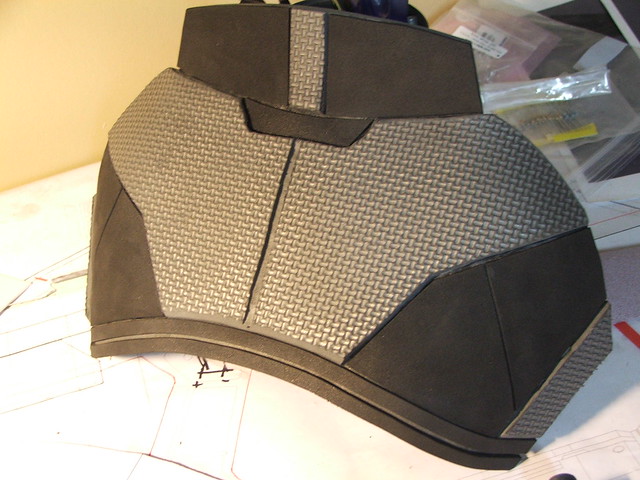
The "panel lines" in the armor were made by first using a hot knife to trace a line across the armor using a metal straight edge. After this, I retraced the line with a dremel tool, using a grinding wheel.
I was lucky enough to trade some lathe work with a friend of mine who laser-cut some of the more intricate spine and back details for me. Little bits like this would have driven me mad.
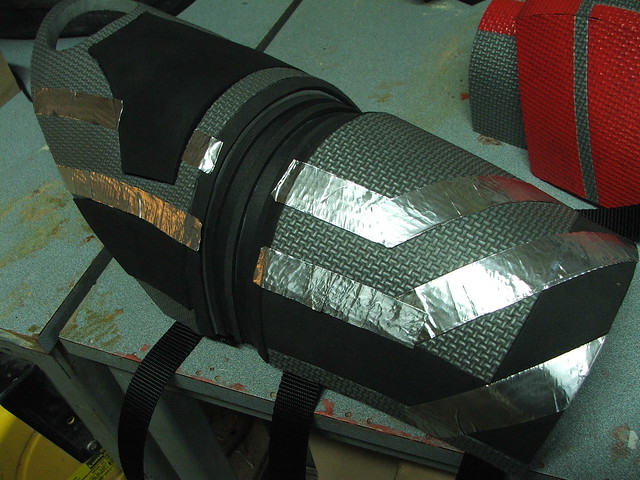
If you don't typically have access to a laser cutter (as I know I usually don't!) then I recommend a bandsaw. Most of my foam was trimmed using a medium wood blade on a 9" bandsaw with no problems at all. Thinner pieces can get pulled into the blade and down into the wheels though, so be careful. I never used a hotknife for cutting, though I know others have.
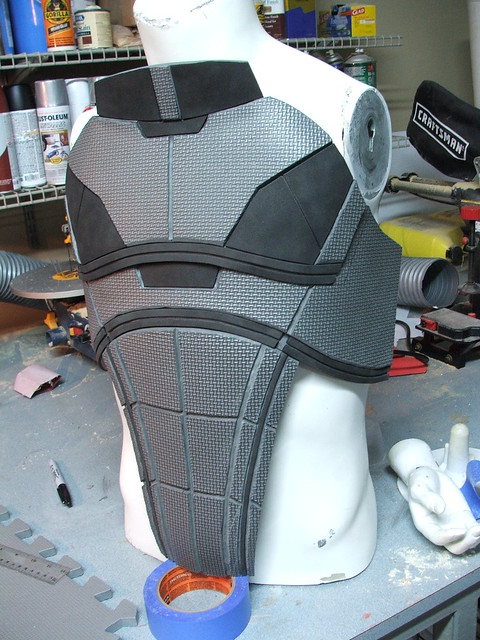
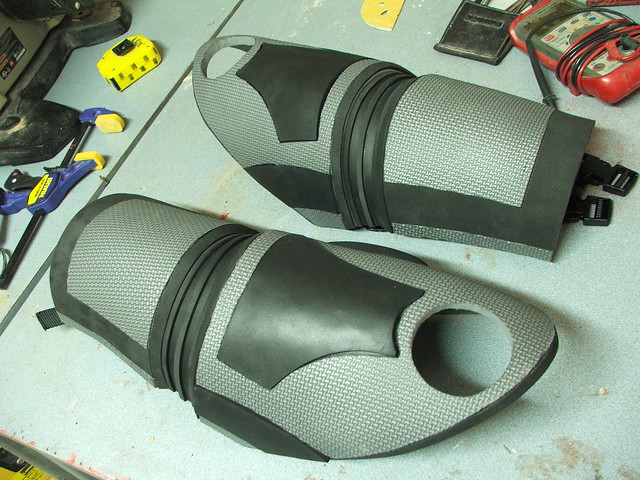
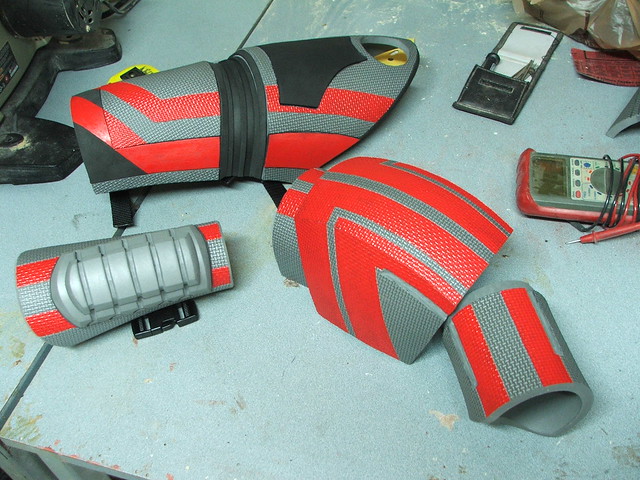
Rigging these pieces was a fun challenge. The bicep pieces (below, little more than foam rings, really) and gauntlets stayed in place by friction alone, but the shoulders, thighs, and chest/back took some thought.
The chest/back was held on with 4 velcro straps (2 on each side) and 2 nylon clips that went up over the shoulders.
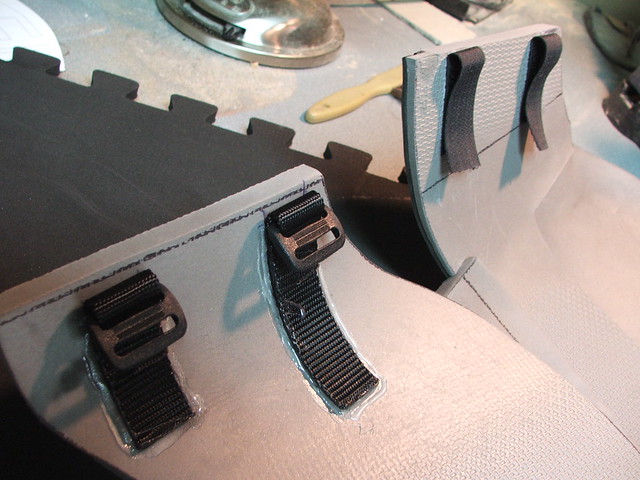
The over-the-shoulder straps threaded through the loops on the inside of the inner shoulder piece, holding then in place. The larger piece is connected to this with a strip of elastic, and another inner piece of elastic keeps the armor in place around the bicep.
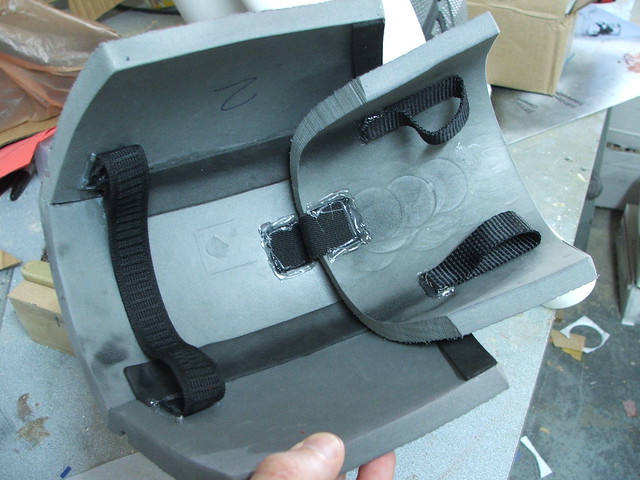
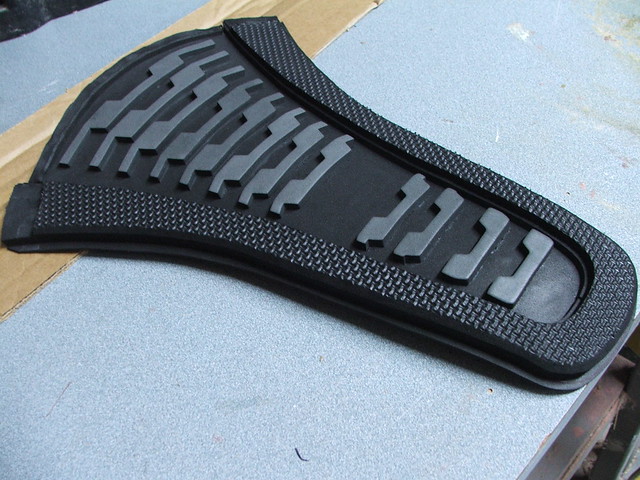
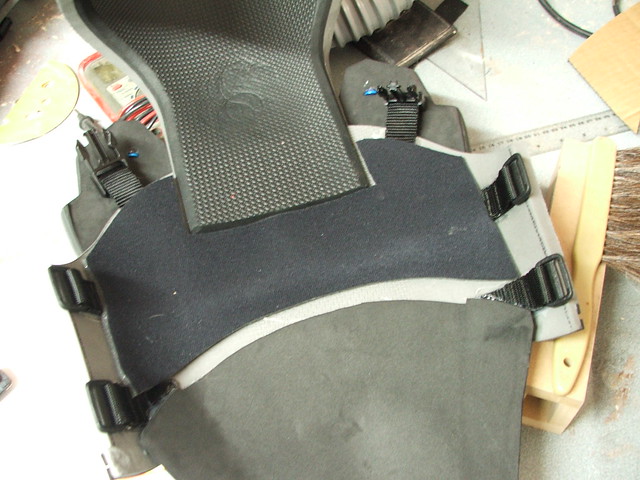
The thighs had three buckled straps a piece on the inside which somewhat held them in place, but luckily the guys at BioWare thought about them slipping down and gave us an out! There are two hip pucks that have a webbed nylon strap running through them, which attach to the chest and back pieces to keep them from sliding down.
I chucked up a piece of MDF on my lathe and popped out a quick master for some vacuumform pulls. These pieces were slotted to receive the webbing that holds the thigh piece up.
The thighs themselves were the result of a lot of heatgun and dremel work. If you're looking to get these pieces in a compound curve, its best to heat them from both sides with a heatgun and pull them over a domed surface. I had some spare PVC endcaps for some 2" pipe that worked really well for this. I also used my knee from time to time if the foam was cool enough.
Most of the shots above show hotglue holding the straps in, but that was the only place where hotglue was used. The foam itself was usually bonded together using superglue. I prefer the Gorilla Glue brand. These pieces held up for 2 days of use at DragonCon and none of the superglue ever let go. It can be a bit pricey though, as I went through 6 bottles for the entire suit.

The best tip I can give when working with this stuff is my painting technique. Since the surface is heavily textured and tape doesn't adhere to it well, I had to find a way to mask off the plethora of stripes I had planned to add to the suit. For this, I first laid out the pattern in tin ducting tape.
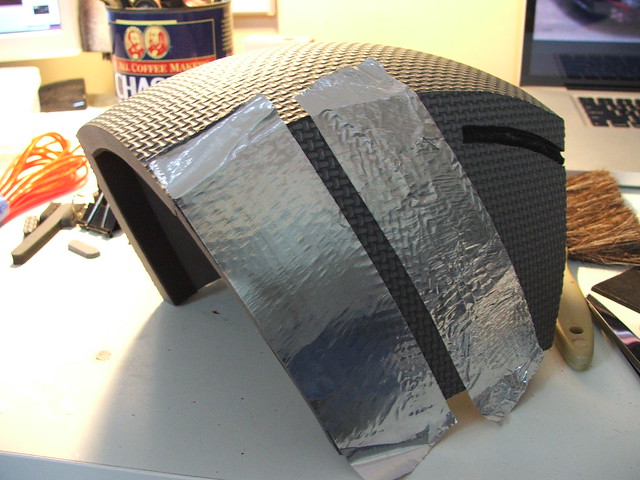
By tracing the edges of the tape with an exacto knife, you create a small indent in the foam. Using a brush, you can paint up to this line to create a clean edge. Its tedious and does take a significant amount of time (the stripes on my suit took me about 7 hours) but the results were worth it.

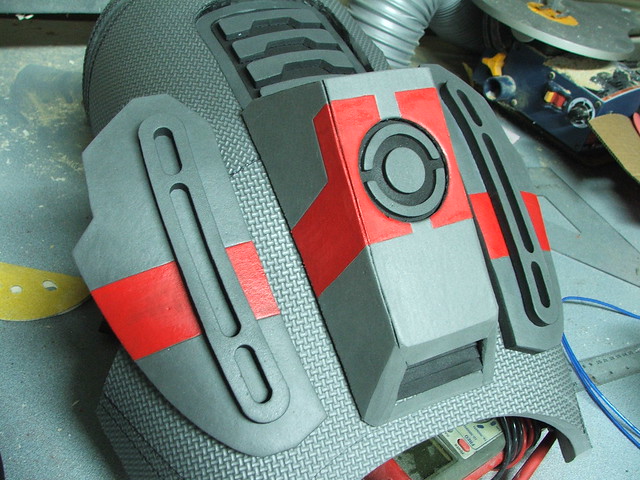
I had the same vinyl shop that did the decals on the M8 (Signs Now) put together some N7 vinyl decals for me to use on the chest plate. I used a piece of black sintra, heated and bent to shape, for the backing. You can see the red paint cracked pretty bad after the con in the shot below - the red used was laquer and the white was enamel. It seems like the enamel holds better to the foam.

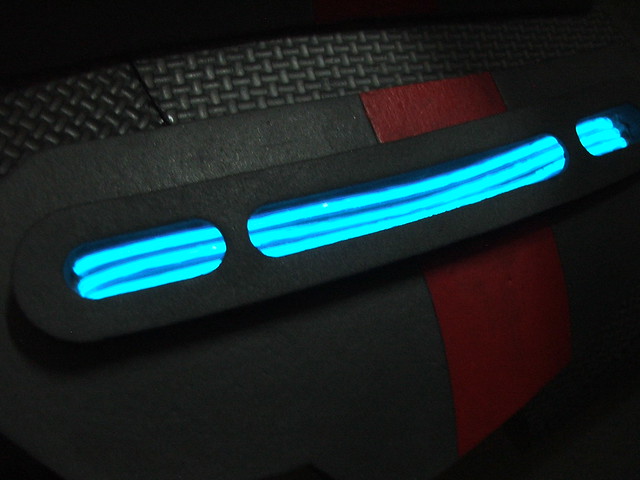
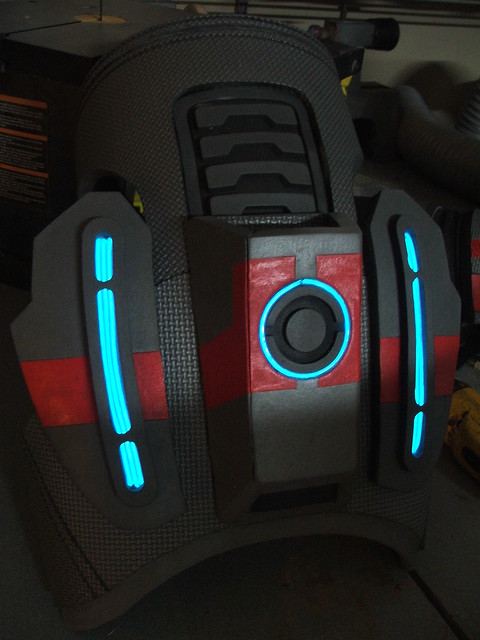
Lastly, I added some blue EL wire to the back, running off 2 AA batteries. This was my first time using the stuff, and aside from that annoying high-pitched tone the inverter gives off, its a very cool lighting tool. Remember, if you can make something glow, its instantly cooler!
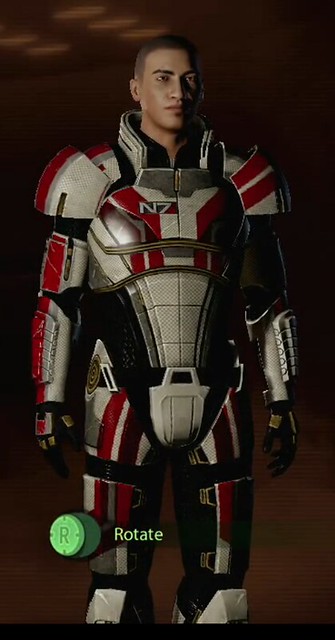
The completed suit! Not too shabby for a rush job, though there's a ton more I would have liked to do if I had the time (painted panel lines, textured the undersuit, made a helmet, etc etc etc!) For DragonCon 2011, I am committed to spending more than a handful of weeks on my costume! Overall though, Foamshep was a blast to wear. The EVA can get a bit warm at times, but its a comfortable, low-cost suit that looks pretty convincing. Also, you don't have to worry about breaking any pieces if you drop them.


Below are a few shots from DragonCon - credited with them are their respective owners on Flickr. I've got a photoshoot scheduled with the Jack cosplayer in the shots below, so look for that soon!
 Credit: Chase Wirth on Flickr (Original here)

The reporter I'm punching in the shot below is Mark Meer, the voice of Commander Shepard in Mass Effect. I was a little tired of his disingenuous crap (Seriously though, he was a damn cool guy to meet in person!)

And another pic from Scenemissingmagazine on Flickr - Thanks again for the awesome shots!
43 comments:
Wow... You've outdone yourself. I am VERY impressed.
SUPER COOL. DO WANT
Great stuff. After I stumbled the M8 rifle, I put this in my feeds. Glad I did so, because I wouldn't've been able to see how well it came together if I didn't.
Impressive ! As always !
Thanks for sharing your work !
FFFFFFFFFFF
You know, while I was sitting with Sara and Heidi on the chairs I was remarking 'man that armor looks like it's made of floor foam...'
Still love this costume, and the bits on JKP
I like that Meer is Hunter S. Thompson in Fear and Loathing, and he's wearing a Sinestro corp suit, the corp that draws their power from fear.
I really was impressed with your armor at Dcon.. what do you think about using sentra, or another plastic instead of foam? I met another girl who did a similar thing with foam, but as always, you came out on top haha. Good job!
We took photos together at Dragon*Con.
http://www.facebook.com/home.php?#!/photo.php?pid=33570717&id=41802390&ref=fbx_album
http://www.facebook.com/photo.php?pid=33570717&id=41802390&ref=fbx_album#!/photo.php?pid=33570718&id=41802390&ref=fbx_album&fbid=569903826419
I haven't photoshopped these so they're a little dark. But I've been inspired by EvilFX and you. I am working on Cerberus Assault armor right now.
Excellent armor!
How are you shaping the foam? You mentioned craft foam, so are you shaping that with a heat gun and then gluing the thicker foam on top or can you shape the thicker foam with a heat gun?
Sweet!
Continue to impress and educate. Love your work.
How does it feel to have or made for others the coolest stuff at every convention?
Volpin, your work is really inspiring. I really appreciate all your step-by-step tutorials. I'm attempting a ME costume soon (probably for next year's dragon con) and I totally want to give you slow motion high-fives if my costume doesn't look like complete shit and fall apart.
Great seeing you at Dragon Con this year. What kind of paint did you use for this? Latex based or something different to brush it on?
Daniel: Some of it was Enamel, and some was Lacquer. The enamel fared better, but I'm told Acrylic is actually the best route for this stuff. Next time!
Matt: All shaped with a heat gun, and yes the thicker stuff will form, it just takes a while.
Ryan: Sintra would have been much heavier, and also more expensive. You can do more with it, but the foam was great for a tight-deadline suit
I'm using acrylic paint on my Cerberus Assault Armor and it's perfect. Flexes, doesn't chip, covers evenly.
I recently made your costume bioshock and I wanted to know if you planned to make a costume of the Lich King, because indeed no plans to do so I think of you
The next logical step would be something Dead Spacey. A full Isaac suit would be awesome, but if time is of the essence, a simple RIG would look sweet too. And I guess a Plasma Cutter with an actual transforming barrel is possible too? :)
respect.
I'm AgentFoo and this is my favourite cosplay on the internet.
Wow, incredibly well done. How long did the whole thing take you? I'm hoping we'll get an enormous number of people building these, and it will end up being insanely awesome :P
dude. wtf thats amazing, this will be my reference. thanks for it.....really!
I wanted to thank you for all your inspiration!! You were instrumental in helping me make my foam Shep. I am going to re-do it now as I have learned so much from the first crack, but I did try something that I haven't seen anyone else do...the helmet! Add me on Facebook if you want to see the stages. Btw....I might need your advice to make a better gun!
oh yeah...and hope to see you at Dragoncon this year.
This is amazing man, hands down one of the best N7 cosplays out there. Very cleanly and professionally done, not to mention the sheer likeness to Shepard's in-game armor.
This is truly the most exiting thing I have ever seen. Is there a chance to get some printable blueprints of it?
доктор гонзо неотразим...
Absolutely fantastic,I'd love a set of that armour and the riffle.
what is the scaling you used?
i want to make one too, but i don't want to fuck yup with the scaling of the template
That armor isn't made of foam - it's made of WIN!!! :)
Seriously, though, really good job. I wish I had the space to work on awesome costume projects like that.
your armour makes the floor look like it isnt real,
did i just go through warp space to the 22nd century?
Thats incredible. Is there any chance I could get a copy of the blueprints that you used?
Better question, what would you charge for a complete set of N7 armor?
I just now saw this! This is breath taking man! Seriously ever since ME1, I've wanted to cosplay as Shepard and you've brought it to life. I can only hope to do anywhere near this well.
My question is, how'd you make the boots?
how much for a custom suit. i will pay money.
do you seel me :) How mutch? claudiohair1983@gmail.com
Amazing inspiration <3 thankyou for sharing!
how much for one??
Wow... I love it. Hey, how to make a Tali? xP
lol how about a femshep piece now?
Beautiful work. Do you do commissions?
Post a Comment