
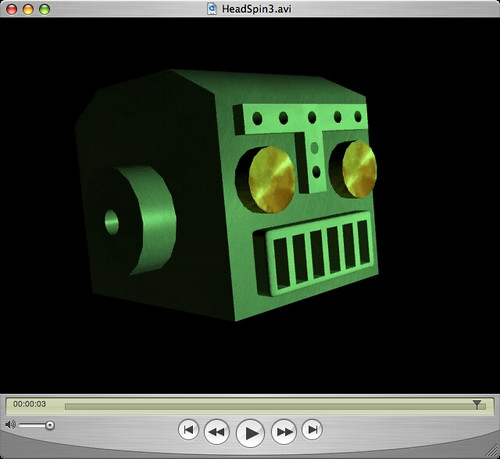
Yanier (Niero), the founder of Destructoid.com, commissioned me to replicate his mascot "Mr. Destructoid" for their website's three-year anniversary.
Their original mascot had served faithfully for years, but Yanier wanted an upgrade. My design direction was "Chibi, but like a Transformer" Fun times!


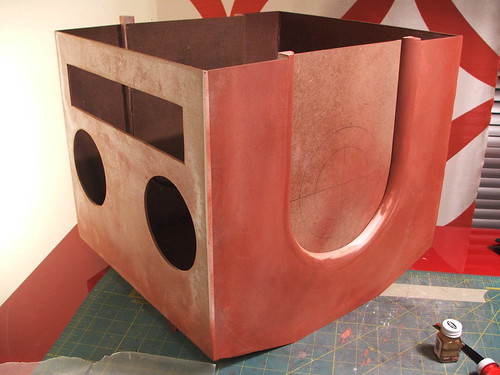
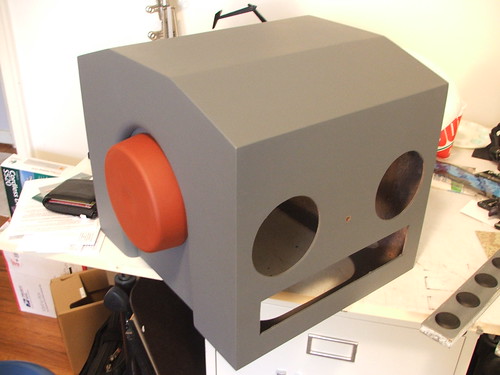
After deciding on dimensions and schematics, I transferred my design from printouts to masonite, and trimmed the necessary pieces. These were tacked in place for mockup, then hotglued to hold thier shape temporarily.
The seams were filled on the outside with Apoxie Sculpt to make everything have sharp 90 degree angles.
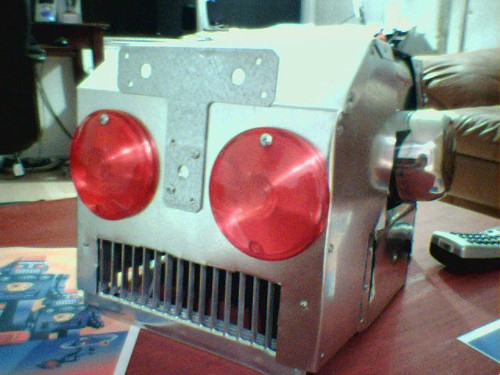
Niero was looking for some illumination, and I found a set of LED lights that fit the dimensions of the helmet perfectly. I wired them to have a "high" and "low" setting. They're very bright when on "high." The whole system is powered by my favorite, a 9V battery.
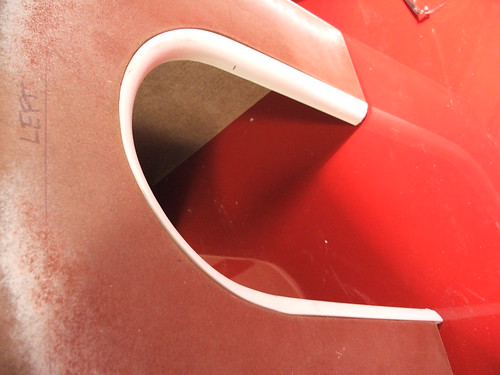
I molded some extruded plastic edging into the C-shaped cut outs around the ears to taper the outer shape into the ear recesses. These were temporarily hotglued in place...
...and then masonite backing plates were added as well.

Of course, hotglue isn't very sturdy or reliable. I reinforced the entire inside of the helmet with fiberglass mat and resin, adding some apoxie sculpt in the corners to give them extra rigidity. The C-shaped ear cutouts also recieved fiberglass treatment.

At this point I decided on a helmet rigging system. The hardhat has a ratcheting system in it so that the helmet can be worn by different people. I also added a chinstrap to it after Neiro told me he was planning on running a 5k jog (!!!) with the giant thing on his head.


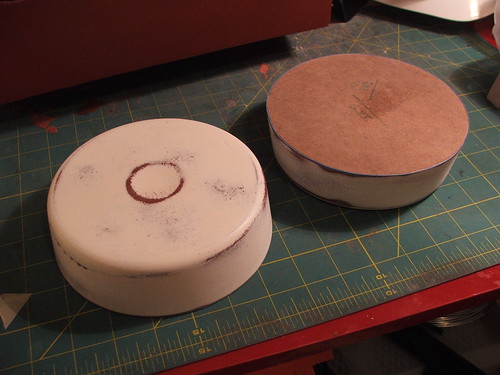
Paint buckets were used for the ear "pucks." The bottom of the buckets were cut out, and a masonite disc was epoxied to the open edge.
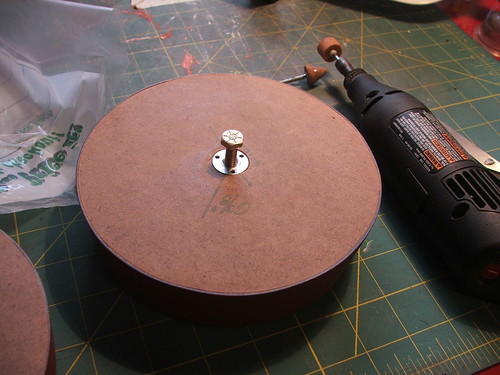
After mucho sanding, the pucks were drilled for a blind nut that was epoxied in place. An aligned hole was drilled in the helmet, as well as a "locking tap" which keeps the ears from spinning around on their bolt.

A fellow SCAD graduate ran the rivited "eyebrows" and mouth through a cool autorouter he has. I'm really looking to see what his machine can do, and this was a good simple pattern to test out. 343's website (dude who did the carving) is here: http://sevencubed.net/
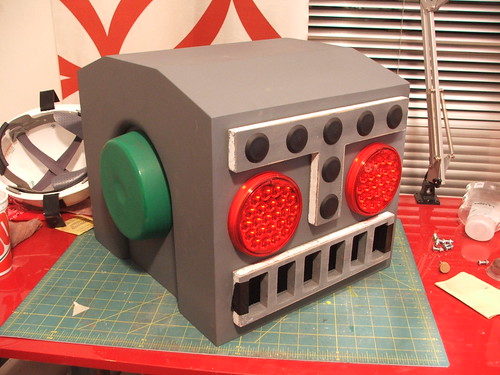
After lots of sanding, I had my first test assembly with all the components! One ear puck would NOT co-operate, and I ended up having to paint it in between the snow when it was about 20 degrees outside. Laying a gloss coat in weather like that sucks.
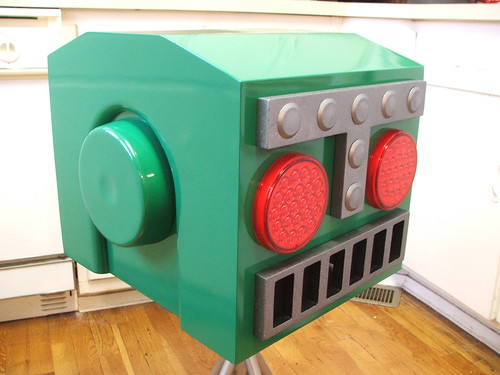
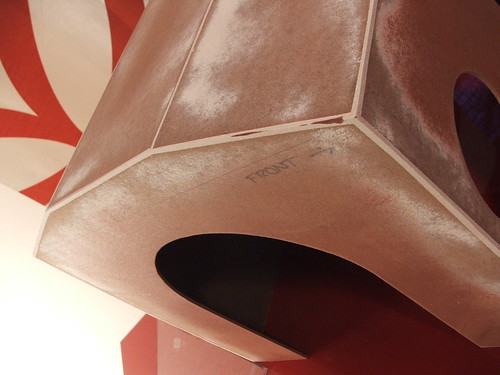
It all paid off though! But this looks far too new... too shiny...

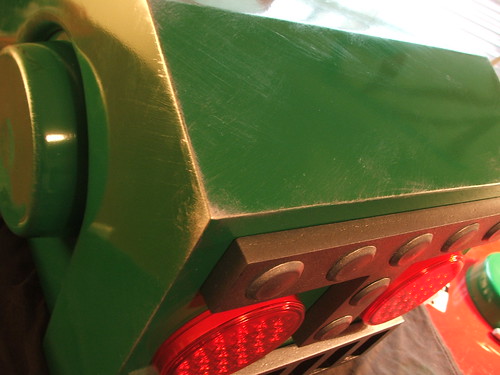
A little drybrush weathering to give the effect of a "used robot" was employed. This really set off the corners of the piece and pulled the whole look together.

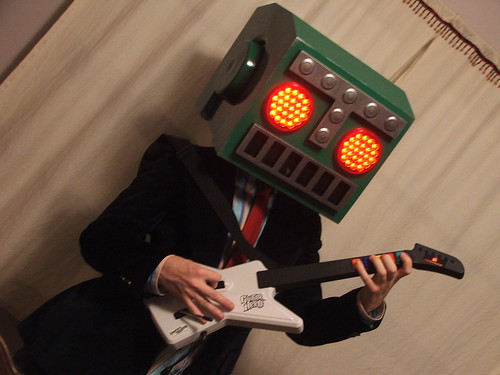
I added some mesh behind the mouthpiece as well, to keep other people looking in from being able to view the wearer as well as if they're completely open. The inside edges were also painted black for this reason. It really doesn't inhibit viewing out when you're wearing it though.
The guys at Destructoid.com did a really cool teaser video for the debut, which you can check out here:
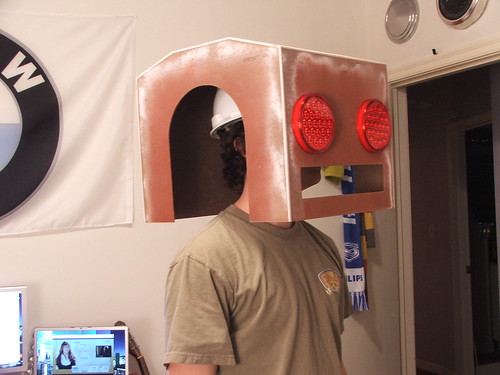
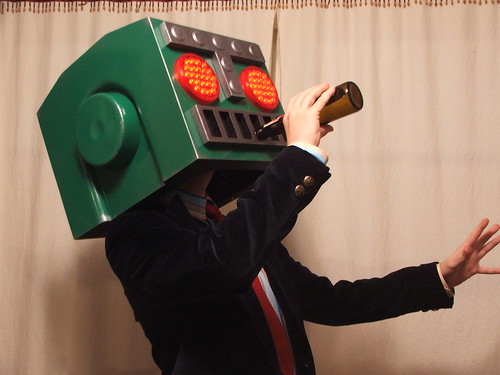
And here I am, taking the helmet through a quick "test run." Despite what it looks like, there's actually a good amount of visibility through the mouth. It gets rather echo-ey in there, but you can't help but have fun when you're wearing this thing.
Happy Third Anniversary, Destructoid.com!
[Edit]: To answer some quick questions I've been hearing on the Destructoid.com forums;
- The helmet weighs about 8 pounds. Some very quick google searching says the average human head weighs 11 pounds, so its kind of like wearing another head.
- The positioning of the viewing port in the mouth makes it so that if you're ever talking to anyone of the fairer sex, all you can see is their cleavage. I tested this on my fiancé. Its awesome.
- I chose not to line the inside of the helmet with any sound-deadening material for 2 reasons. 1) it weighs enough as it is, and 2) one of the main complaints I heard about the old helmet was how hot it got inside. I figured insulation wouldn't help much. The "echoey" thing isn't really that bothersome; you do have your head in a box, after all.
- I tried to make things as light as possible, while also remaining budget-conscious. I could have made the whole thing, then made a silicon mold and resin-cast the whole helmet, which would have saved me about 3 or 4 pounds. This would have quadrupled the build cost, however.
- It is huge. Thank you for noticing.
- Per client request, I will not be producing duplicates without the expressed permission of Yanier.
14 comments:
Wow that turned out great! Great job as always.
You did an incredible job, Harrison! I'll be sure to post it on the site asap.
Wow, this is unbe-freaking-lievable. Awesome work, man!
This is amazing, well done, Sir.
Really fantastic job, it looks amazing!
Amazing job for Destructoid! You are awesome!
Incredible! Beautiful craftsmanship. A SCAD alum eh? I'm looking into SCAD for grad school.
Awesome work, man.
Awesome job! That helmet looks so perfect...
AMAZING! DO WANT!
Dude, way awesome! Thank you for giving our favorite robot a shiny new upgrade <3
Thanks for all the support guys! It was awesome to be a part of the 3-year anniversary of Destructoid. I hope the community enjoys seeing the helmet as much as I enjoyed making it.
Very awesome craftsmanship! You sir are King of props!
it's awesome !
i wanna try to make that one, may you share how to create the LED eyes?
really love it !
Post a Comment