

My former is a little bit different from others I've run across. My wife and I recently received a new toaster oven for our wedding (Thanks Cindy, Susan and Terri!) so the old one that followed my wife through college was now up for harvesting. I decided to take out the heating elements - these being often the trickiest part of most people's vac-former builds - and make myself a vacuum-former around them. This limited me to the size of the heating elements, but since this is my first ever attempted vac machine, I figured it couldn't hurt to start small.
Here's a few helpful links I scoured when doing research for my build:
First thing was first: I had to dig the coils out of the old machine. The flash in the picture makes it look worse than it was, but we're talking about 5 years worth of corn dogs and mini pizzas here. This thing was nasty.

And the guts I excavated. In the end, I didn't end up using the temperature control switch or the timer. The "bake, broil, toast" is only a rotary switch that turns individual heating elements on and off, so that was scrapped as well. The wires had a nice heat resistant shielding on them, so I re-purposed those later. They even had their very own fancy ceramic posts!

The heating elements dictated the size of the oven box, which itself dictated the size of the frame and platen. In the end I would up with a 14" x 14" work area. This is the oven box going together - its a maple box lined with 2 sheets of 1/4" hardibacker concrete board.

From the dimensions of the oven, I worked backwards to figure out the size of the platen and frames. Frames are also maple, held together with L-brackets and wood glue.

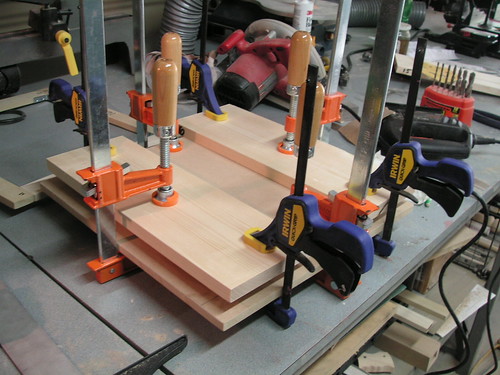
For the platen, I took two sheets of 1/2" MDF and sandwiched them around a sheet of 1/4" MDF. The 1/4 was trimmed to about 3/8" wide to form the inner hollow area. These were clamped and set to dry overnight.
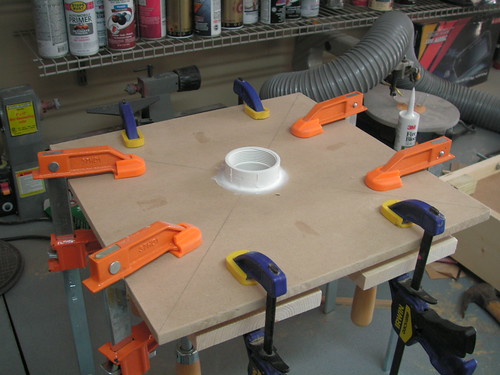
On the underside, I glued in a threaded piece of PVC and sealed the seam with caulk. The threads allow me to use a different adapter if I ever step up to a larger vacuum pump in the future.
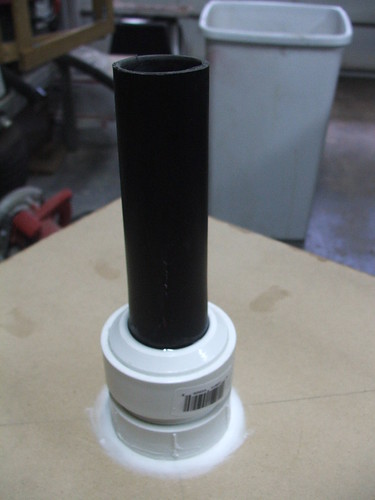
This is the cobbled-together adapter I'm using for now. All sealed with caulk as well, it pressure fits onto my shop vac hose.
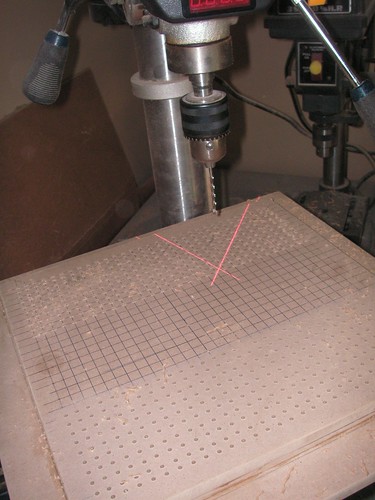
After this came the drilling. And then more drilling. And some drilling after that. I don't know what I would have done without the laser guides on my drill press. The holes are 1/8" and spaced every 1cm. This was based on my "well, that seems like a good idea" research, and some hinted-at suggestions online that smaller holes over a larger area work better.
I got the rolling table when stopping by my parent's house to pick up some of their old furniture. This used to be their kitchen telephone table. Initially, I had planned to remove the leaves, but had to include them in the end because the table top was about 4" too narrow.
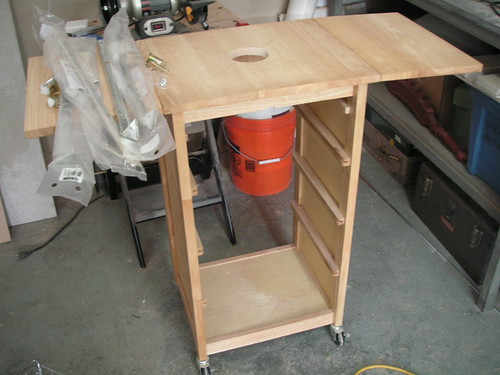
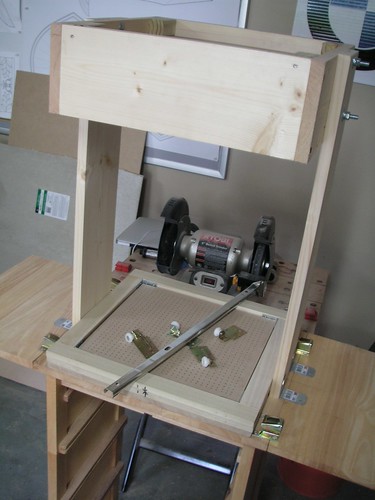
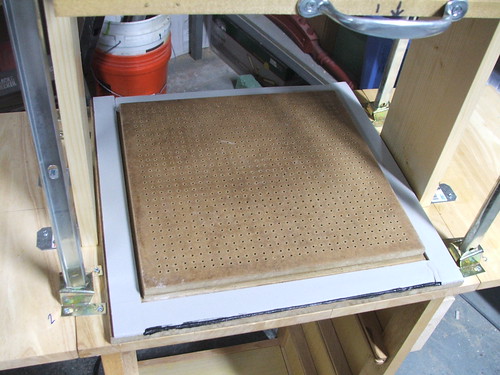
Here's the freshly drilled platen and the oven box ready for mounting.

The oven box itself was mounted to the table using 1" x 4" poplar boards. 3" long lag bolts were used to anchor the board to the sides, and it is held to the table with L-Brackets
The inside of the oven before mounting the coils. I used fireplace caulk to seal the edges and seams of the hardibacker board. I also used this later to seal the wiring going into the oven.

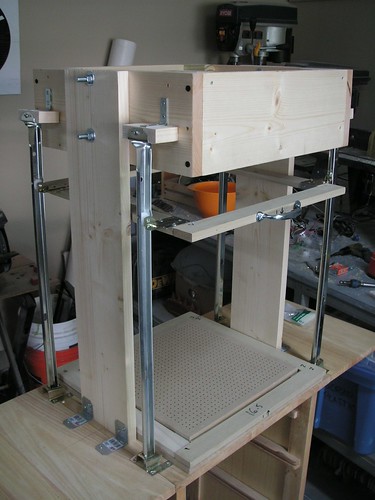
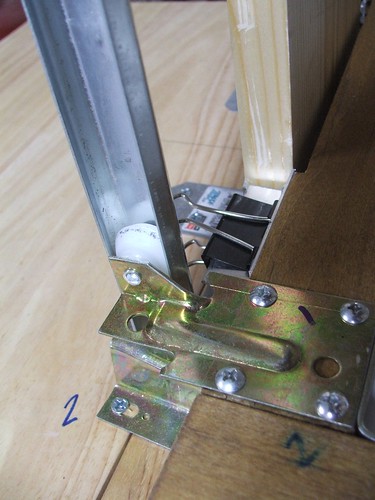
To articulate the plastic frame and move it from the oven to the platen, I tried something I've not seen used before: drawer rails. Similar to the idea of using toaster oven heating elements, this was something that seemed to make sense in my mind, despite never having seen it employed before on anyone else's build. I bought 4 of these at home depot - 24" long - and mounted them to the table and frames. They took some adjustment, but overall the result is great. Smooth action and dirt cheap!
I also stained and sealed certain pieces of the machine to protect them from wear and tear. The platen and frames were stained and sealed, while the oven and support arms got a coat of wood hardener.

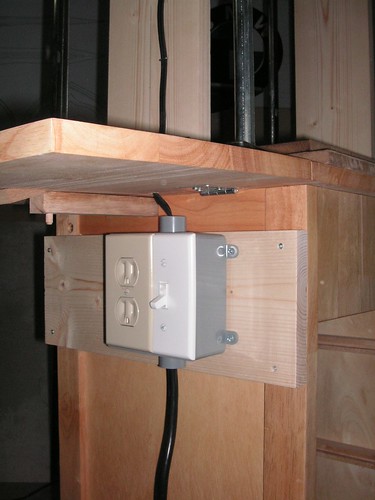
For power, I ran a grounded line to a distribution box with its own outlet. The switch here controls the oven, and the outlet is used for the vacuum and heat gun. Don't laugh at my rigged-up switch plate - I had a few of these laying around and I was trying to get this thing together as cheaply as possible!
The oven wiring took a little trial and error to get right. Initially I had the entire thing running in parallel, but this tripped the breaker in my garage a few times, so I had to change the wiring configuration. I decided to do 2 coils paired in parallel, and then wire these two "banks" together in series. That worked out well, heating the elements nicely but not popping my breaker.

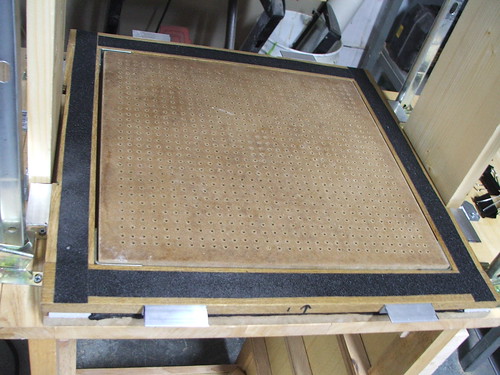
I had a few more things to do before firing it up. The frames needed a way to clamp to one another to hold the plastic in. I used some aluminum L-channel stock and cut 2" sections from it. These were screwed to the frames and secured around the plastic with binder clips. I have somewhere around 600 of these things in my house from a previous project, so I'm always trying to find new ways to use them.

I also added a strip of closed-cell foam around the platen to help seal the vacuum when I lowered the frames down. Additionally, I added non-skid tape to the insides of the frames to better hold the plastic in place.
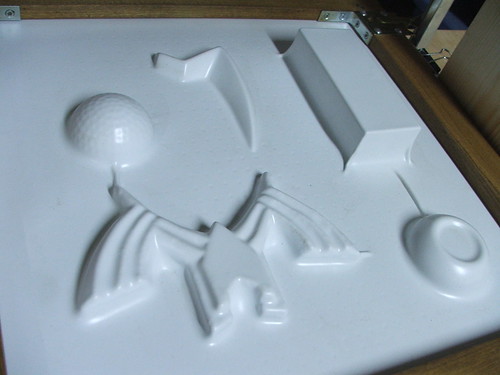
With that done, it was tine to melt some plastic! I grabbed some random junk from my shop and lined it up. Shown (clockwise) is:
- A filigree piece from my Hylian Shield build
- An aluminum block
- The mold master puck from Chell's Heel Springs
- An old, damaged mold master from my Master Sword
- 1/2 of a golf-ball textured yo-yo

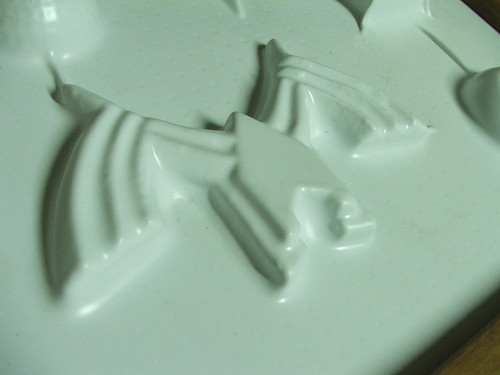
And the first pull! This was with .060" styrene - I'm betting I can get really good definition with some thinner stock, but its what I had available.
A close-up of one area. Not bad for a first pull!
The finished beast, complete with battered shop-vac.

All told, this project cost me around $100. Most of the components I already had laying around from other builds, so I guess if you had to go from scratch, it might end up running $150-$175 or so.
- Toaster oven heating elements: free
- Table: free
- Shop vac: free
- PVC Fittings: free
- MDF: $18
- Pine/Poplar/other wood: $20
- L-Brackets: $15
- Wiring/Switches: $12
- Hardibacker Board: $8
- Caulk/Sealant: $5
- Wood stain/sealer: $10
- Various hardware: $2
- Drawer sliders: $4/ea
Best of luck fellow DIY-ers, hopefully we'll start to see some more toaster-oven formers popping up in the future. As always, thanks for reading!
13 comments:
Nice build! ^^ I'm all so jealous for your Drilled base plate, mine is a pre-drilled tble i found somewhere in the sea, well, in the coast.
Now, i'm wondering if you can help me with the styrene sheets, I'm from costa rica (so please excuse my english), so it's almost immpossible for me to get them here. Don't you know a good supplier on line? Or where do you get those? Thanx for any help provided.
P.S.: I'm thinking on re-Do my vacuum former, mine has a horizontal build.
Well done, sir! I've been wanting to make a vacuformer too, but was too lost to begin. This is extremely helpful. Thanks for taking the time to document the operation.
Have a happy day
KW
Incredibly innovative. Very impressive, as is everything you do. Thanks for sharing.
You are an inspiration to all DIY-ers out there
Excellent! You can avoid the webbing that occurs from the bucks being too close together by raising the bucks with some sort of spacer between the buck and the table.
Pretty awesome and useful little project. I'm curious though... why drill the base plate by hand? Could you not get peg board in those dimensions? Don't get me wrong, I'm all for doing things yourself to save some cash, but drilling that base-plate must have been brutal, even with the laser guide.
Another question... from the images you posted of your first pull, the outer profile seemed a little rough. How did the inside look? Was there more definition on the inside?
Inside of the pull looked MUCH cleaner.
The reason for drilling all the tiny holes is because pegboard holes are much larger, and they're on a thinner sheet. This piece didn't need any reinforcing.
I've heard of other methods using only a single suction hole... maybe for my next build.
seriously, where do you get the plastic sheets I made a vacuum former (not as cool as this) and looked high and low for the plastic, I ended finding a website that sold it, us plastics or something like that, but isn't there an easier way?
in your photos it dosent show how you mount the plastic sheet while its heating
What I mean is how does the frame stay In place while heating do you have to hold it?
nice and great work
please an writting an undergraduate project thesis on design and fabrication of thermoplastic vacuum forming machine. please i need a resourceful material or previous work on this topic
I have seen people use perforated bread pans too.
Nice! A perforated bread pan can be used for the table top.
Post a Comment