
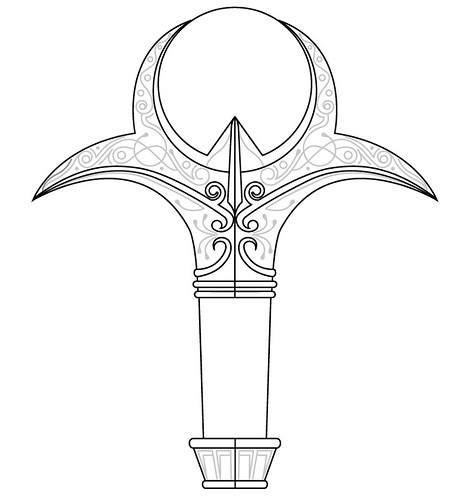
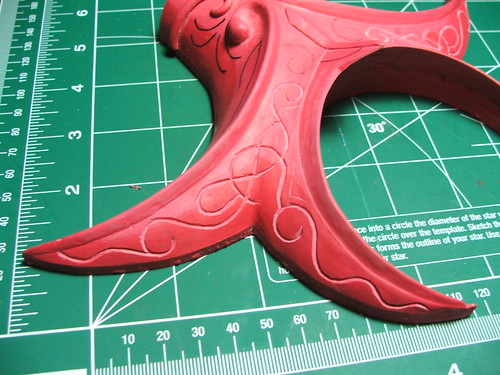
I traced the basic shape of the staff in Illustrator and set about designing the filigree ornaments on the staff head. I used a screenshot of a character wearing one of these staves to get the scaled size appropriate.
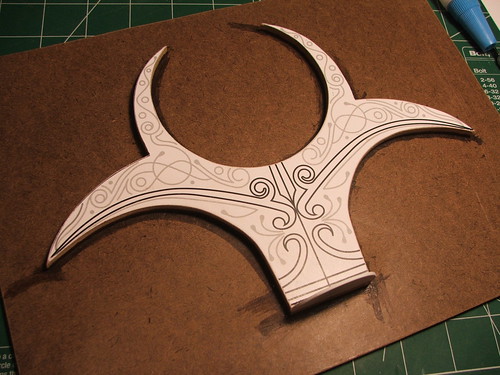
I decided to try a clay sculpt this time around, since the staff head has a fairly organic shape. First off, I printed out my blueprints and adhered them to a sheet of 1/4" MDF. This way, my sculpt would remain symmetrical so long as I stuck to the edges.
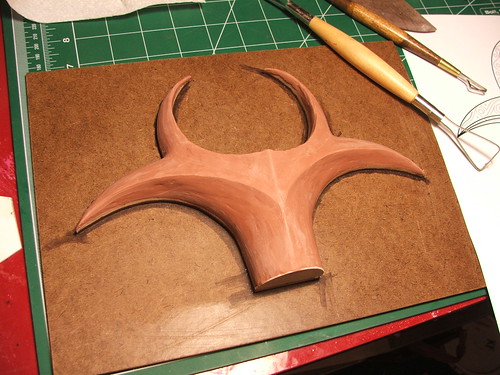
The sculpt was done with Chavant brand medium weight non-sulfur clay (there's a mouthful.) All in all, it was fairly easy to work with, and a lot faster to work with than if I'd tried to make the entire piece from carved MDF or foam.
Basic shapes started rough, and I mostly just used my fingers to get the clay to the approximate shape.

As the edges got more definition, I switched to clay tools and sponges to smooth out the shape.
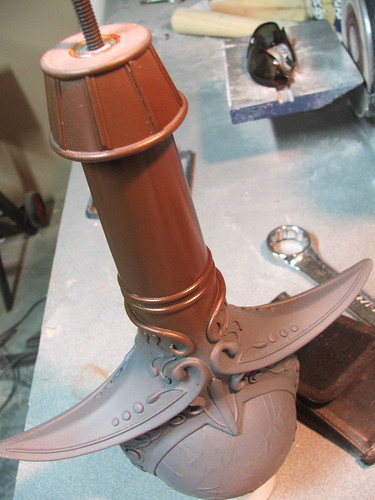
This is skipping a LOT of smoothing, adding clay, tooling, and frustration - but the final result can be seen below. I ended up lathing a puck out of MDF to take the place of the orb while I was sculpting. This was cut into three sections and the outside edges were sealed with wax to make removing the piece much easier without damaging the thin and fragile clay pieces surrounding it when I went to pour the mold.
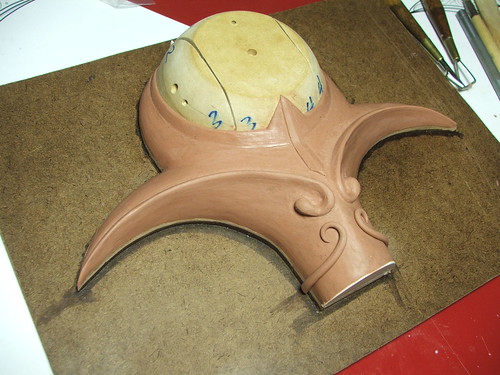
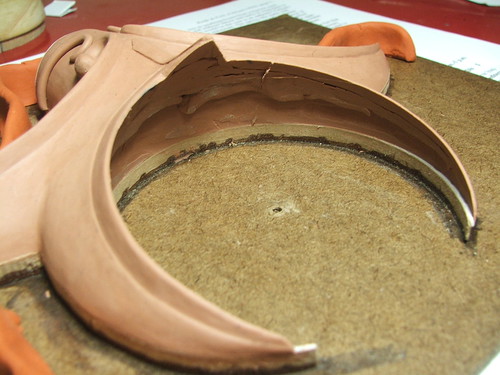
Here you can see the definition on the edge of the clay after the MDF puck was removed.
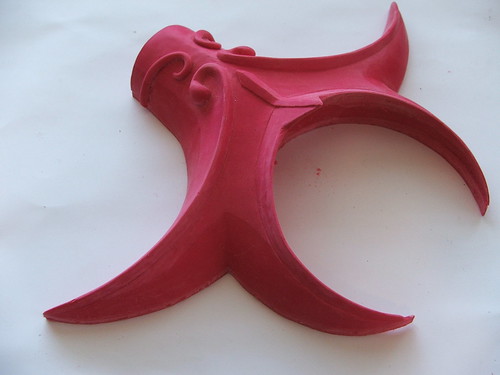
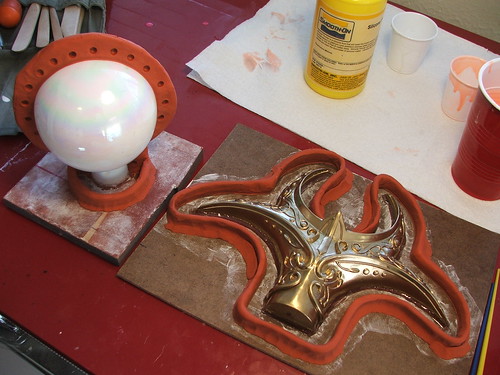
After the sculpt was finished, the clay piece was put under some Rebound 25 silicone rubber.
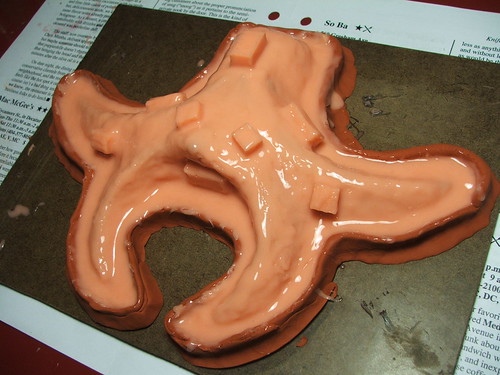

Once the mold was set, I pulled a resin copy. Details transferred very well, and this piece needed no cleanup at all.
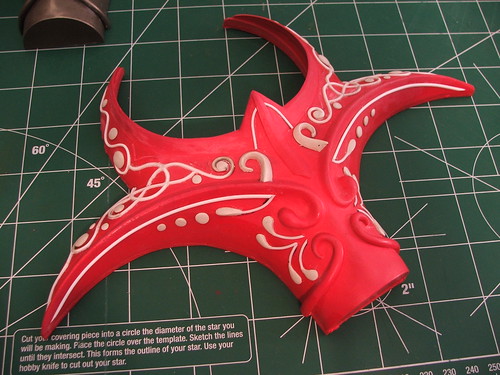
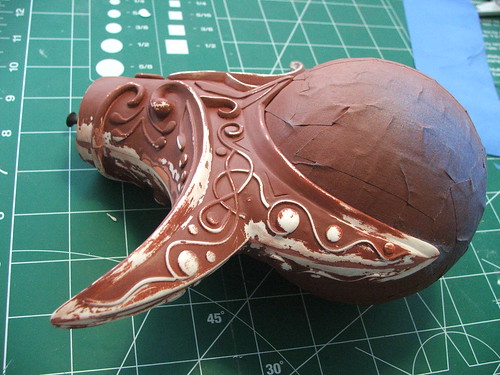
Using my original blueprints as reference, I transcribed the filigree patterns onto the cast in pencil.

These lines were then (painstakingly!) carved out with a lino block carving tool.
The carved channels made it easier to line up the round styrene bars for adding the accents on top of the resin cast. Thicker parts - such as the curls at the center area - were added with apoxie sculpt.
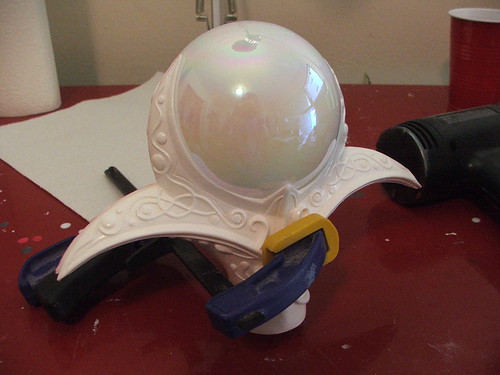
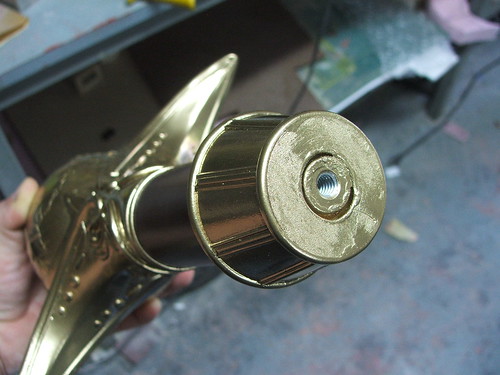
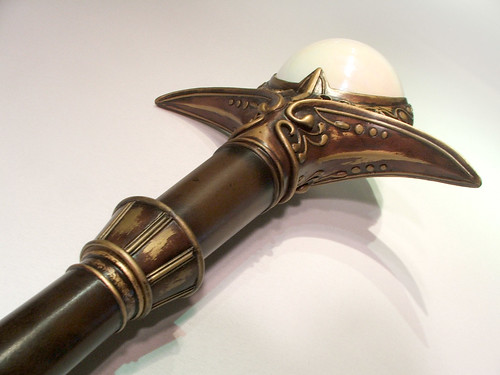
This piece was primed and painted, then molded in the same manner as the clay sculpt. I used a glass gazing orb for the central large bead at the top of the staff, and decided to create a mold of it as well so that I could make multiples later if I felt like it.
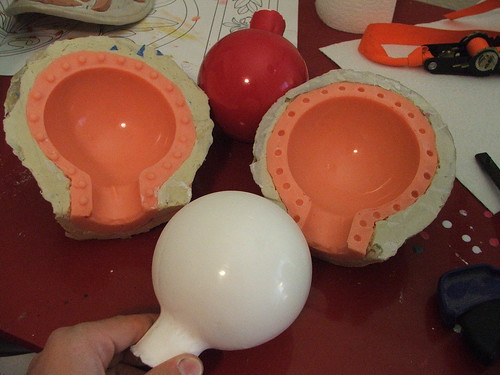
Two halves were cast in resin from the final mold and epoxied around the glass orb. The seams in the edges were then filled with apoxie sculpt.

After that, it was time for the most tedious part of the build... primer, bondo, and sanding. Repeat, repeat, repeat.

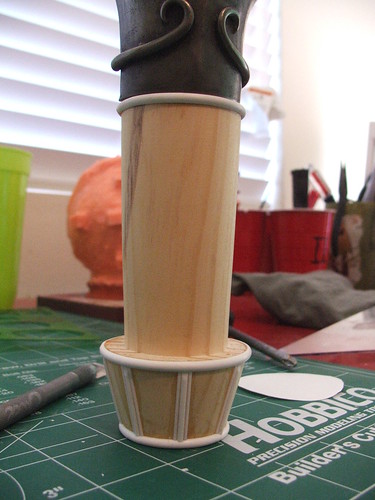
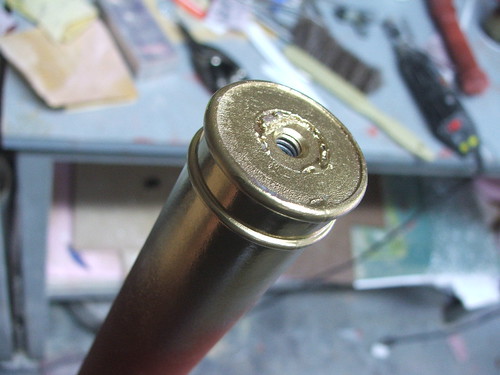
For the "neck" part of the headpiece, I lathed a pine block to shape, then added accents to the bottom area in half-round styrene.

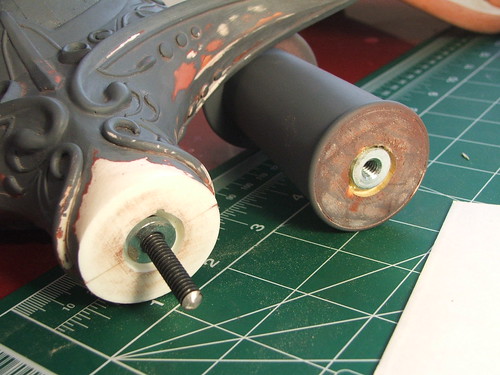
These two halves were joined together with blind nuts and threaded rod. After the glue on the blind nuts was set, both pieces were joined with epoxy.
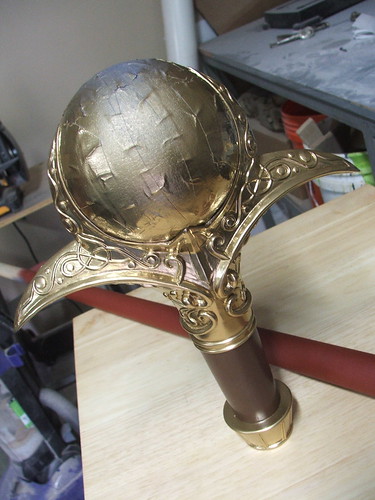
The first coat of paint going on the staff head after all the sanding and prep work had been completed. For the brown, I used the same Krylon Fusion brown paint that was used on the Force-a-Nature build.
For the longer rod of the staff, I needed a tapered dowel that was about 40" in length. Problem was, my lathe only has a 12" working area. Solution?
Pool Cue!
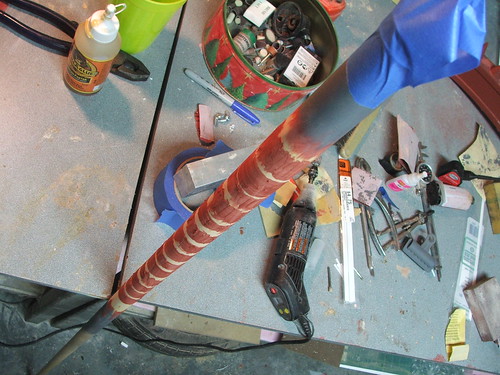
The divots in the handle of the cue had to be filled in, since the length of the staff rod is smooth. I filled these with bondo several times in order to get the edge as smooth as possible. This shot is from the first pass.

After the first coat dried, the brown area was masked off and the rest of the staff painted with Montana Gold spraypaint. This stuff is VERY shiny, and will remain that way unless you topcoat it with something else. I was going for more of an aged brass look for the final piece, so this got toned back a lot.
As with the halves of the staff head, blind nuts were used to join the upper and lower portions of the piece. These were left un-glued though, to help with shipping. The client can epoxy them later if so desired, or leave them loose if they ever decide to travel with the staff.
Finally, the piece was weathered with a wash of acrylic paints, airbrushed into the crevices and then wiped clean on the raised sections to give it an aged look.

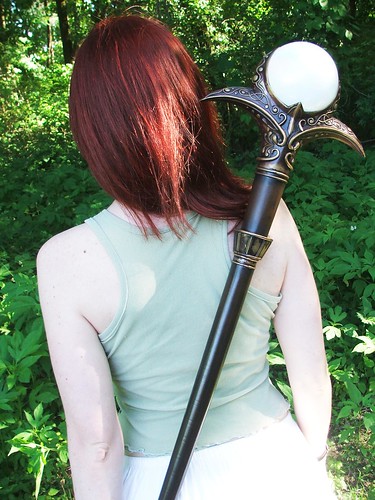
The lower portion of the staff was weathered in a similar manner. After that, the two pieces were joined and the piece was finished!

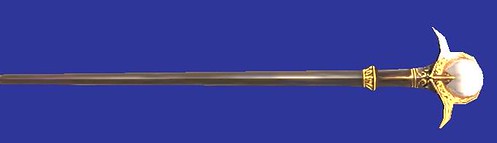
The piece is over 45" tall and weighs about 5lbs. Added after the fact was a small rubber nub at the bottom to protect the wood and finish.


More pics, and higher res shots are available on my flickr page if you'd like a closer look. As always, thanks for reading!
15 comments:
Awesome job, as usual
Nice! While you've got the Final Fantasy bug, you ought to take a whack at Lightning's sword from XIII.
Hot damn, Harrison. You need to stop it with the mad skillz! Jealous!
That's wonderful! Wow. SO GREAT to see some XI love - and made so well too.
Any particular reason you chose a silicone rubber mold over polyurethane?
Every time I see your new work I keep thinking that I would like to be your shop gopher for a year.
I wanna ask a question, Is MDF a good material for making props? I felt some and it feels really weak
@ Kenmichi: I used silicone because that's what I had! Rebound 25 is specifically made for brush on molds as well, and can coat to a good thickness in just a few applications. I've never worked with urethane rubbers before, so I wouldn't know where to start.
@ Vonwilbur: I love MDF. Depending on the thickness, it can be exceptionally strong. It really depends on what you need the piece to be; something thin and structural would probably be better served with using fiberglass, metal, or plastic
I have some experience using brush on polyurethane rubbers and it's extremely easy to work with AND is generally cheaper. Polyurethane comes in many thicknesses depending on how much detail your object has, but you can also offset that by adding many layers to the mold itself.
http://www.polytek.com/cart/
http://www.smooth-on.com/
Great site for buying polyurethane and learning more about their products. I hope this helps!
Mother of God...
As impressive as -- if not moreso than -- your Kraken Club build. But still not quite as cool as the Portal gun... no lighting effects, you see. ;{)>
I am completely inexperienced with prop builds, so I must ask: how did you get the crazy gradient soap-glass-like effect on the bead? As for the narrow extra bit left on the bead after the molding, how did you remove it, or did you conceal it back into the staff head?
The bead came that way - its a gazing orb used in gardens. The fancy pearl look was built-in!
lol Ingeniously resourceful! BTW: the 4562400700_e7f23ccba4.jpg image of the headpiece is evocative of an M. C. Escher:
http://www.mcescher.com/Gallery/ital-bmp/LW268.jpg
Wow. You are so talented! I love your works!
xoxo
How much would this cost? I'm finding myself really interested in getting one.
Post a Comment