

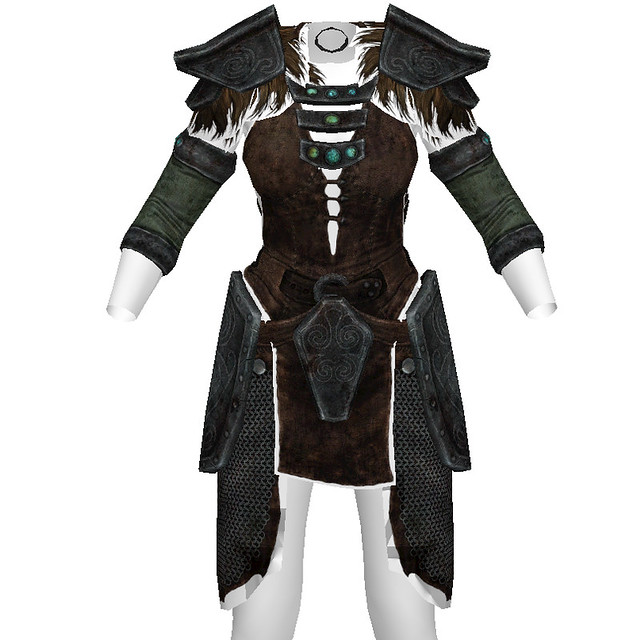
Worbla is the name of the game this time, and anyone who is involved in cosplay and the convention scene has likely heard of it already. One of the most prolific artists to use this stuff is Kamui, a German costumer who makes amazing armor sets from (primarily) the Blizzard universe. I was curious about taking a crack with this stuff myself, and for the Ancient Nord Armor, I used a roll that I'd gotten from Yaya Han to try out.
I spent a fair bit of time on scaling the armor and creating blueprints of each part. I was lucky enough to have a friend of mine (thanks David!) pull the 3D model out of the game and send it to me as an OBJ file I could manipulate in Photoshop. I gathered a bunch of reference and started making line art files for templates.
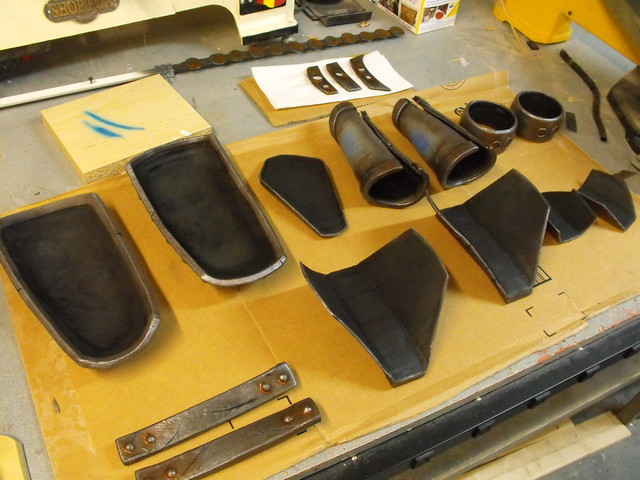
My approach initially was very similar to my Wonderflex build. Essentially Worbla is a low-melt plastic with embedded wood pulp fibers. The plastic gives it elasticity and adhesion to itself, and the fibers allow it to keep its shape. The downside is that, once heated, it sticks to pretty much everything. I've found that ducting tape is a good barrier to this, so I started off with simple cardboard forms wrapped in aluminum tape.
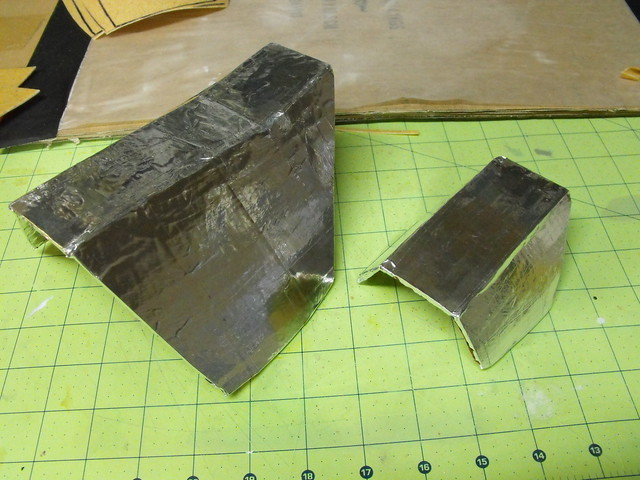
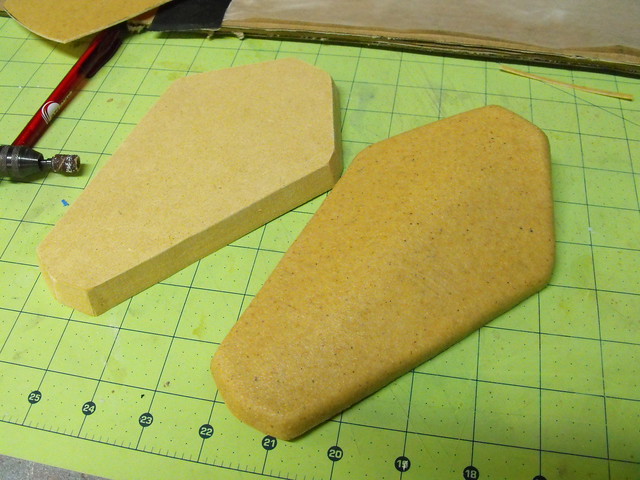
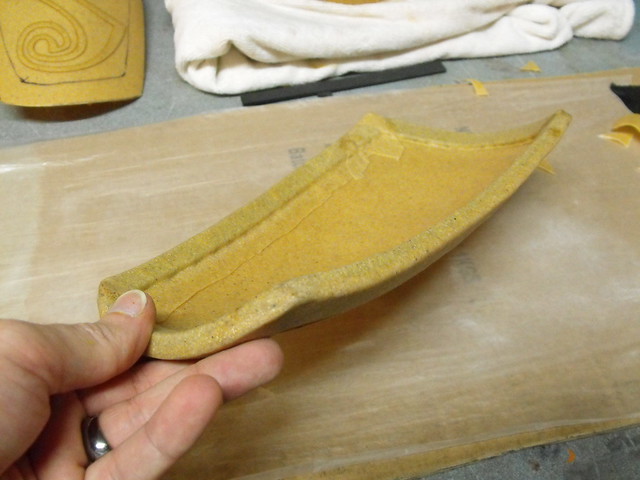
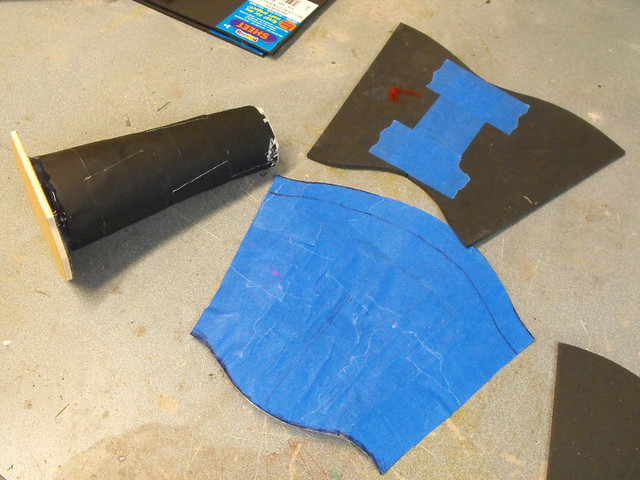
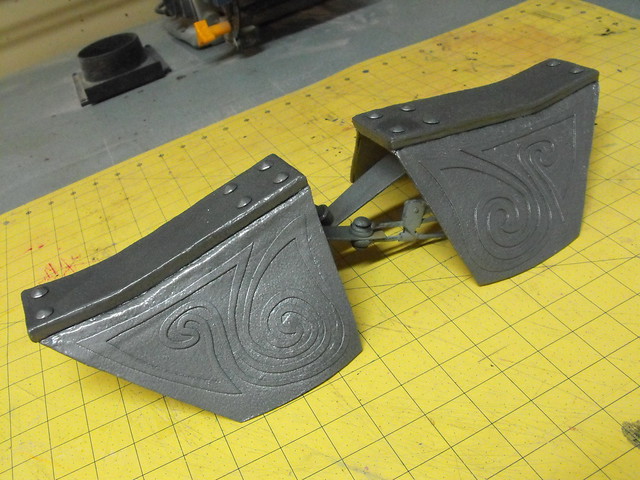
It is possible to shape Worbla without a form, but getting an exact curve will be trickier. For most things in this project I made a buck; the piece here is for the "crotch plate" and the buck was just a slab of MDF I had laying around.
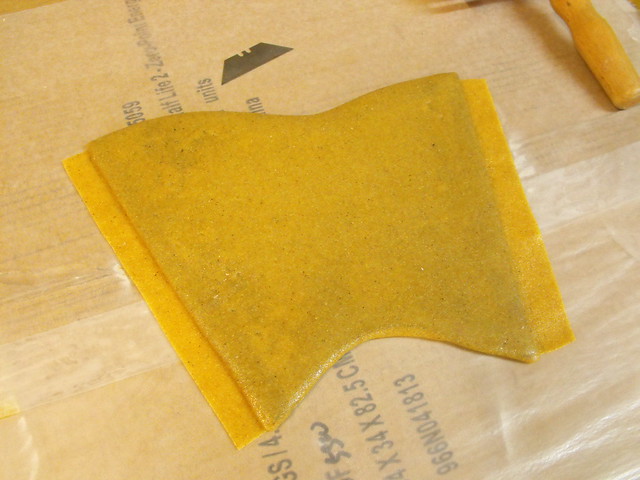
Here's the base shape for the pauldrons. The large square block on top was made by wrapping 6mm craft foam with a sheet of worbla.
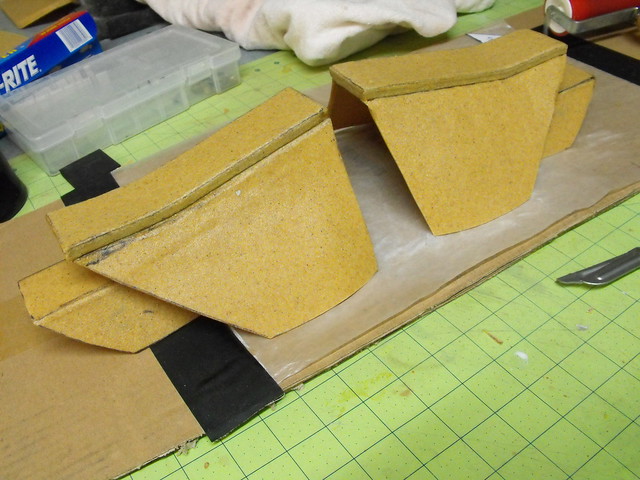
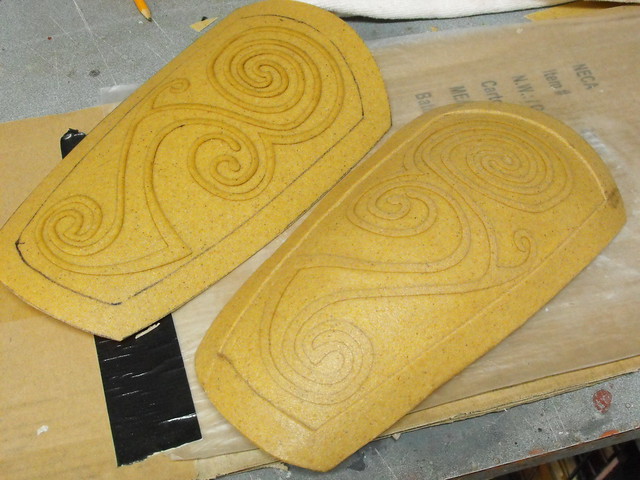
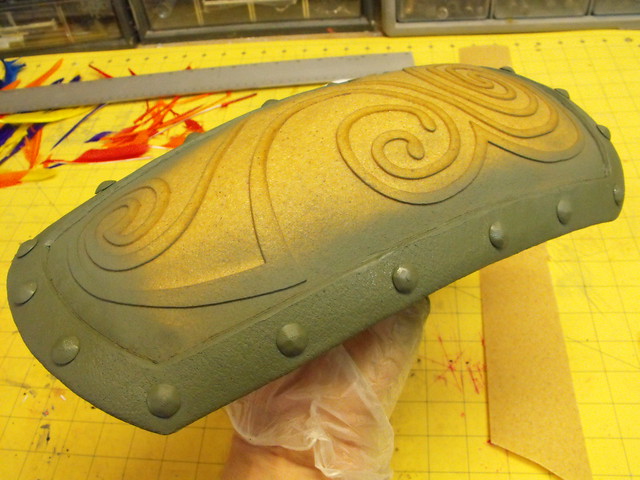
The hip plates were shaped mostly by hand. Since it takes some time for the material to cool and become rigid, I have found that working next to a bucket of ice water is very handy. Bend your part to the shape you want, then hold it in place while you submerge it in the bucket. The part cools quickly, sets into it's desired form, then you're free to heat a new section and tweak the shape as necessary.
The sides of the hip armor needed to be quite thick, so I repeated the craft foam layering along the perimeter edge.
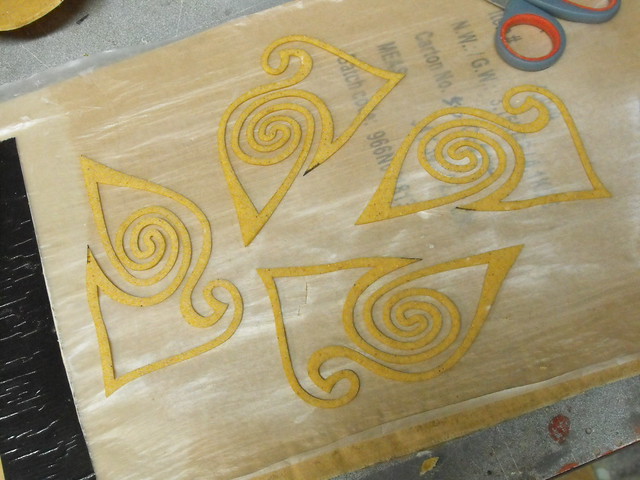
Another cool thing I found out about Worbla is that you can cut it with a laser cutting machine! I will say the amount of smoke it puts out is pretty significant (similar to cutting MDF or other woods) so it's a good idea to clean the mirrors in your machine afterwards. Still, being able to make super intricate shapes like this after tracing the patterns in Illustrator saved me hours of cutting time.
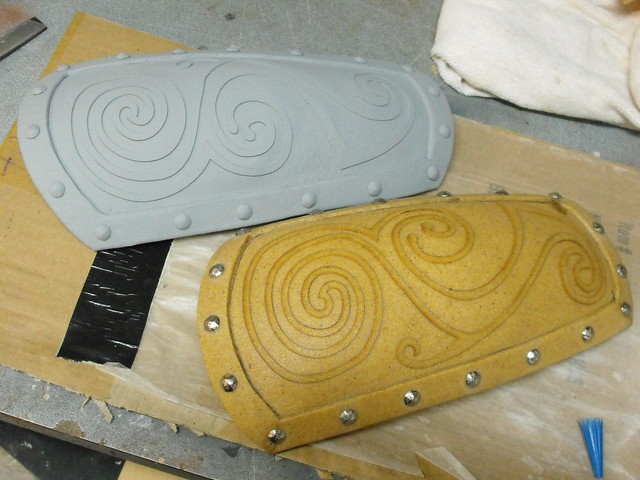
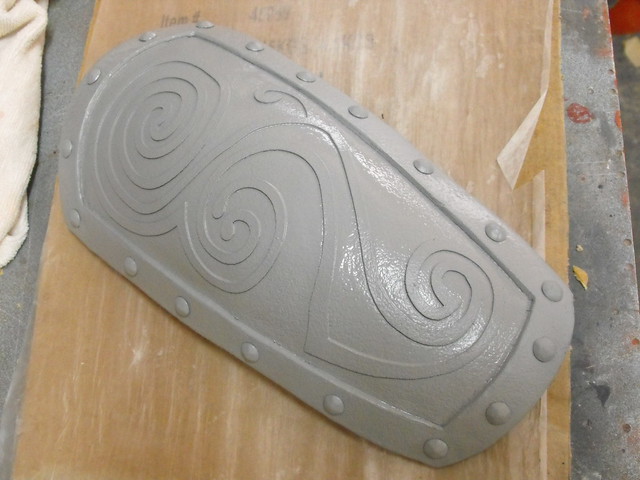
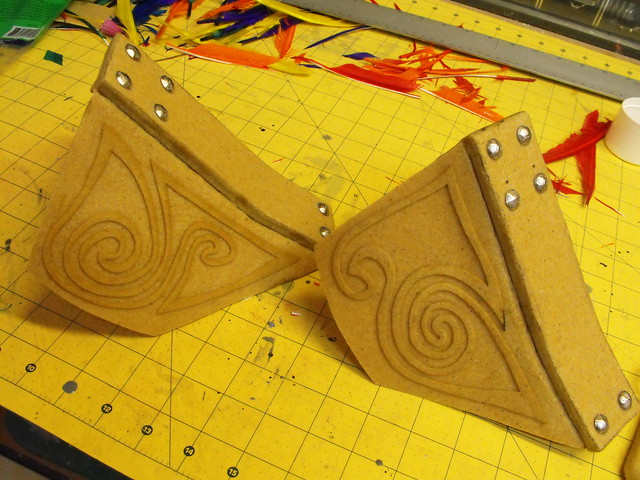
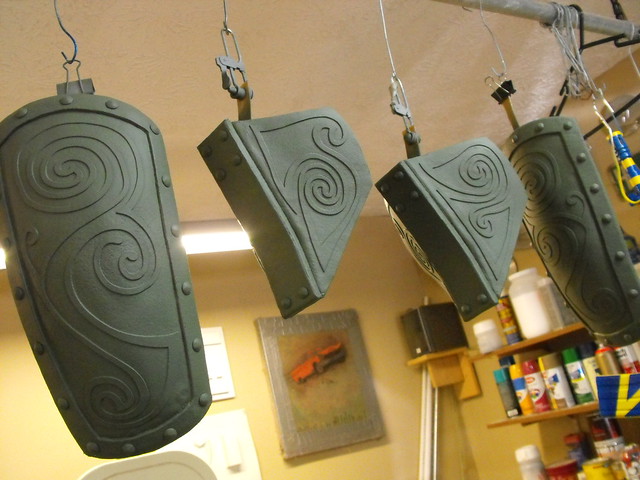
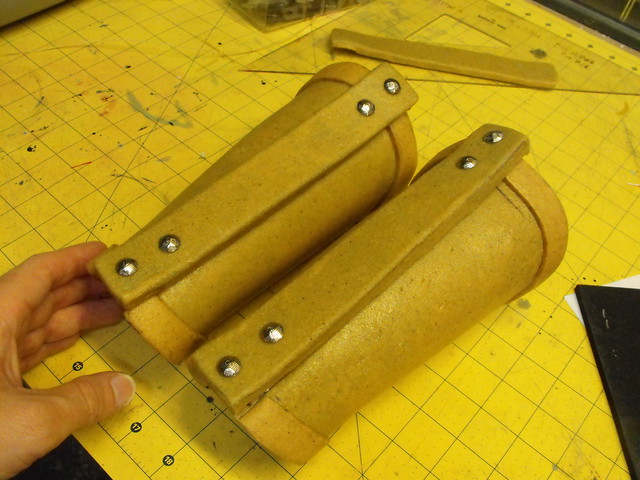
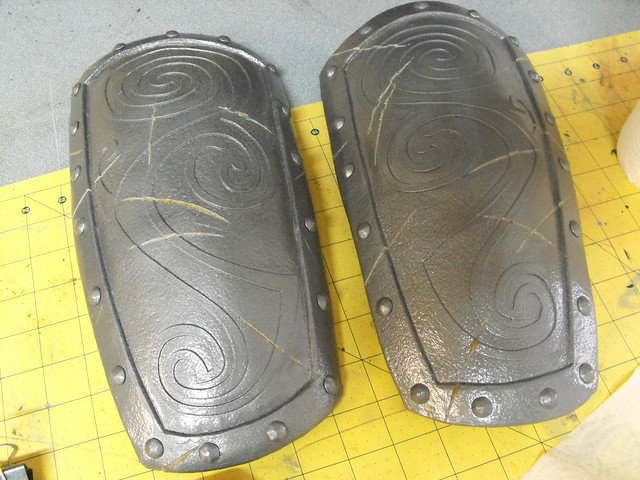
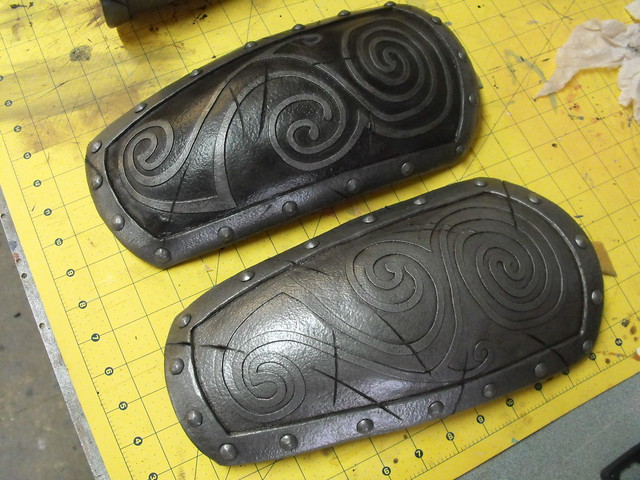
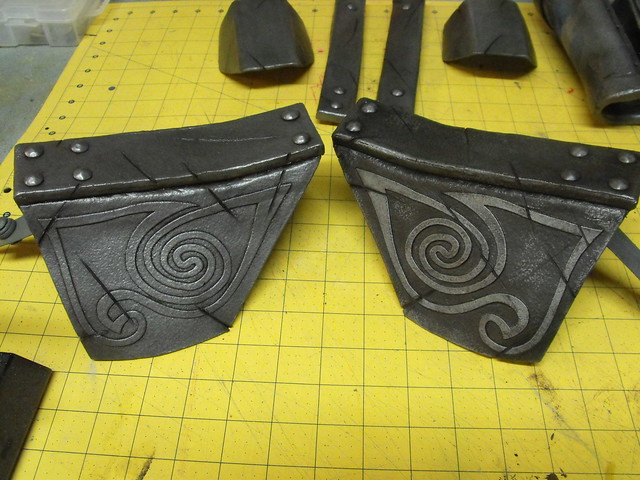
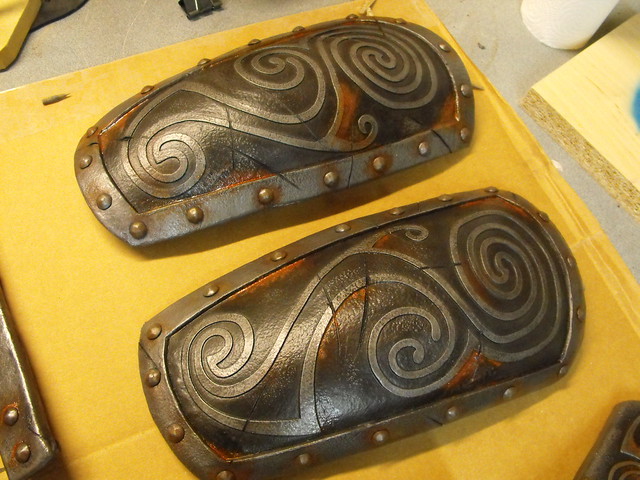
Here's the hip plates again after adding "rivets" (just furniture tacks from Home Depot) and a bit of primer. Looks a lot more like armor now!
Same trick was repeated for the pauldrons. There were around 70 tacks on this costume all told.
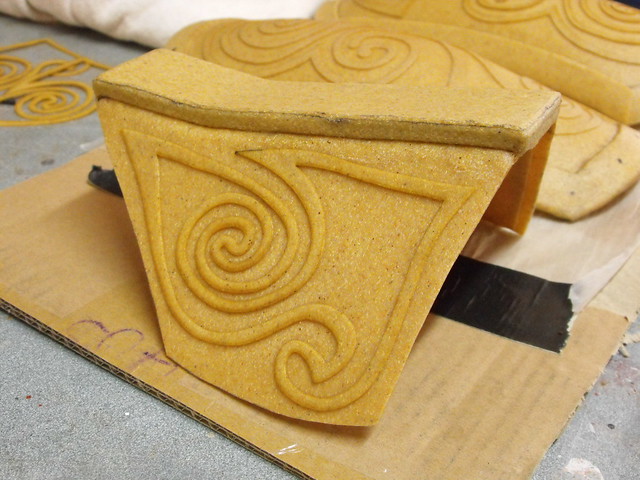
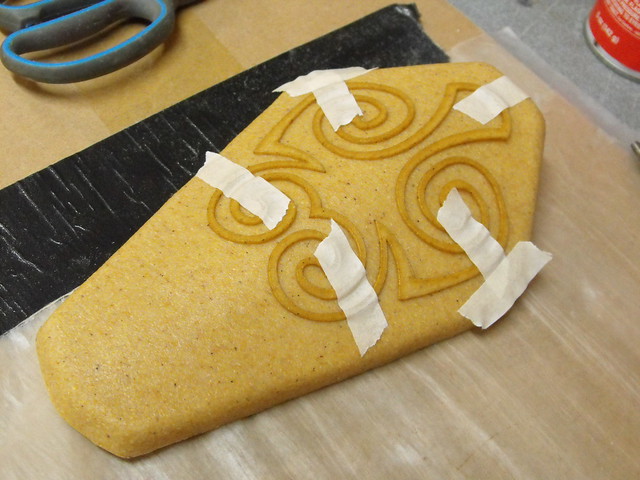
Another laser cut filigree. I found out with this piece that you have to wait for the Worbla to cool after cutting before removing a piece this delicate. The first one warped and all I had was a twisted knot to show for it. Also, in this shot I have it taped to the piece of armor to keep it positioned while heating. This seemed like a good idea, but pins would have been better. The Worbla stuck very well to the tape once it was heated and those sections required a bit of repair later on.
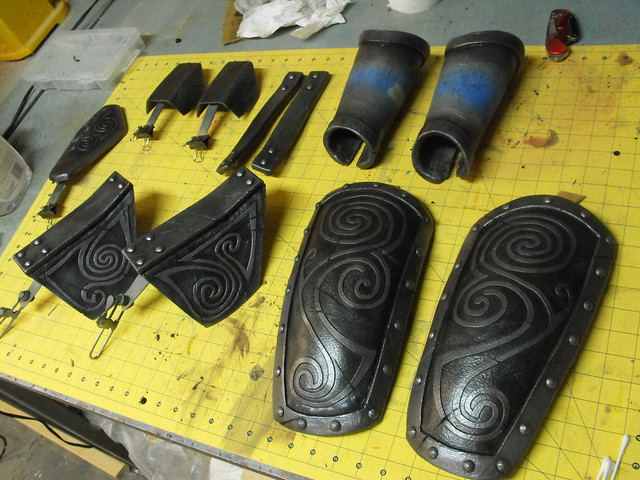
First pass of primer. Something you're not going to see here that was used a lot on my Wonderflex armor is filler and a lot of sanding. The Worbla has a pebbled rough texture that I decided to keep intact for the purposes of this armor. If you're after smoother stuff you'll need some sort of filler (gesso, filler primer, spot putty) but after priming these parts I thought the raw Worbla looked great. Wonderflex, by contrast, tends to have a definite woven pattern that doesn't really match much of anything, which is why my Iron armor requires so much filler.
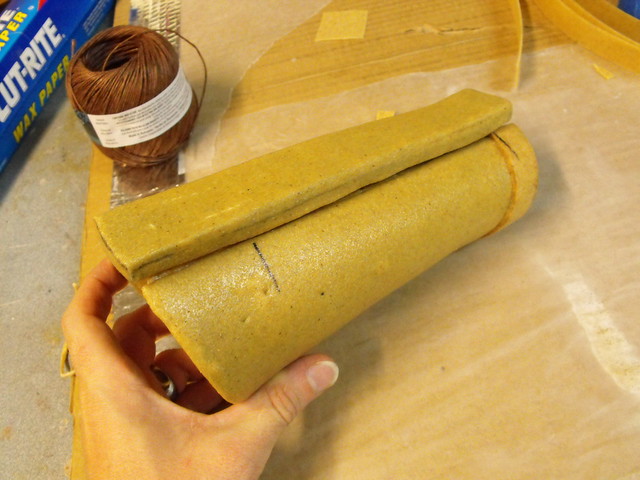
The wrist cuffs on this set were a bit trickier. There aren't any seams or obvious way to get the parts on. I started with a tape and foam copy of my wife's wrist (similar to a duct tape dummy, but only a forearm) and made a pattern in tape and craft foam.
This was transferred to Worbla. I used a sheet of 2mm craft foam as a core to give it a bit more rigidity.
After wrapping around the arm copy and allowing to set, this is the basic shape. The large bar on top is made from 10mm craft foam, again wrapped in more Worbla.
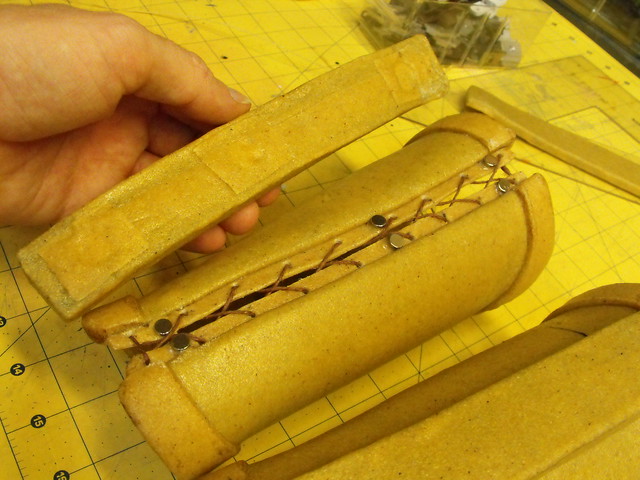
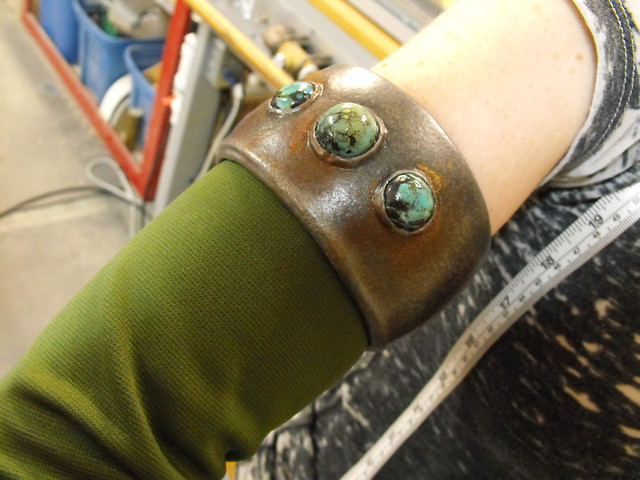
Since there isn't an external clasp or seam, I hid the lacing for these under the large top bar plate. Six neodymium magnets on the bracer match up with 6 more embedded into the cover plate. Once the cuff is on the arm and laced up, the plate snaps into place to hide the lacing.
The last bit of detail here is something I found out with my Wonderflex armor and I think everyone should do with Worbla. By using a hot knife, you can blend edges and layers together to look like one solid part. On the left is the bracer edge, and you can clearly see the ~5 layers of material that make it up. On the right is Worbla thats been melted and blended tougher with a hot knife to make one continuous part.

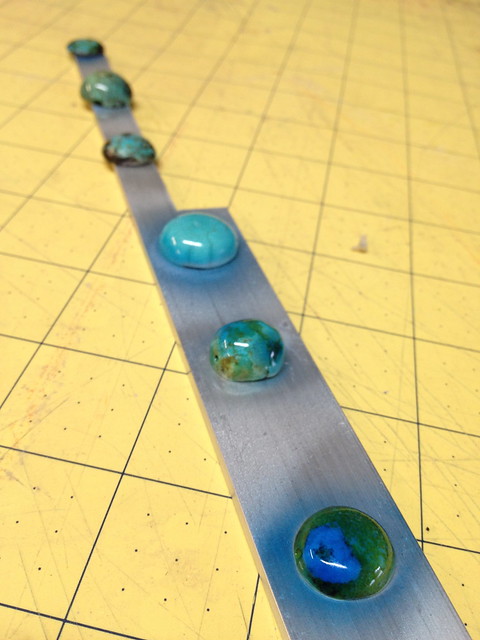
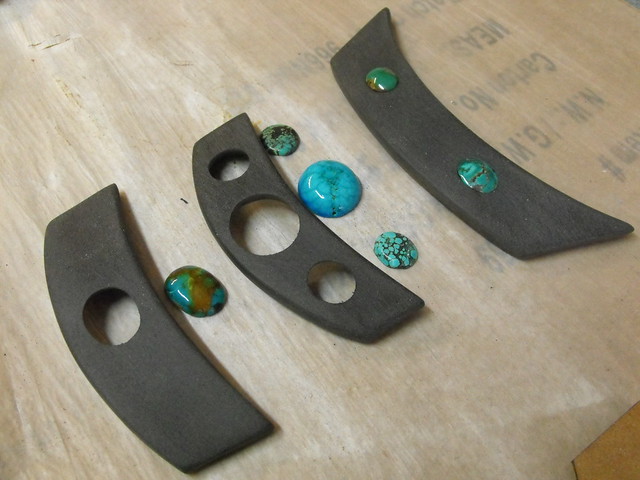
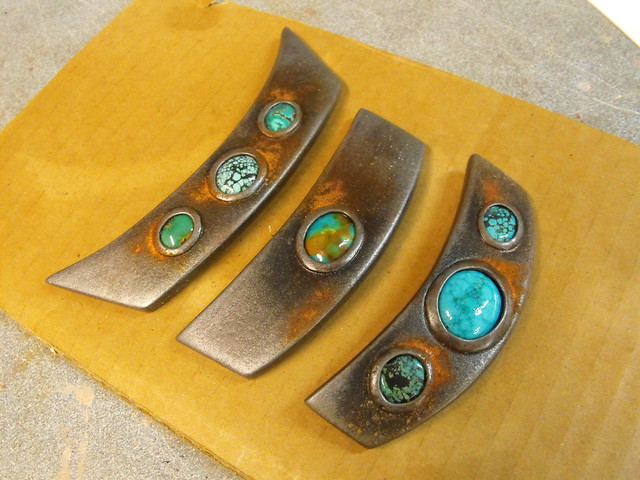
There are a lot of little blue and green stones on this set of armor (I think 13 in total) and my client (wife) was very very picky about which ones looked best and just how green or blue they should be. Trouble is, it's hard to find just the right rock in just the right shape, so I got to learn a lot about lapidary - the process of shaping and polishing stones - in order to get everything just right. Some stones just didn't have the perfect exact color though, and they got a bit of airbrush clearcoat in blue to tint them to the appropriate shade.
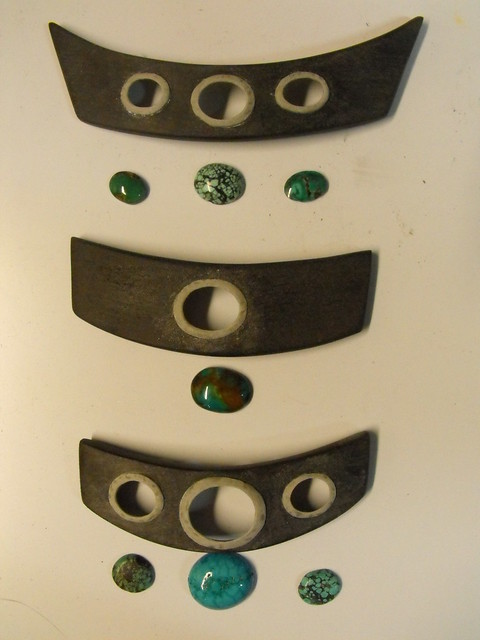
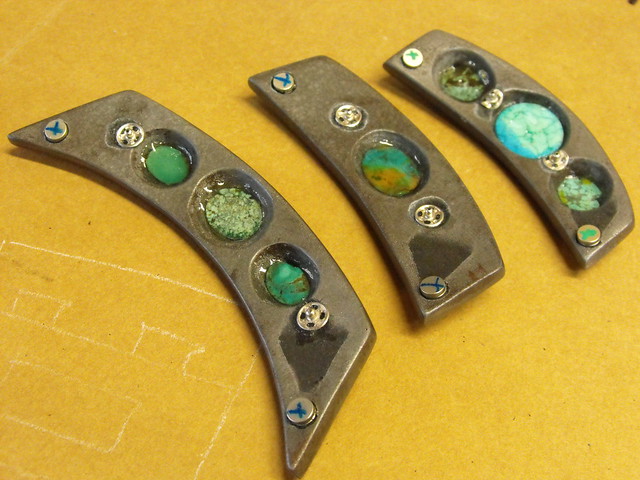
The necklace/chest part of the armor has 7 stones set into the plates. I used sintra for the armor itself, and cut out the insets for the stones from the back side so they would sit recessed when finished. The setting itself is made from Apoxie sculpt; I waxed the front faces of the stones, set them into the plates temporarily, then sculpted the settings around them. After the Apoxie cured I was able to pop the stones out (the wax prevented the Apoxie from curing to them) then clean up the setting with a small set of files.
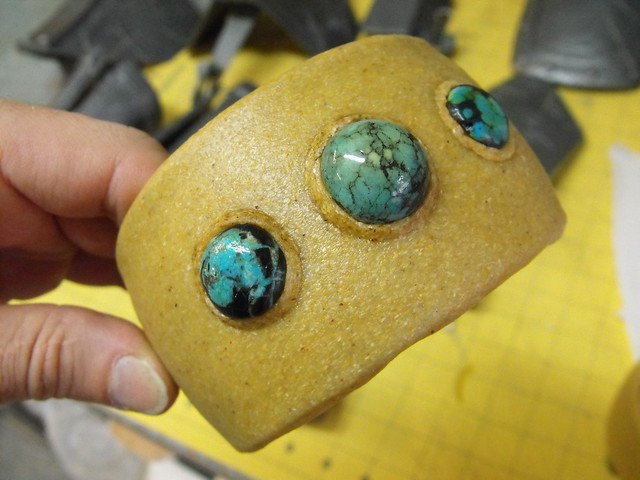
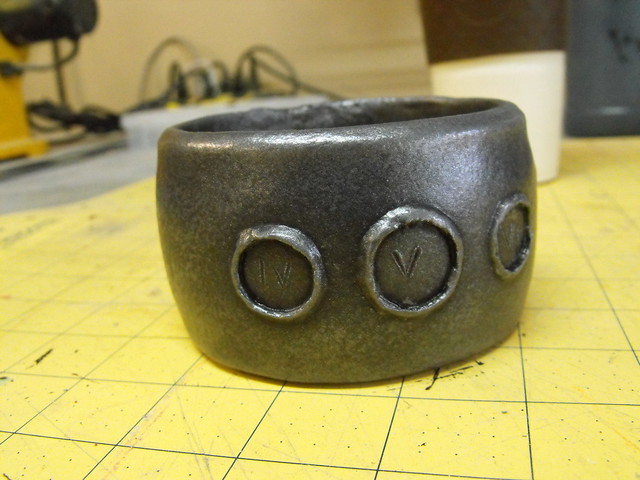
For the arm cuffs, I wasn't able to set the stones in from the backside, so I used a small bead of Worbla wrapped around the perimeter and secured with a hot knife to make the settings. They're rougher, but I think the end effect is still nice.

After removing them I labeled all the stones with a numeral so I'd know which ones went where later on.
With all the armor constructed it was time for paint and weathering. I started off by coating all the parts with primer, then Rustoleum Hammered Silver paint. This stuff is super durable and great for costuming. Each armor piece received 2 thick layers and was left to cure for 72 hours.

After the paint dried, I took a dremel tool and cutoff wheel to the plates and carved in a bunch of slash marks. Half of these are game-accurate but since the texture map just mirrors damage from the left to right sides, the other half is my own haphazard placement. Deeper gouges were accentuated with a hot knife after using the dremel.

Weathering is a layering process and there were several steps to get to the finished product. First, the entire part was covered in a mixed acrylic brown, then excess paint was wiped off with a damp rag.
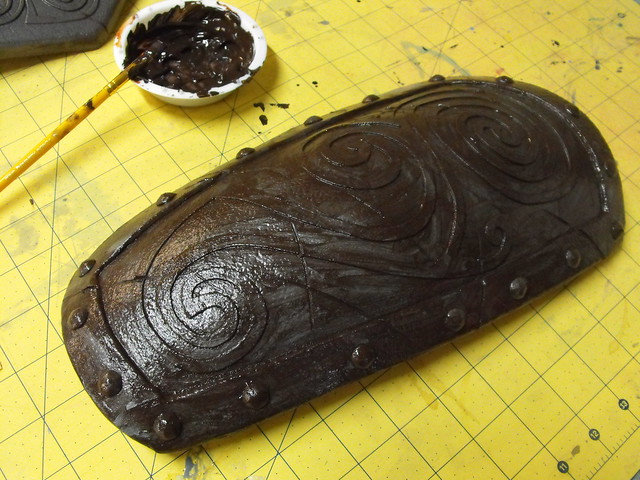
You can see the contrast in this one step alone between the two parts here:
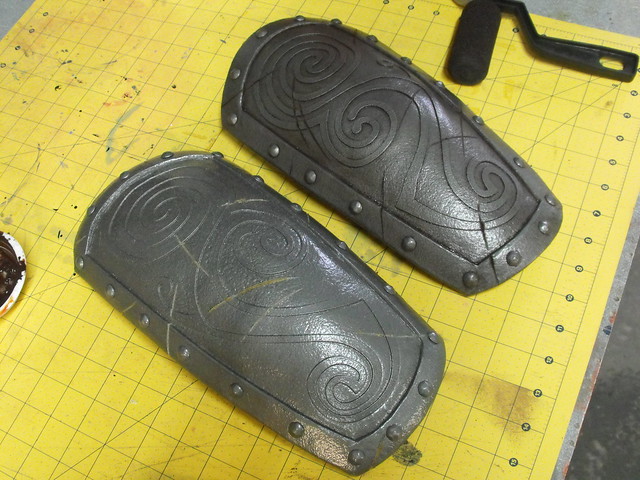
I tried a process intermittently in the weathering that a friend had suggested to me a while ago, and used a small sponge roller with metallic silver paint in between passes of weathering. This gives the armor a sort of iridescent sheen and helps it look much more metallic.

The next step involved airbrushing a more washed out brown, nearly gray, into the background parts of the armor. Any overspray onto the edge or filigree design was wiped away with a damp q-tip.
More contrast between this step and the previous one:
After all the airbrush work is finished, all parts got another light pass with the silver metallic sponge roller, then were left to dry for 24 hours. They were coated with acrylic matte clearcoat, then left another 24 hours for full cure. When it comes to painting, it's really best not to rush.
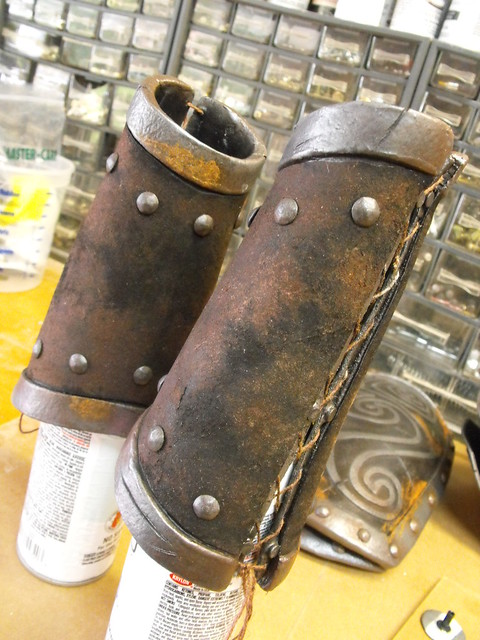
With all the undercoat and clear sealer cured, it's time for rust! This is my favorite part of old armor, and I've detailed the process many times but here we go again. Start off with Ferrous Iron Powder - not red iron powder - this stuff has to be gray. If its any other color (red, yellow, etc) it's already oxidized and won't rust again.
The powder is applied to the armor by wetting a section of the part, then lightly dusting the iron powder over the damp area. This will get it to stick in place. After you've got the armor dusted to your liking, you'll need to mix up something I call "hamster pee" - thats a mix of 50/50 vinegar and hydrogen peroxide, with a bit of iodized salt. Once you mix it up, you'll know why it has earned that awful name in my shop. Spray this awful concoction over the rust powder and watch as it bubbles and transforms into rusty armor! Leave it to do it's chemical thing overnight, and you'll be greeted with pretty orange and red rust the next morning.

Oh, and lay down a sheet of cardboard or something, because you don't want rust runoff all over your workbench, floor, carpet or otherwise. It'll never come off.
A last bit of soft work needed to be done to complete the bracers. While painting, the Worbla in the middle area was masked off to stay clean. This allowed me to epoxy a leather insert in place later on without needing to scrape away any paint.

The leather needed to look old and grimy - it is Ancient Nord armor after all - so I went after it with several passes of bleach and acrylic paint in various spray bottles. It might be a little scary to spritz bleach all over an expensive leather hide, but weathering really does make the difference when it comes to believable props and accessories. That said, always try on a test piece first!
I also like to paint all of the armor inside panels flat black to hide any wonky seams or weird patches that might show in photography later on. This is a luxury if you're not rushed before the convention, but I think it helps the final product a lot.
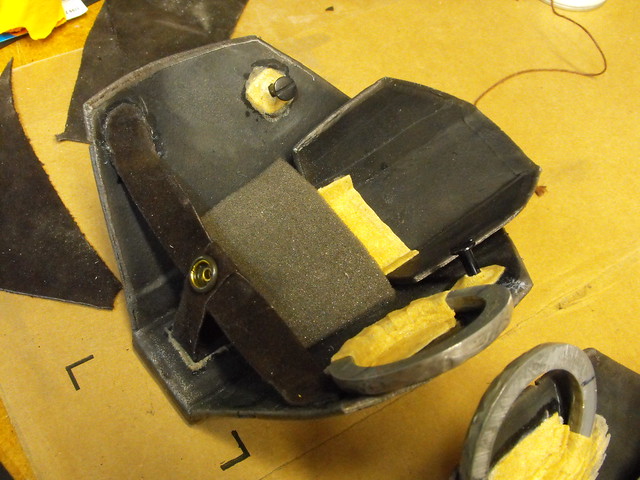
The very last part - and unfortunately the most rushed aspect of this and lacking in photography - was strapping and rigging. I cover that in a bit more detail in my Wonderflex tutorial, but really it's a matter of placing snaps, chicago screws, D rings and blocks of foam everywhere until your armor hangs right. Sometimes this can result in some odd looking arrangements, like the inside of the pauldron here.
For other parts, think outside the standard. When the snaps on the chest plates resulted in a weird hinge-forward look, my wife suggested we just use magnets to hold them in place. The inside ones aren't even attached to the costume itself; they just hold the plates on through the fabric, allowing for easy repositioning of the part.
Now, I can't sew to save my life, so really the bulk of this costume credit needs to go to Emily for all her hard work on the leather, fur and chain mail. I did make the bow though (write up coming soon!) and had my first trial with airbrush makeup as well. Fun times!
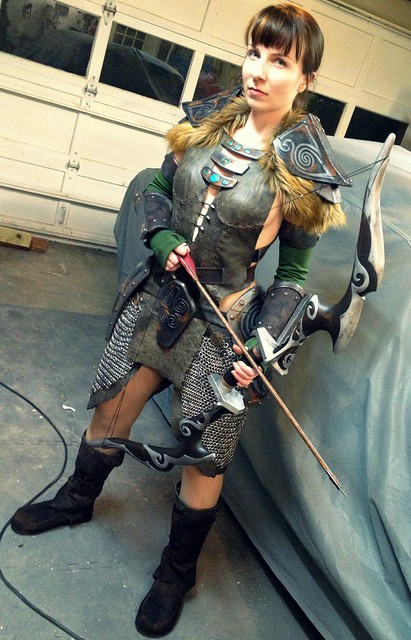
Photo (below) courtesy of and © Joseph Lin
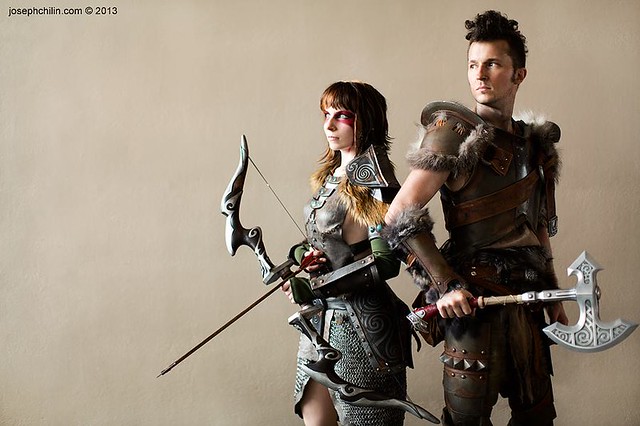
Photo (below) courtesy of and © chriswithcamera@gmail.com

Thanks for reading! There are more progress shots available over on my Flickr page so be sure to check those out if you're interested and want to see my latest up-to-date progress!