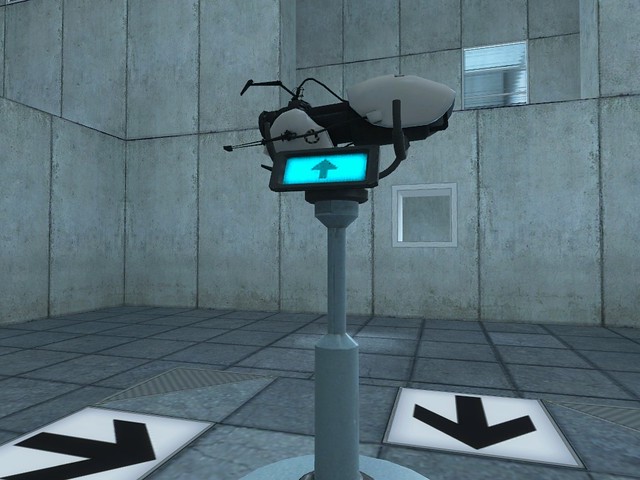
So, one day I decided to make a Portal gun. It turns out the internet really likes Portal, and also really likes my gun.
UPDATE: I have a new entry for a rebuild of this project, which goes into more detail. Click HERE for that write up!
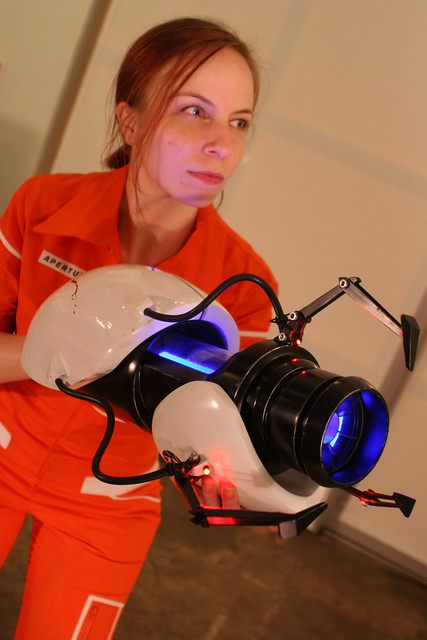
I made this for my girlfriend Emily, who will be cosplaying as an Aperture Science test subject at DragonCon 2009. I have been approached by many people about making duplicates, and I will be making 5 more.
EDIT: These have ALL been claimed, and I will not be producing any more than 5.
Truthfully, a LOT of people want these things, and as much as I could just make a never ending string of portal guns, it would diminish the uniqueness of the piece. It would be a stretch to call my work art, but it is a very accurate replica, and keeping the production numbers low will make the existing models even more rare and unique to their owners. The final gun, #5, will be auctioned off to the public upon its completion. Gun #2 may also be available for auction, but this will depend on whether or not the charity organization I've offered it to gets back to me or not. The reason these are being auctioned is to make sure that anyone who wants a shot at getting one has that opportunity
The 5 replicas will be finished in early October, as I have a lot of other commissions ahead of them right now. When guns #2 and #5 go up for sale, I will be posting a blog entry as well as a link to their auctions.
For anyone that's curious about how I did it, follow along:
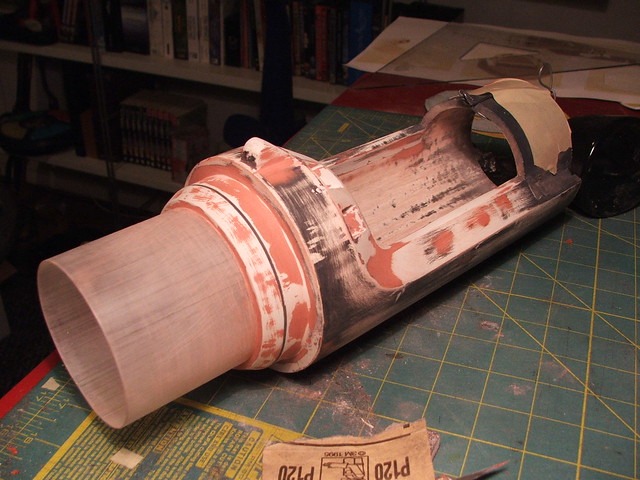
I started with 3" and 4" sizes of PVC pipe and cut them into the shape of the black "barrel" of the gun. Both pieces got U-shaped cut outs on the top and were epoxied together. The gaps were filled in with apoxie sculpt and sanded to shape. After some bondo work and a lot of sanding, I had this:

This gives a better idea of the shape of the cuts, this is after another guide coat and a small application of bondo to fix some other smoothing issues:

And sanded down from the above stage:

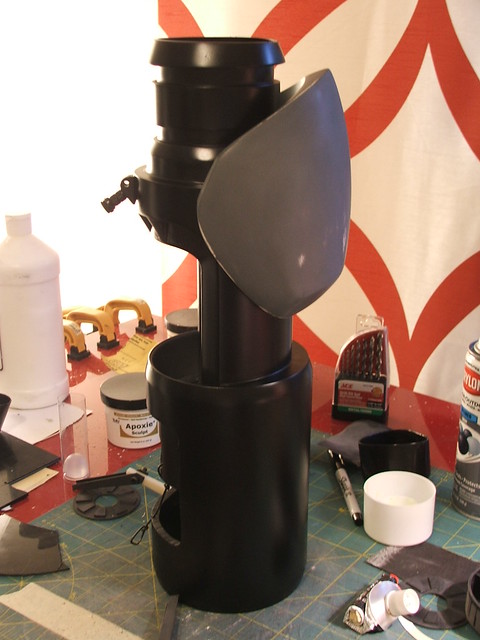
The center chamber was made out of a mail-order lexan tube and an acrylic plunger handle. The black discs are cut from ABS and have more ABS plastic wedges epoxied onto them to give the texture you see inside the gun chamber:

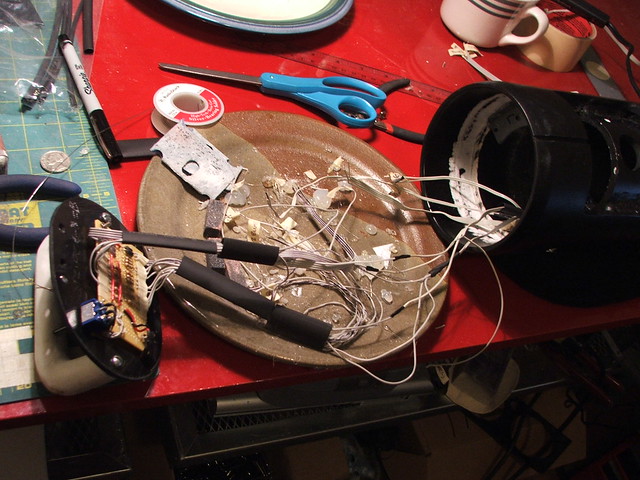
The circuitry was a little annoying. I wanted the gun to light up blue and orange, as well as have red prongs as shown in-game. 27 LEDs or so later, toss in few resistors and diodes, and a 3-position switch, and voila:

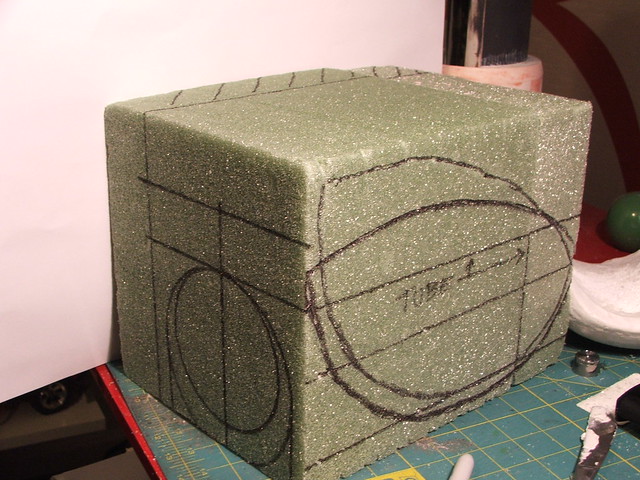
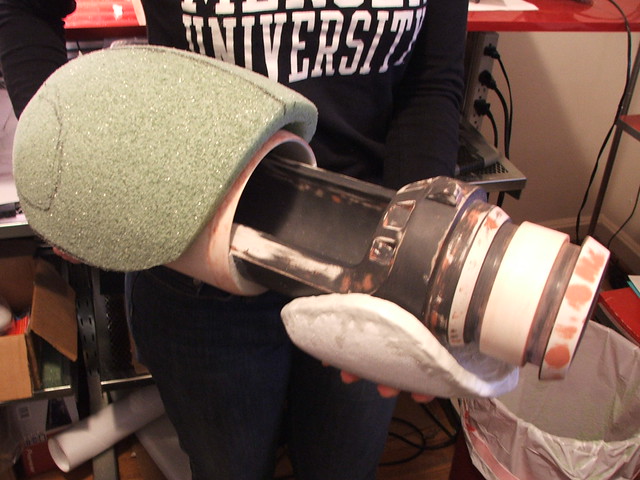
The white casings were the next hurdle to tackle. I had intended to make them out of carved pink insulation foam, but had some issues with solvents and melting of the foam... which goes to show you NEVER trust an online tutorial on something until you try it for yourself. In the end I sculpted these out of green dry florist's foam as more a matter of a time crunch than anything else. Seems to have worked out in my favor though:
I also added 2 sections of 4" PVC couplings to the back of the barrel to act as the larger rear portion. These were epoxied to one another and the seam filled with bondo:

Scale test (Emily is 5' tall even) The foam was covered in Wonderflex plastic, and the edges lined with apoxie sculpt for definition. You can see this in the front casing below
After this, the casings were painted with several layers of high-build primer to hide the texture of the wondeflex, and the gun was guide-coated, wet-sanded, and top-coated.

The claws were made out of ABS plastic, PVC for the thicker base pieces, and carved apoxie sculpt for the triangular ends. Here they are on a test-fit

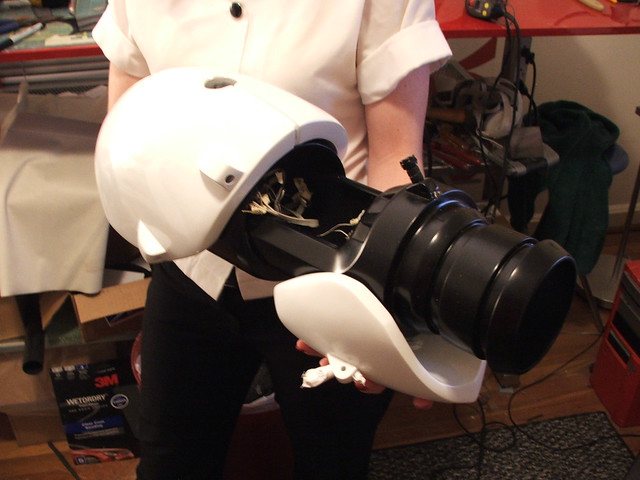
The front casing was wired for red LEDs and top-coated in gloss white paint. Each coat was wet-sanded with 2000 grit paper before a gloss clearcoat.

Another test assembly
Once I had final fitment sorted out, I connected all the appropriate leads to the circuitboard
First "test-fire"

A necessary detail was the "Aperture Science" side logos and barcode. I used water-slide decals with clear backing for this. The files were created in Photoshop and printed onto water-slide decal paper on a laser printer

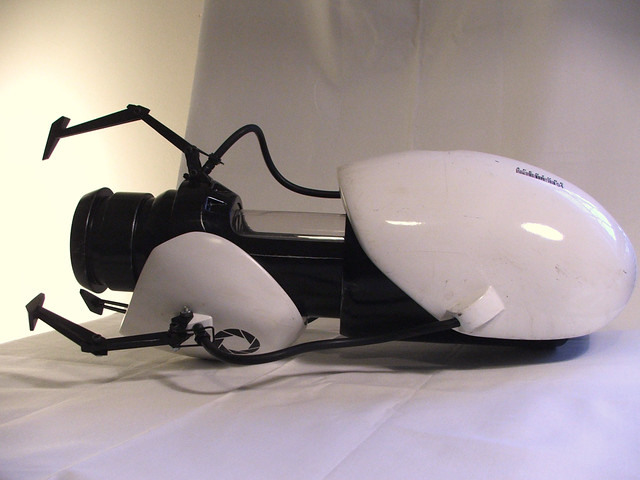
Finished product!
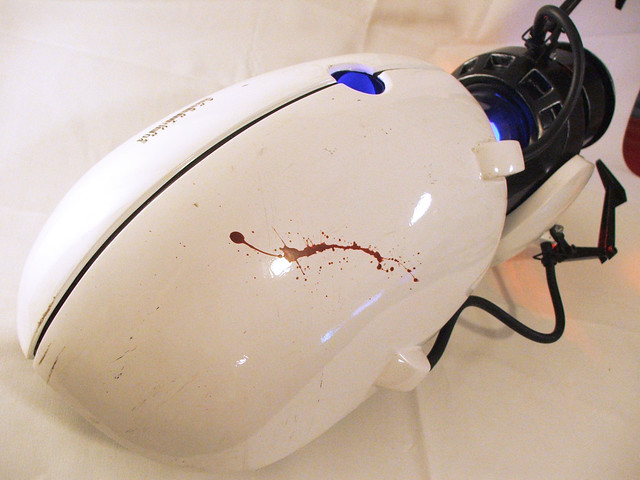
The final touch was some light weathering, and a blood spatter from an errant turret round. Anyone thats played Portal knows you are bound to get tagged by one of those things eventually!
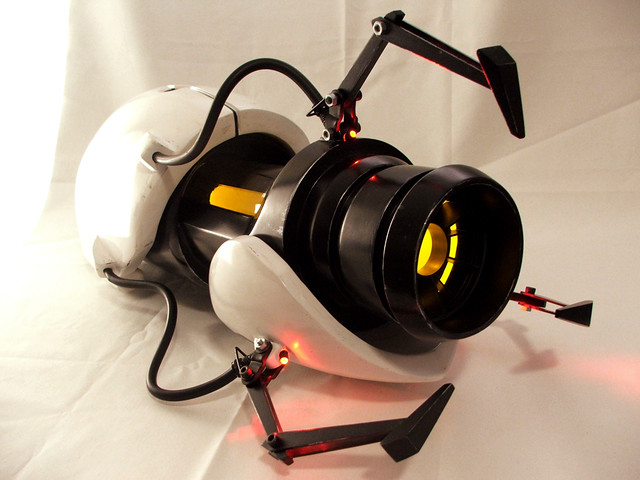
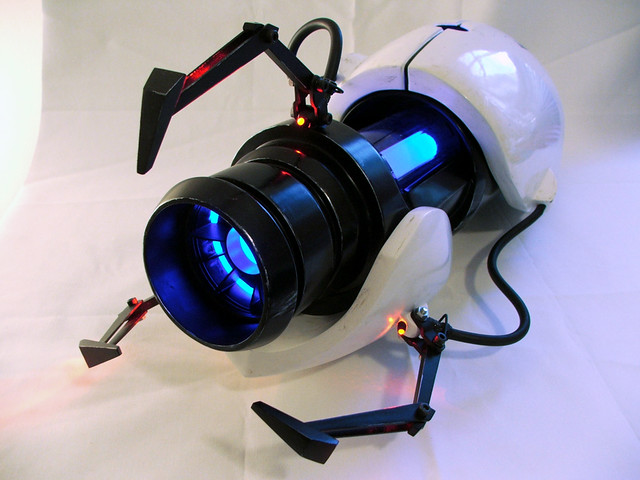
Finished shots, and one of the gun in action!

More pictures available on my Flickr page - thanks for reading!