
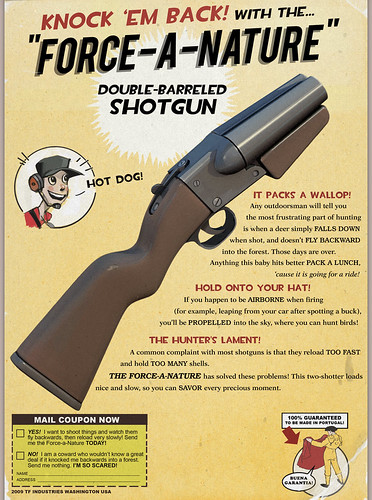
Any outdoorsman will tell you the most frustrating part of hunting is when a deer simply falls down when shot, and doesn't fly backward into the forest. Those days are over. Anything this baby hits better pack a lunch, 'cause it is going for a ride!
This is a very cool and ridiculously proportioned weapon. 7" long barrels firing 4ga rounds and proportionally twice the size of regular rifle stocks, its comedy in overpowered shotgun form. How the Scout can fire this thing - from the hip - is anyone's guess.
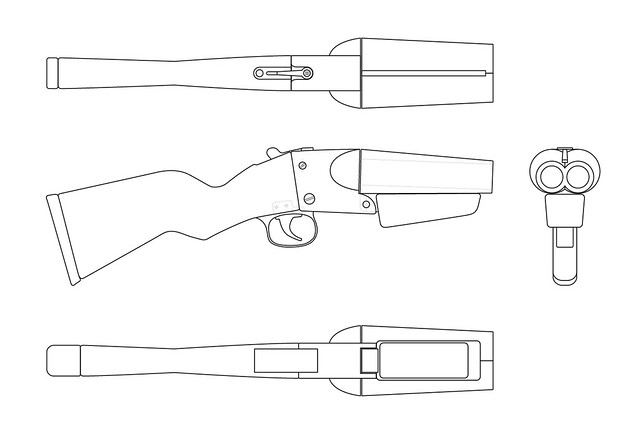
First step first, I made up some blueprints in Illustrator. The scale was determined by sizing up the scout to 68" tall and measuring out the gun accordingly. The Scout, much like the rest of the guys in TF2, has HUGE hands which make the trigger and front grip assemblies respectively giant.
Starting off, I rough cut the stock and front grip out of 3/4" MDF. Thinner sections were added in 1/4" MDF to make sure I had the depth built out accurately.
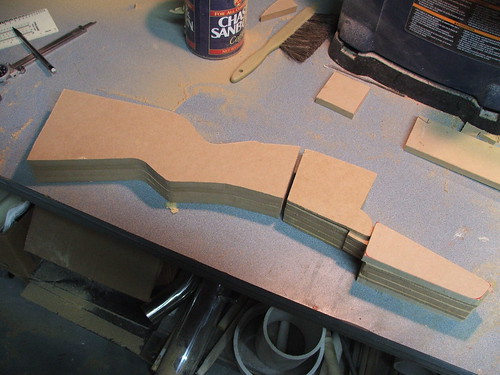
These individual pieces were glued and clamped together to make large blocks. Eventually, I'd shave these down into their final shapes, but for the time, everything remained pretty chunky.

This is the front grip after some sanding. I added an MDF plate to the rear section to even this out and save myself a lot of bondo work. The piece sticking off the back will eventually act as the barrel hinge.

The barrels were an interesting challenge. Initially I thought of lathing them out of a solid block, then coring that block out for the inner barrel later. The more I thought about that, the less I thought I could pull it off well... so I tried something completely different and fairly strange.
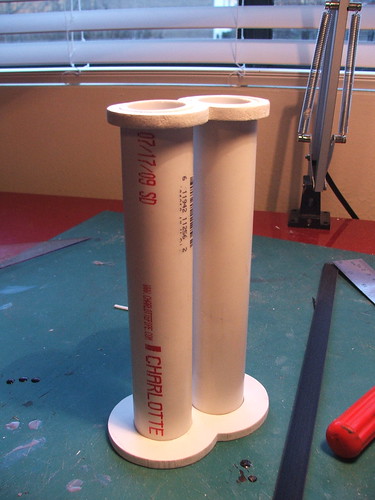
I cut the front and back barrel profiles out of sintra. These are the upper and lower "8" shapes in the shot below. I then cut 1.5" PVC pipe to 7" long and glued the "8"s to the top and bottoms.
Strips of thinner sintra were trimmed in long thin triangles that matched the taper of the outer barrel, then glued to the PVC pipe. I also glued in wedge-shaped pieces of insulation foam to fill up the cavities in between these strips.
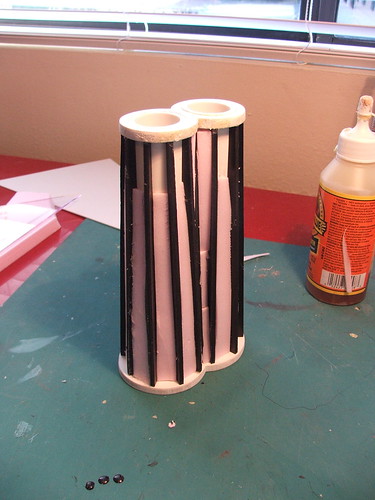
This was then skimmed in apoxie sculpt. The dented lines in the clay in the pic below are guide marks. I pressed a straight edge into the clay, making sure that the sides hit the two figure 8 shapes on the front and back. This indentation told me how much I needed to sand off once the clay was dry.

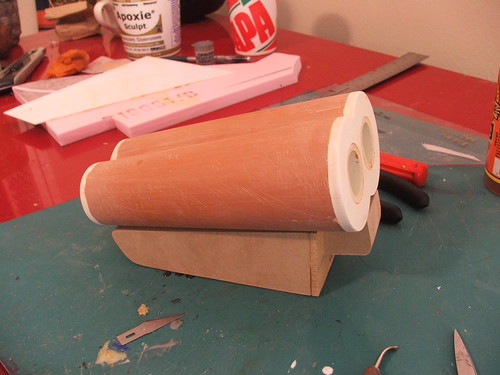
After a few hours of sanding I had this! Nice, smooth barrels, and as light as I could make two giant blocks of clay, too.
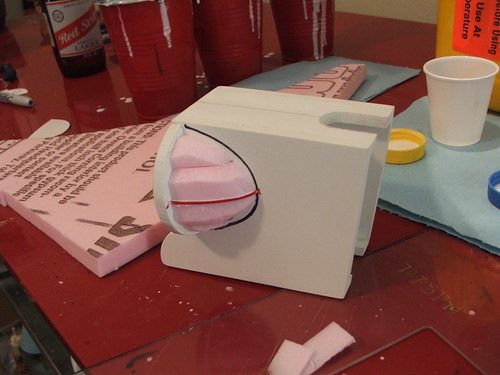
The center chamber was originally going to be MDF, but the gun needed to have a moving trigger and breech release lever, so I decided to go with something hollow instead. This box is made out of 1/4" sintra. I used a similar process to the barrels to make the curved domes on the sides of the chambers.
The chamber section after clay and sanding, mocked up next to the barrels to check alignment.
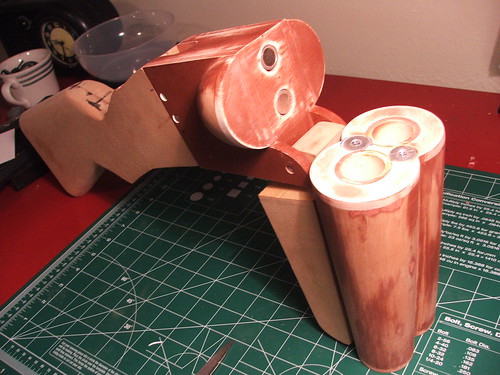
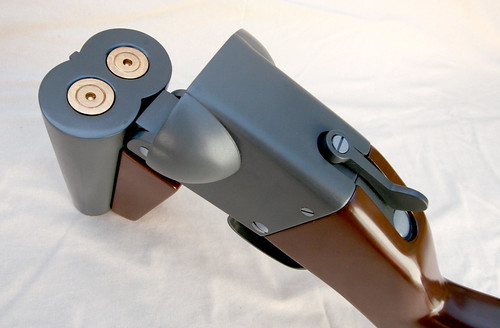
Magnets were added to the barrels and center chamber to hold the breech closed. I went with 2 neodymium 16lb pull magnets situated in the center of the assembly. You can hold the gun by the rear stock and these will keep the barrel closed well until you pull them apart. The best part is there's no maintenance needed for moving parts!
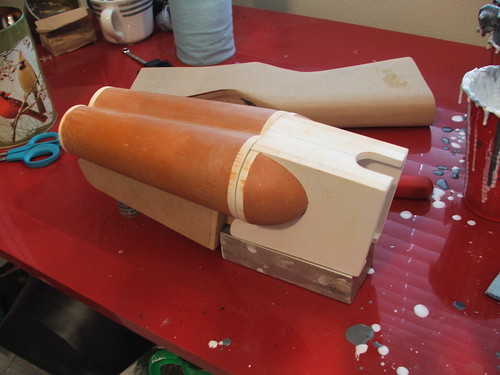
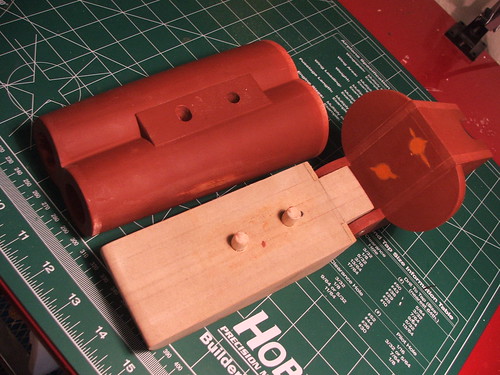
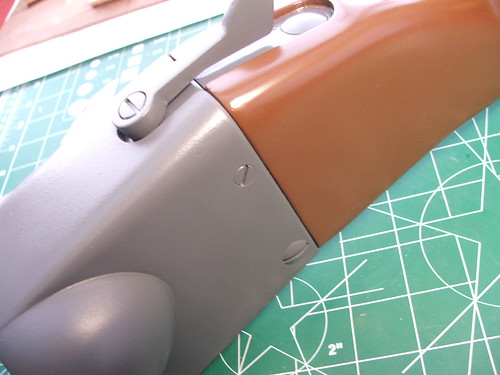
The front grip is held onto the barrels with 2 wooden dowel pins in countersunk holes. These were filled with gorilla glue and clamped for final assembly. The orange areas in the shot below are from an earlier set of magnets that ended up being too weak to hold the chamber closed.
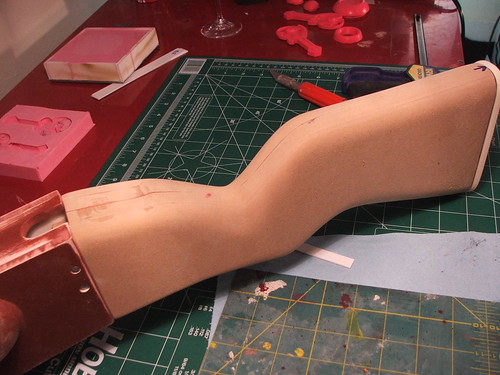
The rear stock was shaped with a dremel and an orbital sander. After poking around online and watching what people have done with DIY CNC milling machines, I can definitely say I'm saving up for one of those next. Shaping this by hand and getting the symmetry right is a pain in the ass.
The front grip was also shaped to better match the in-game shotgun. The sides were beveled slightly and the corners rounded as well.
For the butt plate on the stock, I shaped a spare piece of nylon stock I had lying around from another project. The two countersunk screw holes will be filled in later so the piece is flush.

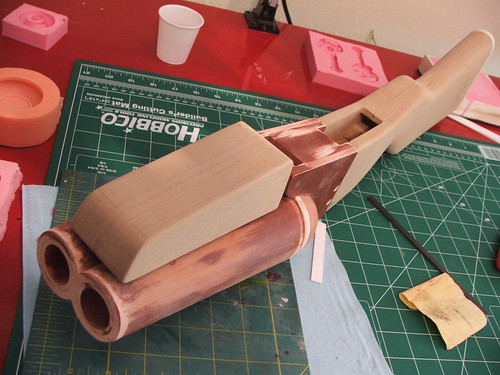
After the stock and grips were shaped, I rounded the corners on the center chamber to match the contours of those shapes as well. I also carved out the area in the stock for the breech release lever. Toward the back of the center chamber in the shot below are 2 stainless steel pins which hold the grip and chamber halves together. This is a friction fit that was glued in place later.

A fellow Portal junkie propmaker friend of mine offered to CNC some parts for me a while back, so I took him up on his offer for this build. He carved the trigger and trigger guard out of a block of aluminum for me based on a few drawings I sent him. He doesnt have much of an online portfolio, but you can see a kickass piece he made here.
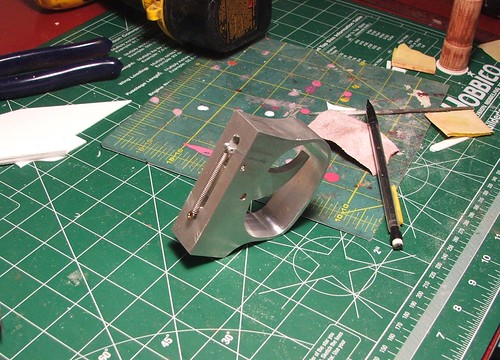
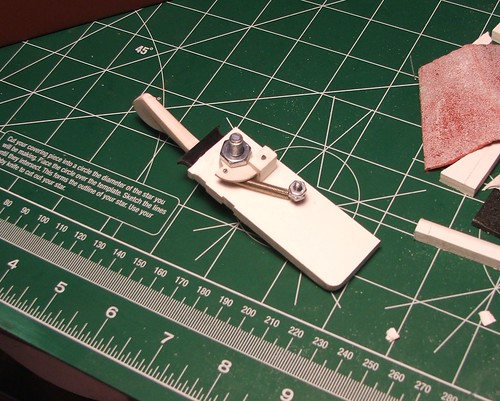
The other moving part was the breech release lever. This was made out of layered styrene. The lever itself is spring-loaded and connected to a bolt on a copper tube that the assembly rotates on. The "guts" of the mechanism can be seen here:
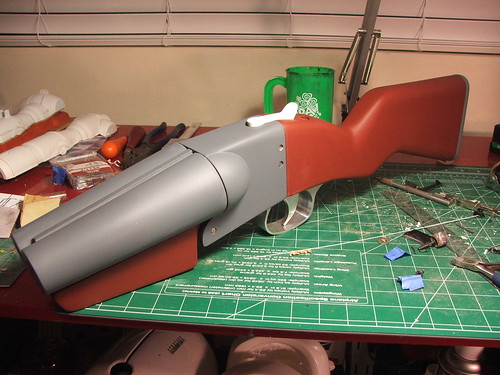
All of the parts were given a coat of primer close to the final shade, and test assembled one last time before final paint. The trigger mechanism fit perfectly, which is amazing considering it was machined in a different state. Often, even the parts I make for myself in my own garage don't fit without at least some modification.

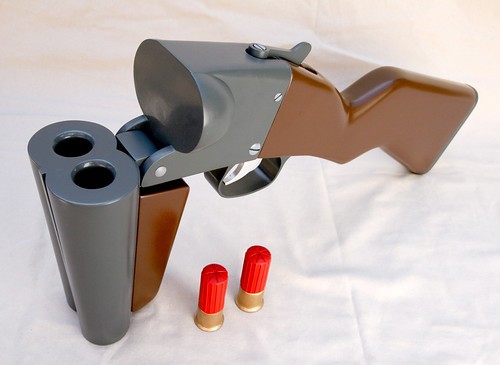
I also made a set of equally cartoony-sized shells to load into the gun. The first master was made out of lathed basswood and styrene.
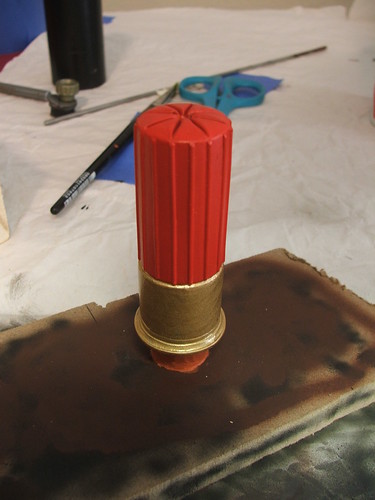
I made a quick mold of the one shell and cast 2 more copies in resin, which were painted to match.

mmmm... chocolate gun parts. Krylon Fusion paint is niiiiice

The gunmetal parts of the FaN were painted with Montana brand paint, which I don't think I'll go with again. The color is excellent, but its far too difficult to get a nice, even coat. For $10 a can, its really not worth the hassle.

Lastly, the dowel pin holes were covered on the side of the gun with nylon screw heads painted to match. These were eventually topcoated with lighter gray testors paint to make them stand out.
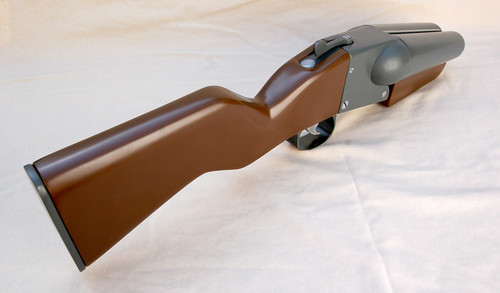
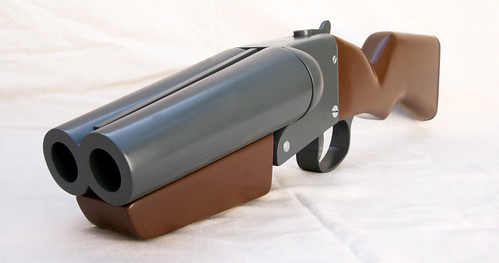
And the final product in all its backwards-blasting glory!


Higher-resolution pictures are available on my flickr page. As always, thanks for reading!
41 comments:
Looks awesome. Actually has the 'cartoony' look, great job.
AMAZING ;O
holy shit this looks awesome.
This is amazing. Your attention to detail is outstanding.
Superbe boulot !
You know, though I like the whole of it, I must admit the best idea I got out of this was of the magnets holding the gun shut ;)
The amount of effort you put into your work is just amazing!
I want one.
:D
pretty friking sweet!
Freaking sweet. Can we get a picture of this with you holding it for a good idea of scale?
Absolutely beautiful.
I would literally pay you for one of these things. How much do you want?
Awesome!! So glad you have this blog, thank you for sharing!
What type of glue did you use to laminate the MDF pieces together?
Friggin unbelievable!!!
just amazing i would pay nearly anything to get one of those.
U got my full Respect! Like the Portal Gun this is just Awesome!
How much does it cost to make one for someone?
Awesome....but you're missing ejectors. You need to be able to open the breech and have the shells fly out. Oh, and you need smoke too.....
Seriously though....nice job.
What do you use to cut the sintra, that stuff isn't very friendly to cutting without shattering or splintering? I love the process you put into this, very inspiring.
Quick answers to the above:
Thermageddon: I didn't get a chance to snap a pic of me with the gun, hopefully my client will be able to provide me with one, as it has been shipped out already.
Edwin: I use Gorilla Glue brand wood glue to laminate MDF pieces together.
Josh: Usually I use a bandsaw or scrollsaw to cut sintra, depending on the detail of the piece being cut.
Questions regarding cost: I don't discuss build costs publicly - if you're interested, please email be at volpinprops@gmail.com
Hey, minor thing, on the intro, it's "pack a lunch". Amazing piece! Any plans to do any other TF weapons?
These fabrications are very talented, but it is sad that your imagination is just about weapon. So please, join the light side of the DIY force.
"A Jedi uses the Force for knowledge and defense. Never for attack." ― Yoda
Bloody Beaut!
Epic success, sir. This stumbler (Phx, AZ) salutes you!
Plz Granade Luncher
Very cool! Just curious, what kind of clay did you use on this? Did you have to bake it or anything?
Thanks!
I came across this completely by fluke. Your talent is astounding and your attention to detail is amazing. Very well done indeed and all the best to you!! :-)
Awesome! Could you do the ambassador? :)
Very cool! I'd like to see more weapons soon!
really very nice
I wish I could do that... I wanna have a Force-a-nature too. U thought about selling them ? :D
I plan on making one of these. May i have a measurement guide for the pieces? Email: Shikakukillyou@hotmail.com. I would greatly appreciate your help.
This is amazing, but not perfect; the barrel hole is too small. :(
Great example of making a prop gun.
I'm going to be making one of these, if I could have some measurements, I would be extremely grateful: arron_shep@hotmail.com
Gonna make Soda Popper now!
Sell it to Valve :P They'll store it in their Headquarters for sure ;)
Can you upload the blueprint? id like to do it for a cosplay :D. Awesome job.
Wowie zowie, I plan on making my own in the near future.
Cool man!
how much to buy one if i wanted you to make one?
email at heath0712@yahoo.com
Post a Comment