
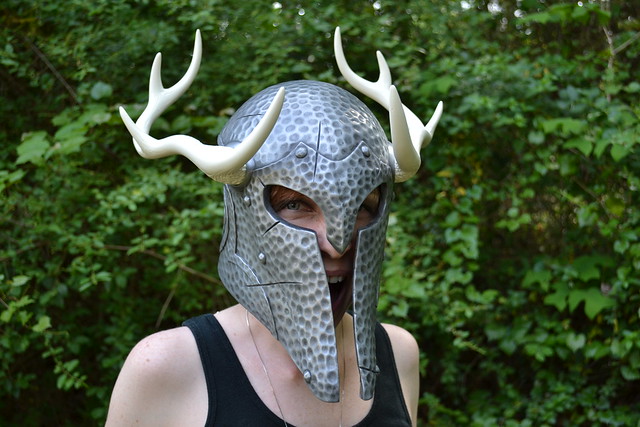
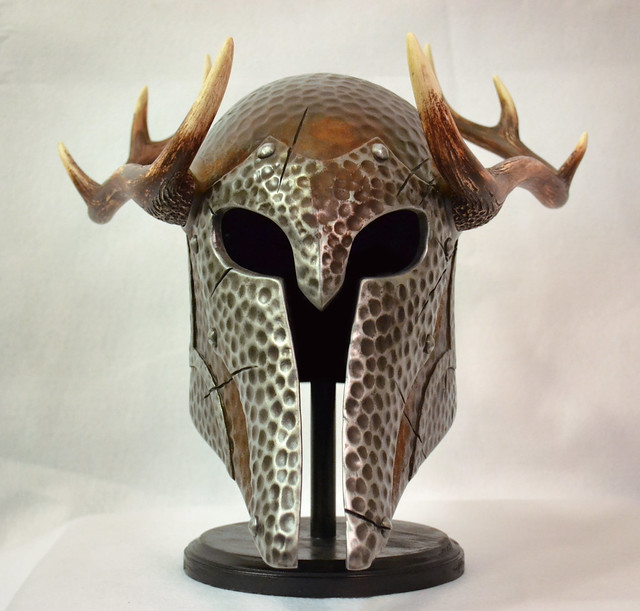
For anyone who hasn't played the game, there's a wealth of beautiful armor and weaponry. Its the sort of thing where a builder like me wanders around the map saying "I want to make that. And that. And three of those." The item I found most striking, and the one I chose to build first, was the Ancient Nord Helmet (also called the Draugr helmet.) The write-up below is a pretty brief recount of my build process. If you're interested in seeing a more complete "step-by-step" account, you can check out the Instructable I wrote here.

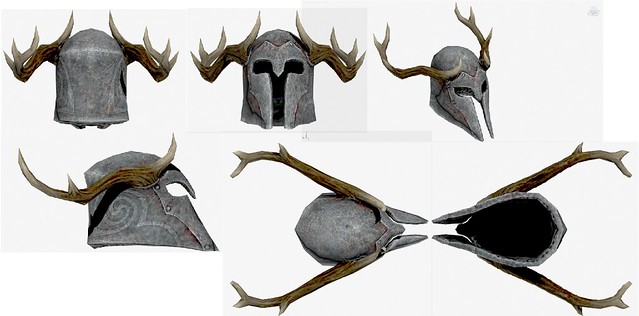
If you played a male character in Skyrim, this helmet may seem odd to you; the female variant got these awesome antlers, the men had the ram horns.
I started out with some very nice 3D files ripped from the game, courtesy of a gent who follows my Facebook page and was kind enough to lend a hand with the source imagery.
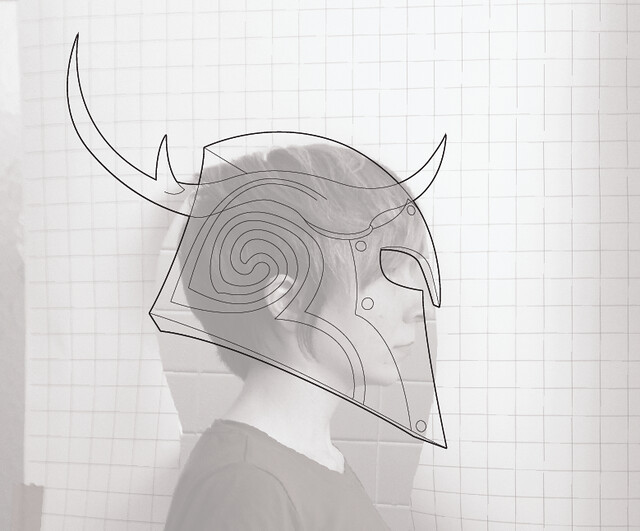
From these, I made a set of 2D blueprints in Illustrator to pattern the build.

Recently I've found a great method scaling blueprints like this to their final dimensions: Print off a 1" grid onto a sheet of plotter paper, then trim out a space for your subject to stand. Photograph this as close to perpendicular as possible, then import the photograph into an image editor such as Adobe Illustrator. By scaling the image so that the 1" squares are indeed 1" in size, you can then import your blueprints over the image and find all the dimensions of your finished part.
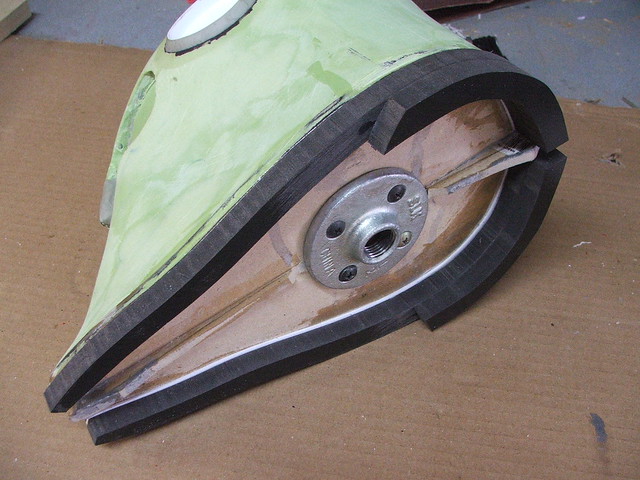
The final dimensioned "slices" were cut from 1/4" MDF and glued together to make a sculpting frame.

Cavities in this frame were filled with polystyrene foam. I used some old water-contaminated casting resin to glue the foam into place, since it can't be used to make decent casts any longer.

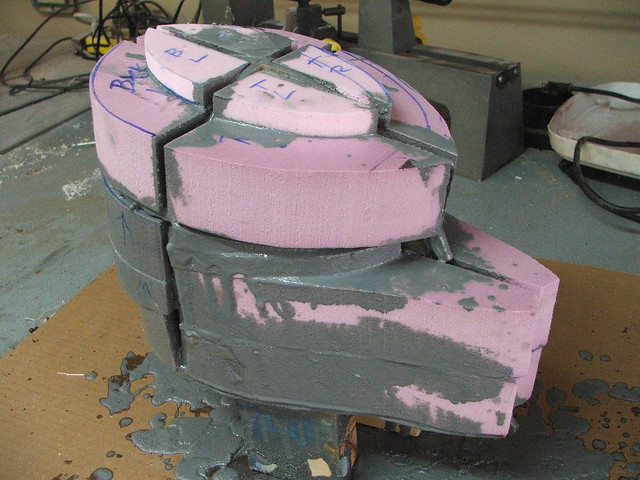
After everything dried, I began shaping the foam with a coping saw, then varying grits of rough sandpaper (50, 100, and 120 mostly) The rough form was then coated in black acrylic paint to seal the foam against the bondo I'll be using in the next stages.
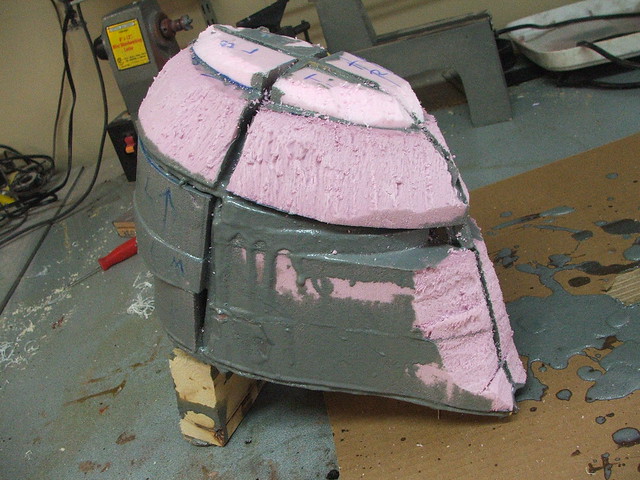
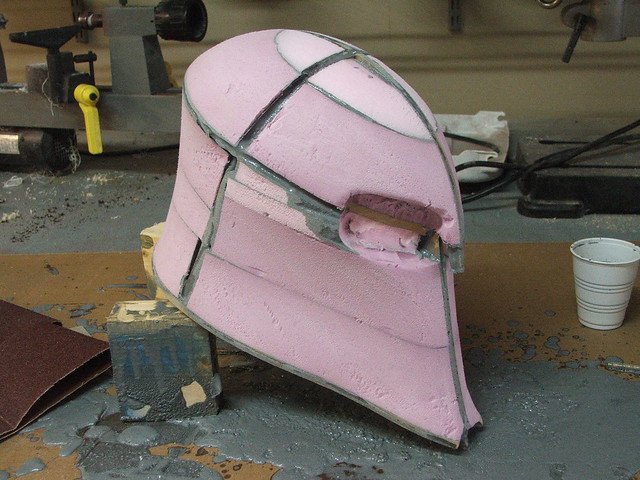

If this all seems very familiar, that's because this process is essentially identical to the way my Daft Punk Thomas helmet was sculpted. I've not tried this method that often, and I was curious to see if it could be transferred to a helmet like this. It worked great, and I have a few more Skyrim helmets coming up in the coming months which will employ this as well.
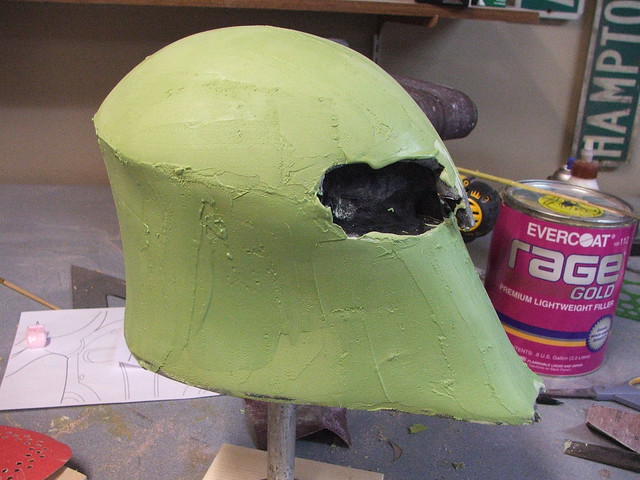
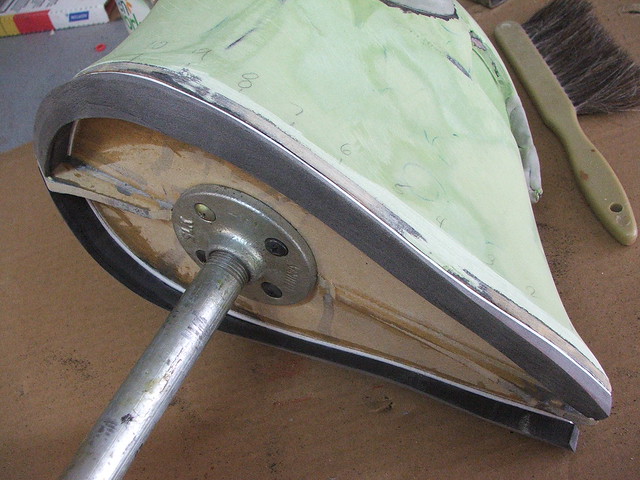
After two coats of acrylic, I started building up the shape with some polyester filler. The green goo in these shots is a filler by Evercoat called "RAGE Gold" - It sands much easier than bondo but is also significantly more expensive as a result. A tip for sculpting like this with polyester filler: at a certain point it will no longer be spreadable, but you will still be able to dent it with your fingernail. When it is at this stage, break out your 50 grit sandpaper and start shaping. The lumps disappear easily and you've got nice, even shapes.


There was a lot of this shaping, until the final base form was satisfactory.
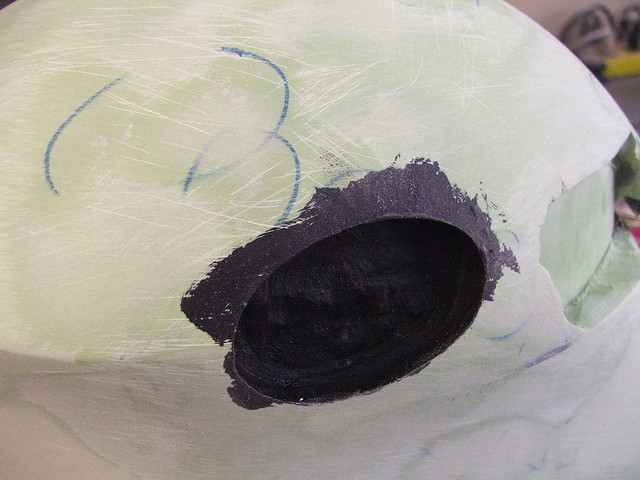
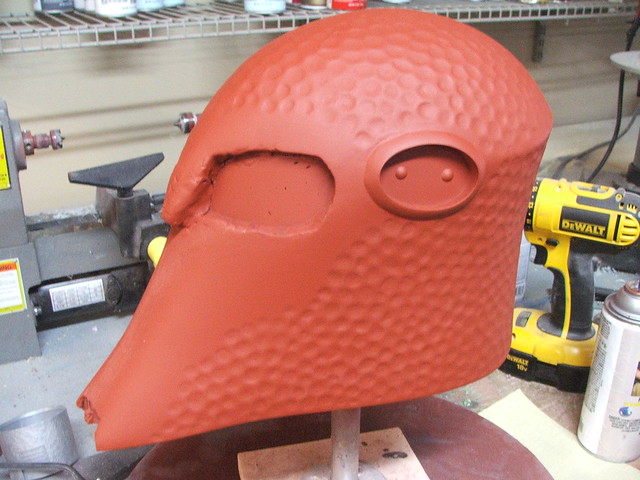
The end helmet was going to be molded and resin cast, but in parts. The antlers would be molded separately, but I needed a place for them to anchor in the helmet. After carving out a couple of sections in the temples of the helmet, I vacuumformed some acrylic plugs and used these to make smooth even recesses in the helmet for the antlers to mount to.

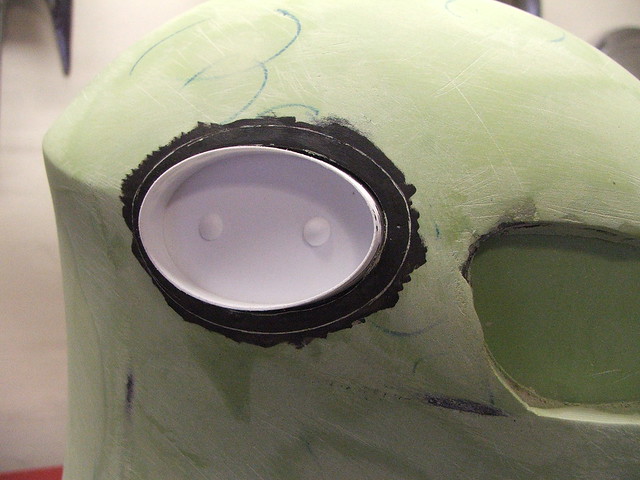
These were then blended into the helmet with Apoxie Sculpt.

Around the neck of the helmet, there's a beveled edge that also had a slight gradual curve along the profile. For this, I glued some 1/2" sintra to the base and shaped it with a dremel. Height measurements were taken every inch along one finished side, then transferred to the uncut side to keep things identical.

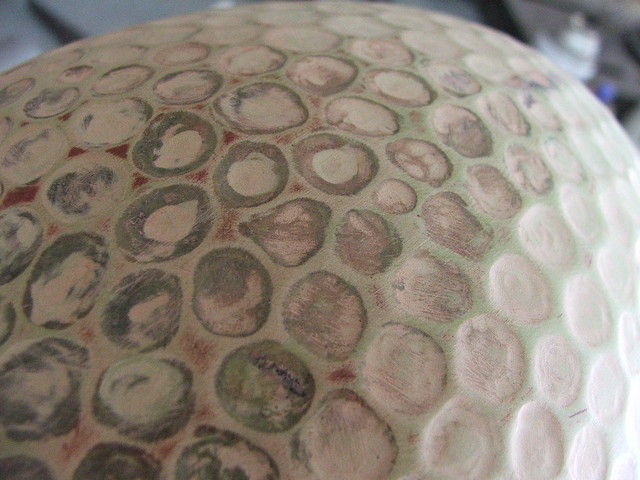
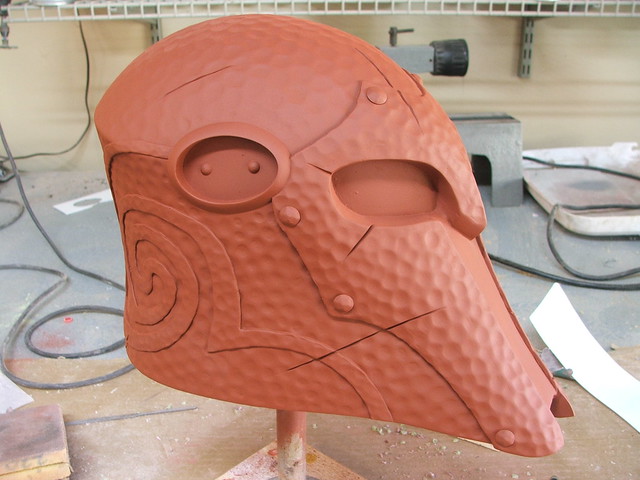
After a coat of filler primer and some 220 grit sanding, it was time to start hammering!

Well, okay, not really hammering. The in-game helmet has a pretty drastic hammered finish, but since this piece is thin filler over a foam base, whacking it with a hammer would just result in a lot of cracks and chipped resin. I put a large rounded sanding bit on my dremel and gradually carved out each hammer blow.
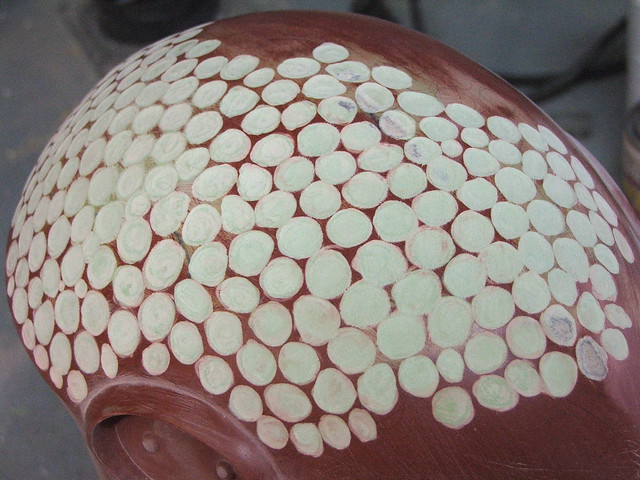
Admittedly, I got better at this as I went along. Initially, the upper section of the helmet is a bit too uniform, but I still like the texture. The full process for this took me a little over two days to complete.
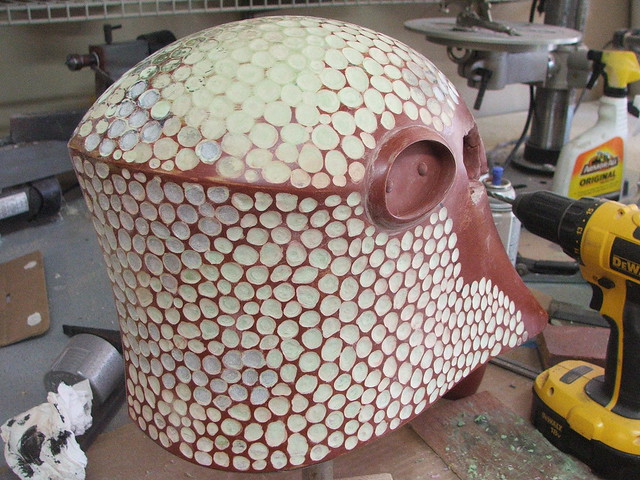
After this was done, the entire piece was then sanded with a 100 grit sanding sponge to blend these dents into one another, then the helmet was given another coat of primer.
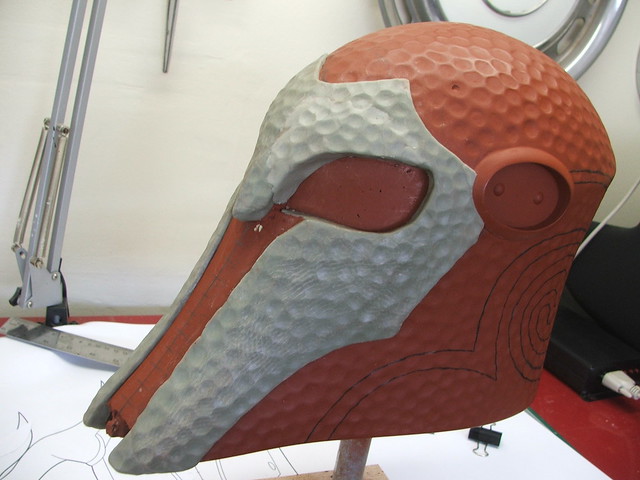
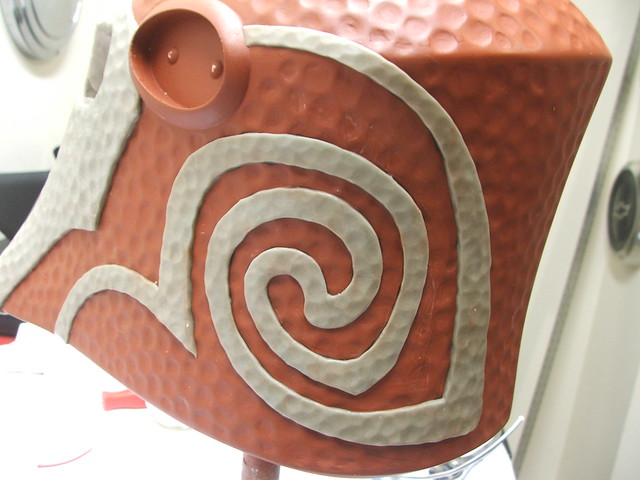
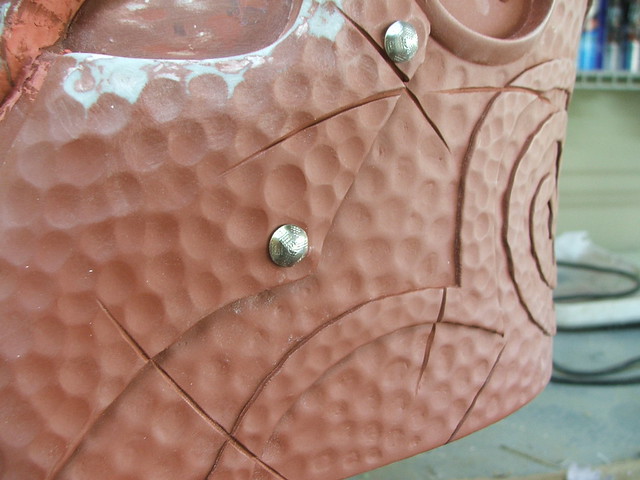
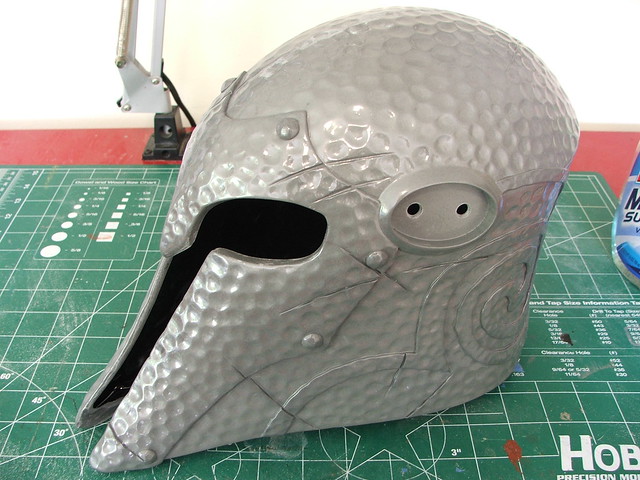
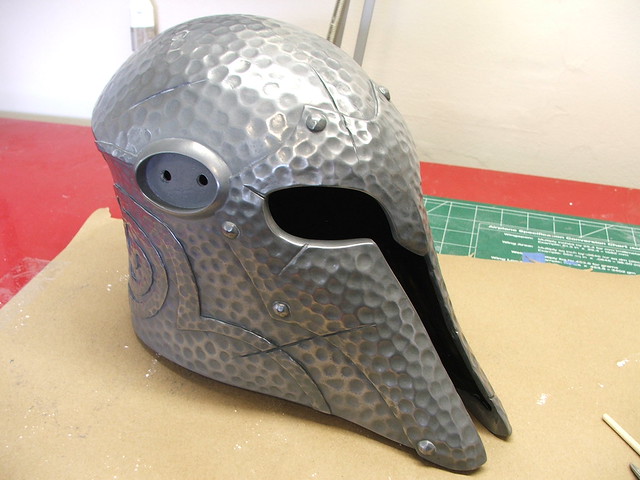
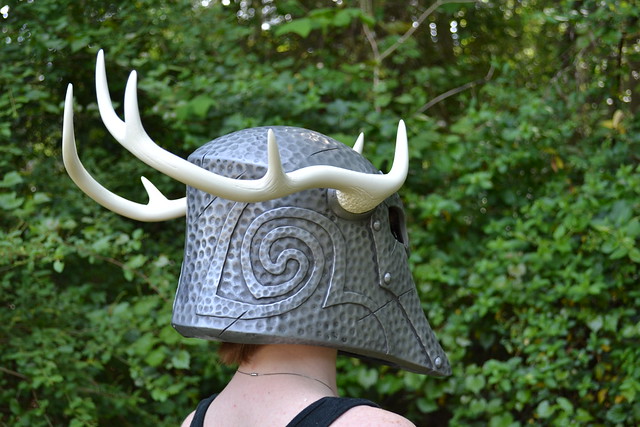
Raised areas of the helmet around the eye pieces and the large curled filigree on the side were added with thin layers of Apoxie Sculpt. I used the back side of an engraving tool to replicate hammer marks in the surface while the clay was still uncured.
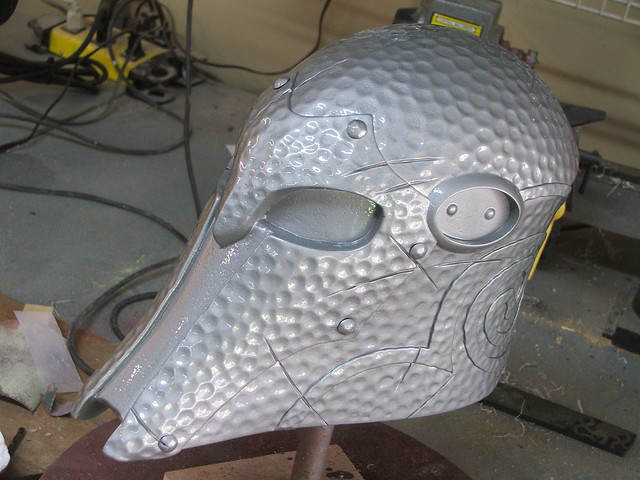
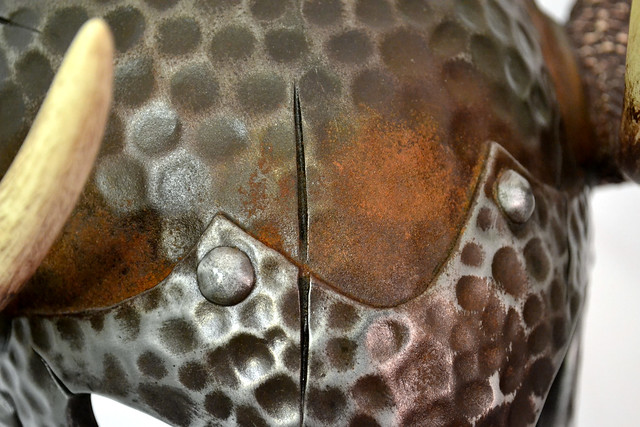
Battle scars were carved into the helmet with a dremel and a rotary wheel, then the large rivets (furniture tacks) were added to the faceplate. The whole part was painted glossy silver and allowed to cure in prep for moldmaking.
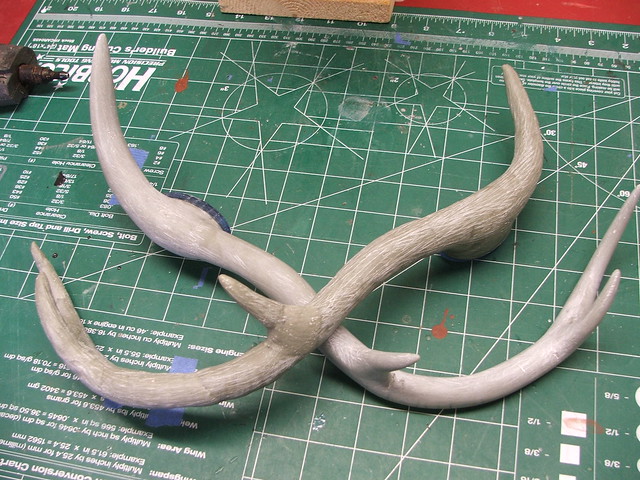
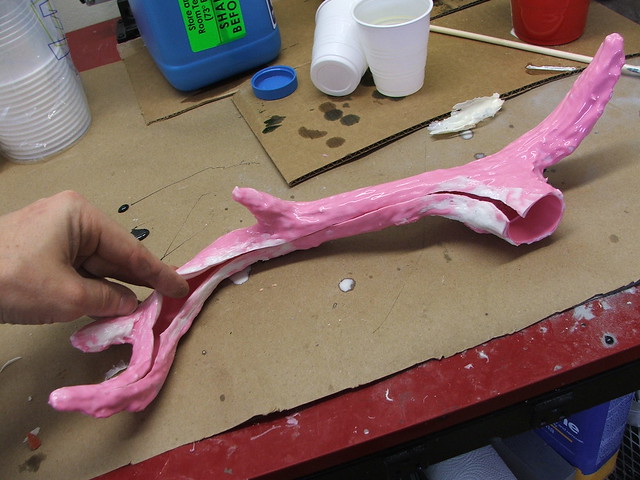
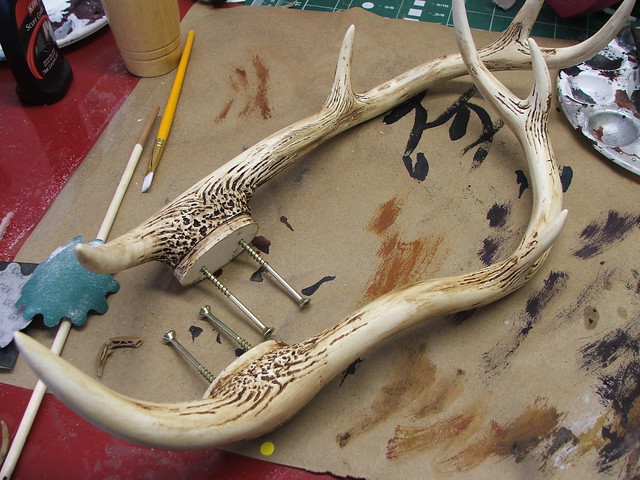
The antlers were a real challenge. After doing some research on modeling maquettes and armatures, I started by making a wire base, which was then wrapped in foil and thin sculpting wire. This makes sculpting the final form easier, cheaper, and lighter as well. Getting the initial shapes symmetrical was an exercise in frustration.

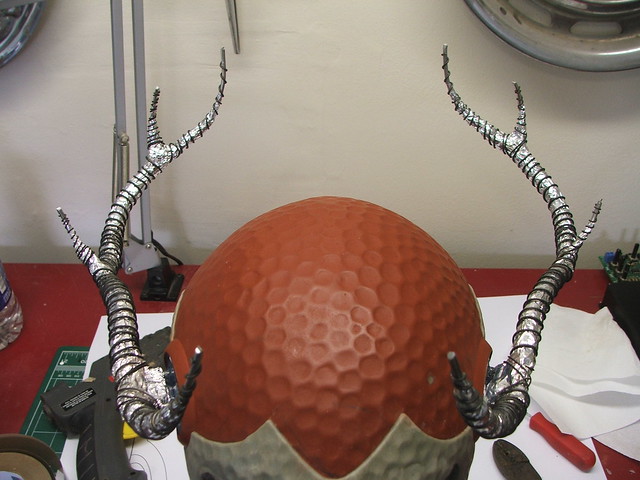
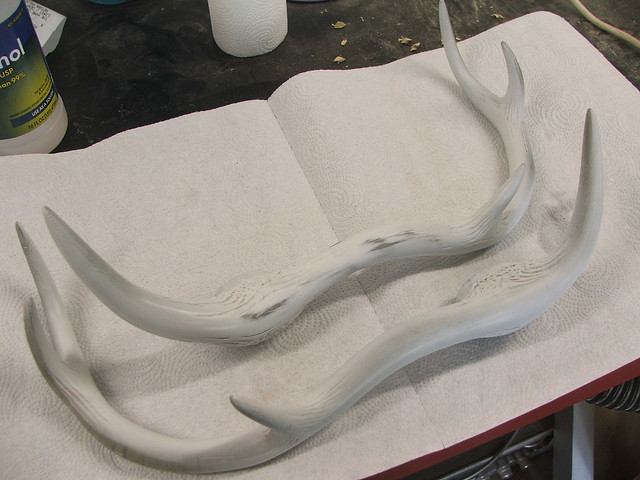
With the base form satisfactory, I skimmed the surface in Apoxie Sculpt. The surface was smoothed somewhat, but the nice thing about working with Apoxie is how well you can sand it once its dry. After curing, I smoothed out the entire antler form.


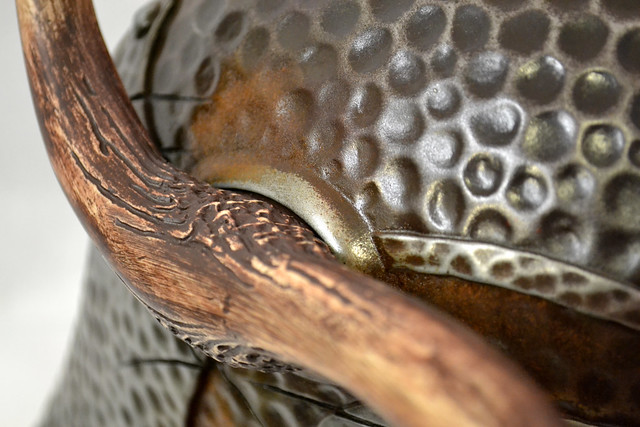
A few more details were added after this smoothing process. I used a dremel with a small ball engraver to carve thin lines along the base and crooks of the antlers, and more Apoxie was added to the antler bases to give them a rough, bony texture.
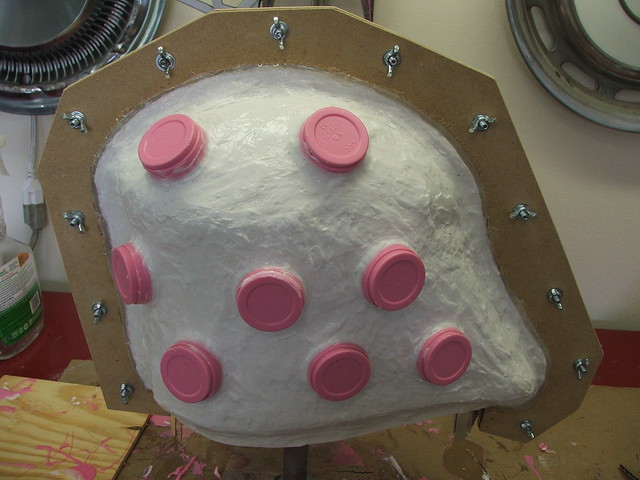
The molds for this project follow a similar technique to my Daft Punk helmet build, with the only exception being the type of silicone used. The white material in these shots is Mold Max Stroke, and the pink silicone is Mold Max 30. If you're interested in more detail regarding the moldmaking process, check out this Daft Punk post.
Helmet mold with registration keys
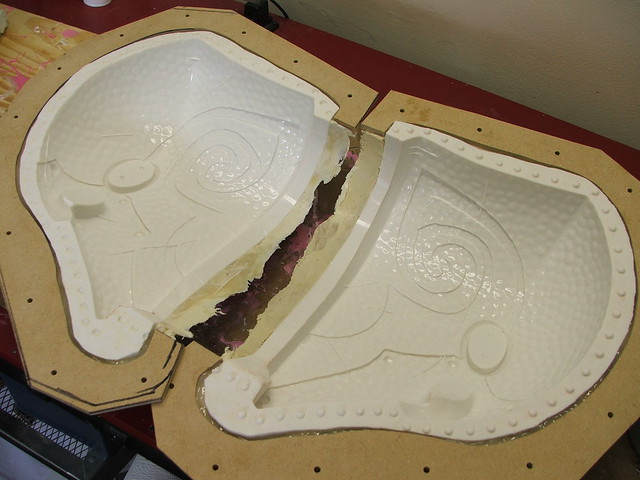
Finished helmet mold
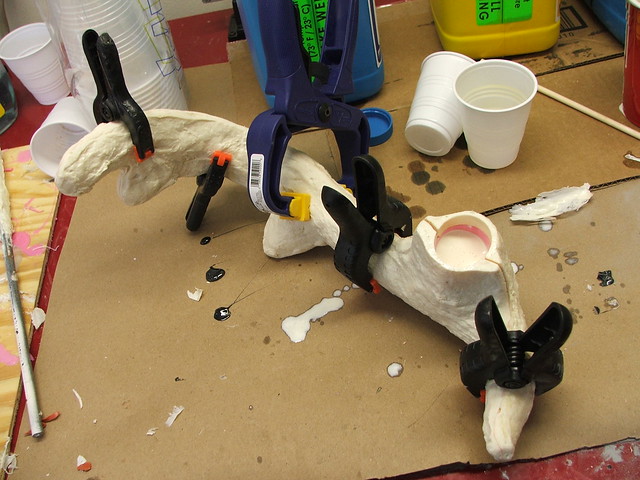
Antler mold with seam line
Antler mold with one half of the mold jacket in place

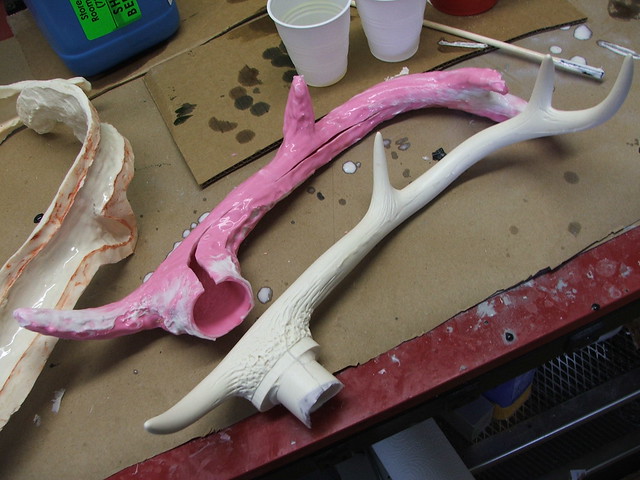
With the molds finished, the parts were cast. The helmet is cold cast in Smooth Cast's ONYX resin. Cold casting is a process where you use metal powders mixed with the resin to make the final casting have a metallic effect. With this helmet, aluminum powder was first dusted into the mold, then sifted around to coat all the inside surfaces evenly with a thin layer of powder. I used fine steel wool (000 gauge) to buff the surface to a metallic shine.
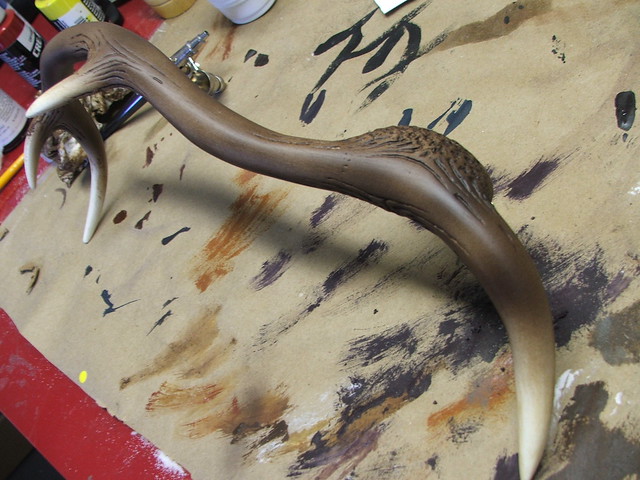
The antlers were cast in Smooth Cast 320, because the off-white color of the resin makes for a perfect base color.
After some dremel work and buffing, the assembled helmet took shape!
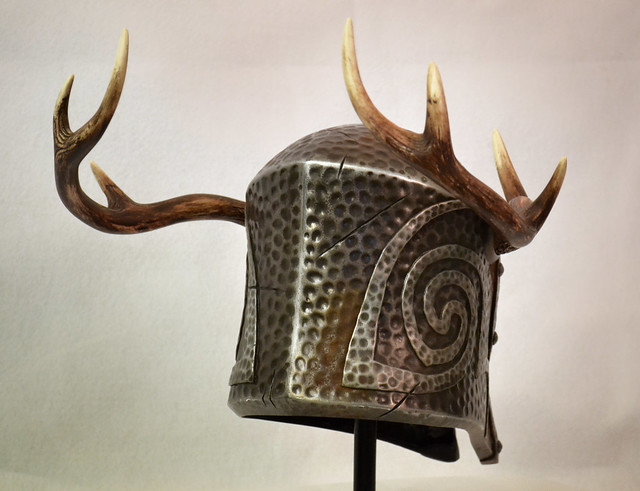
Neat, but it needed a lot more weathering to look truly "ancient". I started with dark washes of browns and blacks into the battle scars and crevices on the helmet. Around the rusted areas I used some iron powder, dabbed on with dark purple acrylic paint.
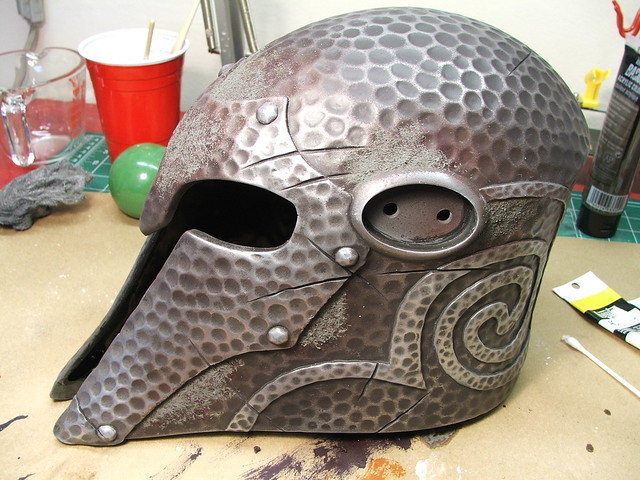
This powder was sprayed with a mixture of hydrogen peroxide and vinegar, then allowed to sit overnight. The results were beautiful rust marks!

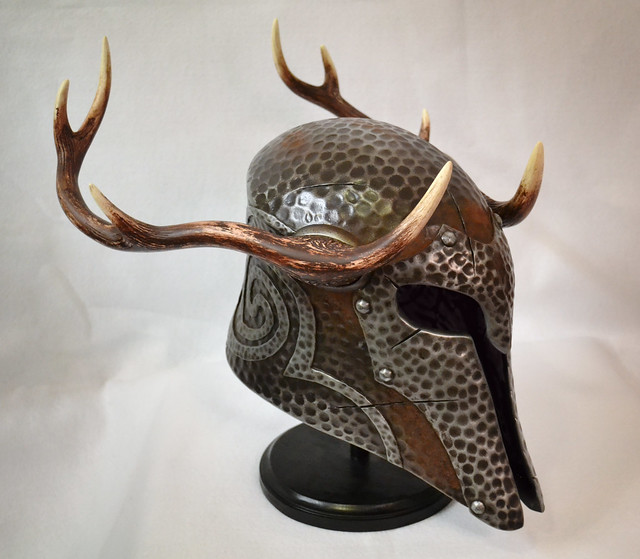
Painting the antlers was a bit trickier. I started by shading in the recessed areas with dark brown, then gradually layered thin coats of airbrushed brown on top of this, which were "scratched" away using a stiff bristle brush and warm water over the acrylic paint. The final version, next to an un-weathered helmet, is below.

After sealing the helmet in semi-gloss and the antlers with matte clearcoat, the final piece was assembled and finished!
I'll have more Skyrim stuff in the coming months, so if you're a fan of the game keep an eye out. There are many more higher-resolution pictures of the process available on my Flickr page, so take a look there if you're interested.

Thanks for reading!
