
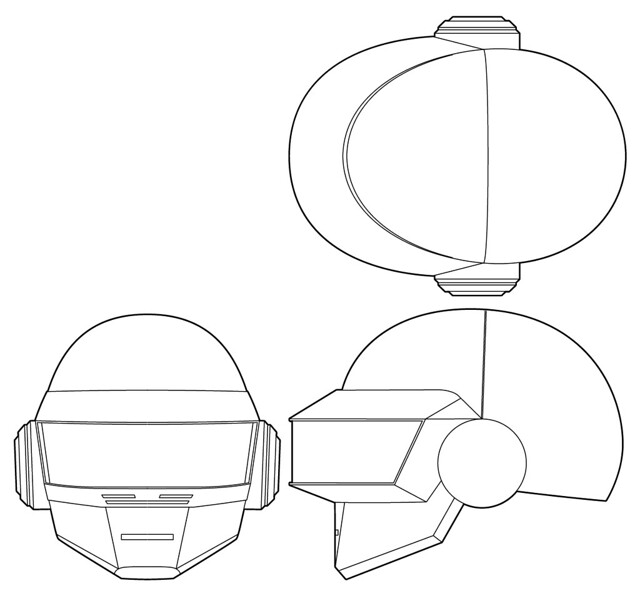
I started out by drawing up some blueprints, taking note this time to do more than 2 views. The width on the Guy helmet was something I struggled with, and more detailed blueprints would have alleviated that.
I learned a lot from Guy, most specifically what not to do. Often times, these are the most potent lessons of all. I started this project with a lot more experience, which has shortened the construction times of many things considerably. This bucket won't be knocked out in a month, but I think I can take a pretty good chunk out of my 1.5 year build time from the last helmet!
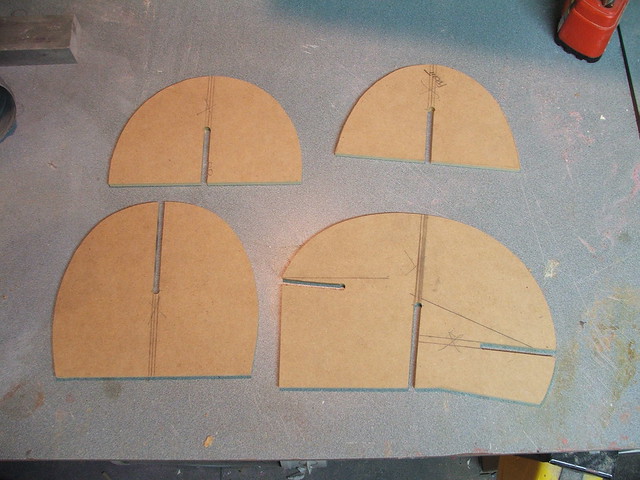
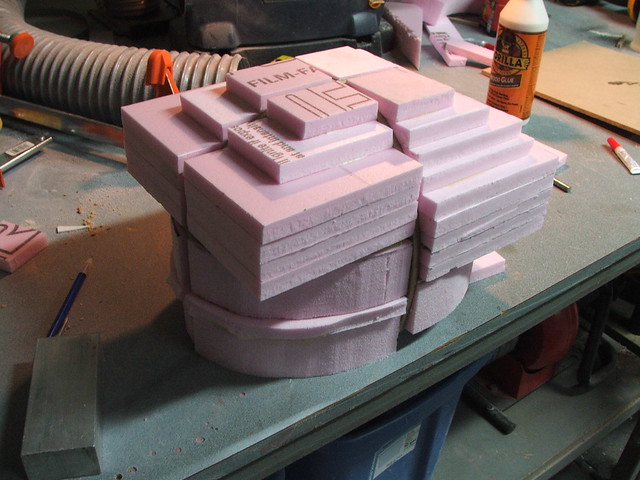
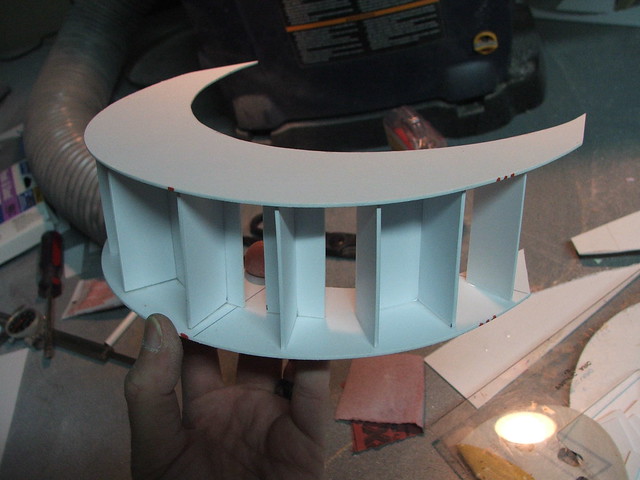
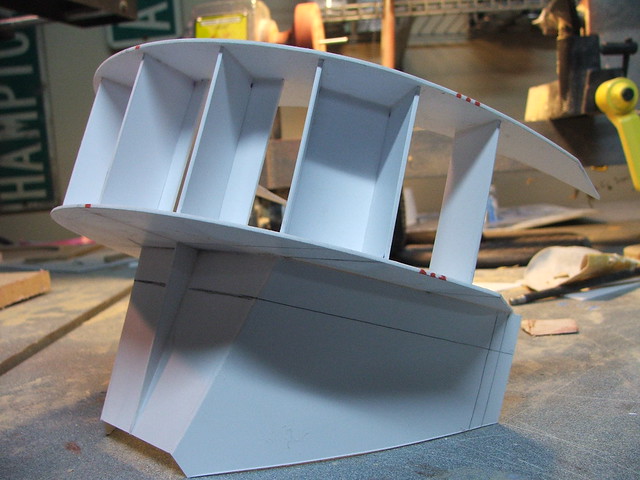
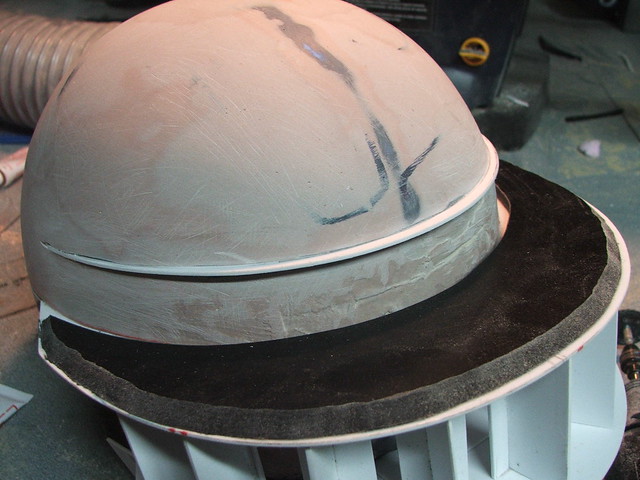
Right off the bat, things changed. The paper template I made for Guy was lacking in several ways. For Thomas, I created sectioned ribs from 1/4" MDF. These built on top of one another to form a sort of interlocking skeleton.
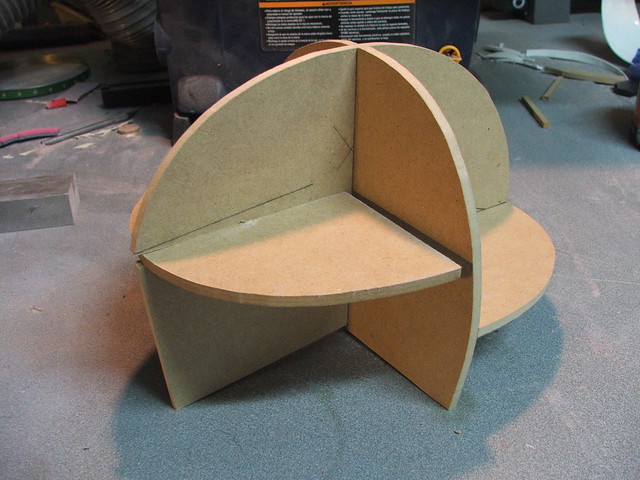
The cavities in the MDF frame were filled up with polystyrene insulation foam, carved to a rough shape with a coping saw, then sanded to the general shape of the dome with an orbital sander.
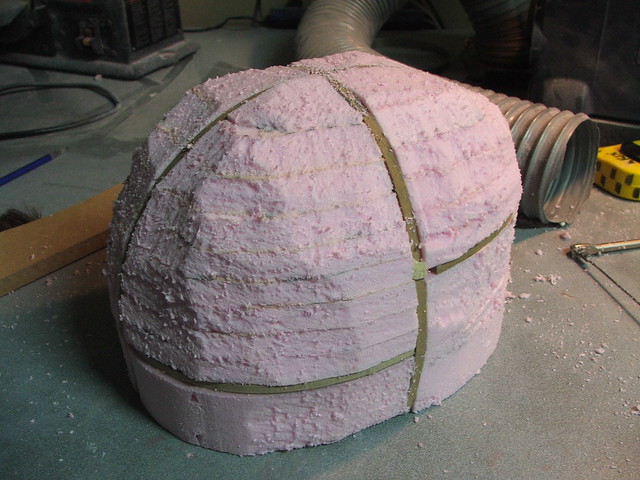
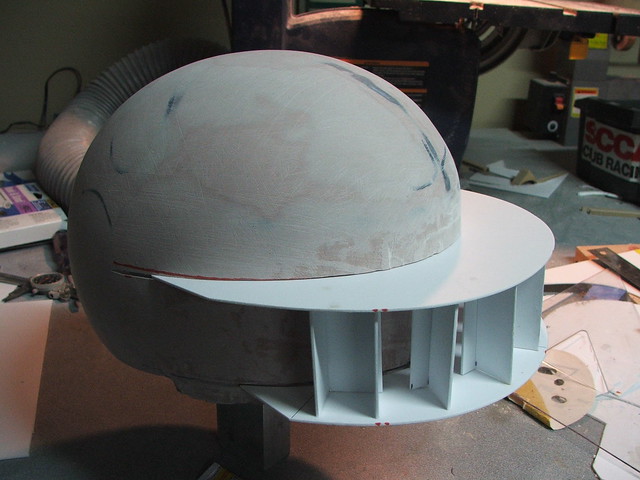
Pink foam acts badly when exposed to polyester resins (bondo, fiberglass, etc) so it was sealed with a few coats of urethane casting resin. This gives me a tough, lightweight shell to work on top of without worrying about it dissolving the foam base.
After scuffing the surface of the foam with some 60-grit sandpaper, I coated the urethane resin with a few bondo passes to refine the shape of the dome. The visor and chin sections will be built out later, but getting the base shape correct was the biggest goal at this point.
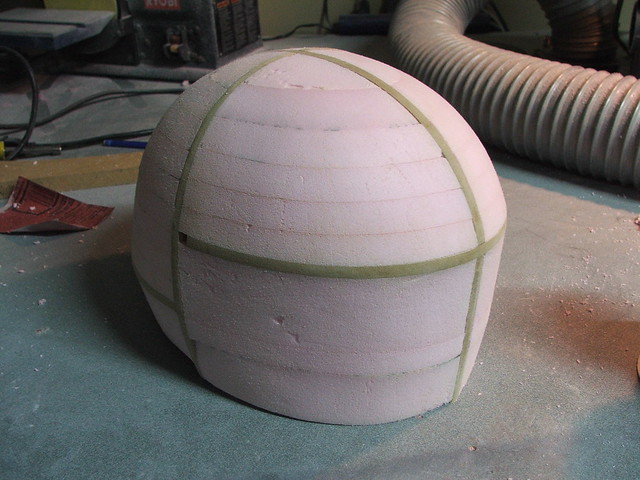
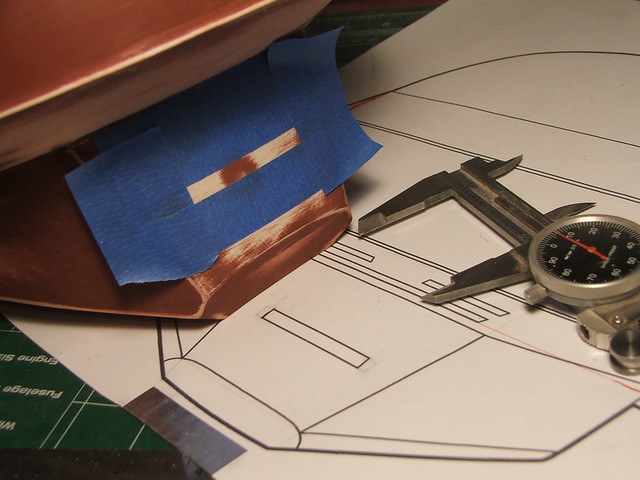
A contour gauge, passed down from my grandfather, makes getting the compound curves of the surface much easier. Take the shape of one side, flip it over to the mirrored side, and add/remove material as necessary…
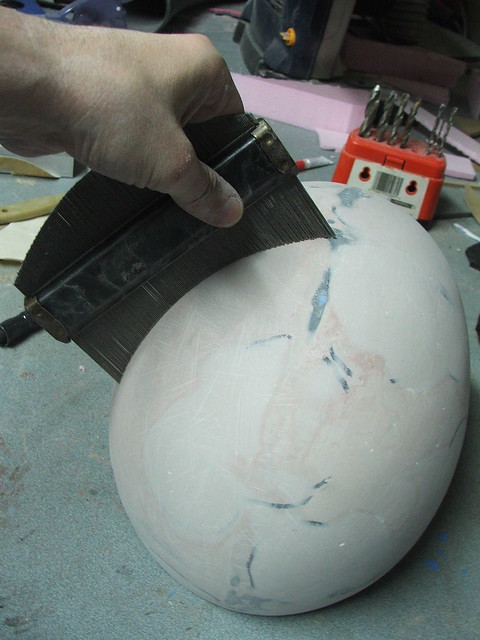
…and there was quite a lot of this add/remove process.

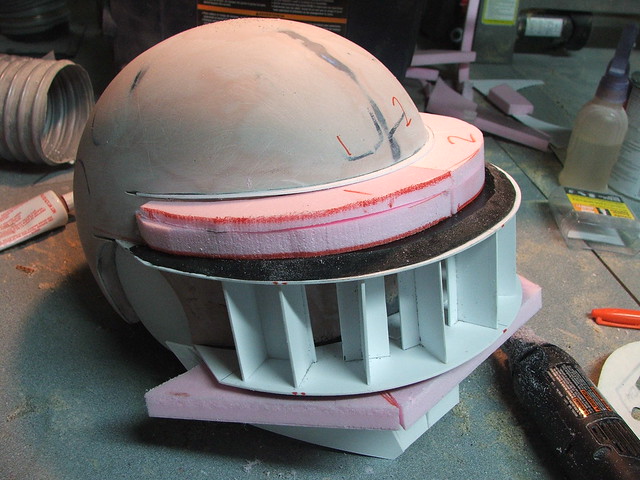
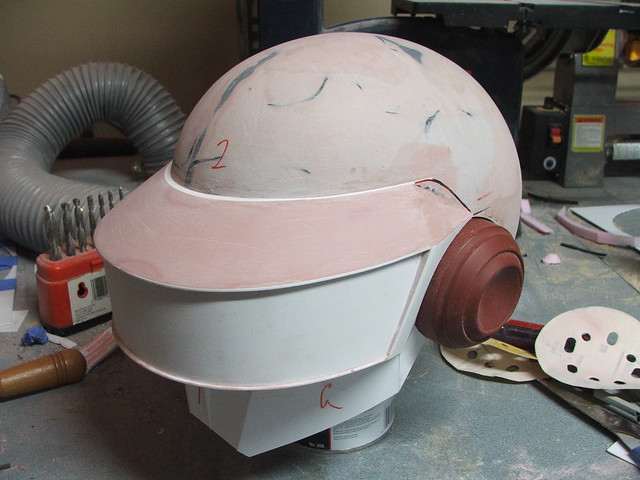
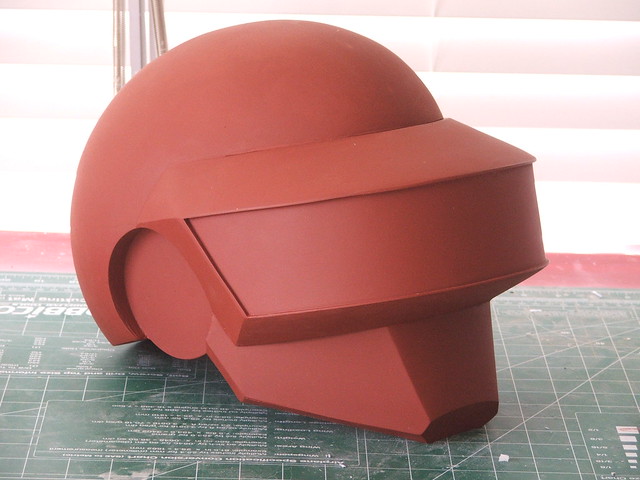
My plan for the visor was to make the shape as a standalone piece, adhere it to the finished dome, then blend the upper and lower sections in. The upper and lower sections were cut from styrene, and spaced apart with upright inserts.

The dome was then slotted to hold the visor sections in place so i could check the symmetry and alignment.
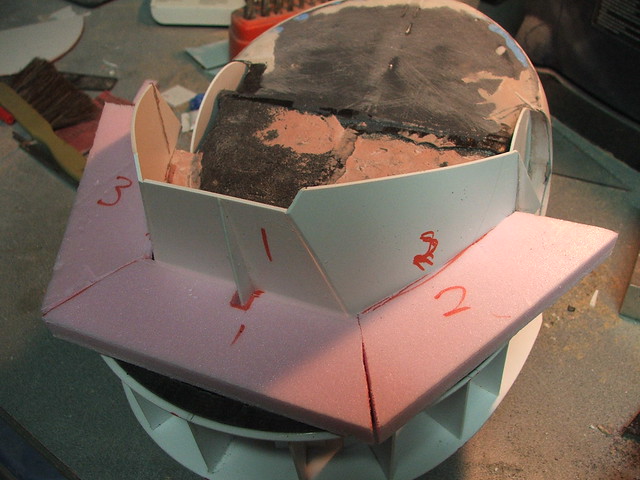
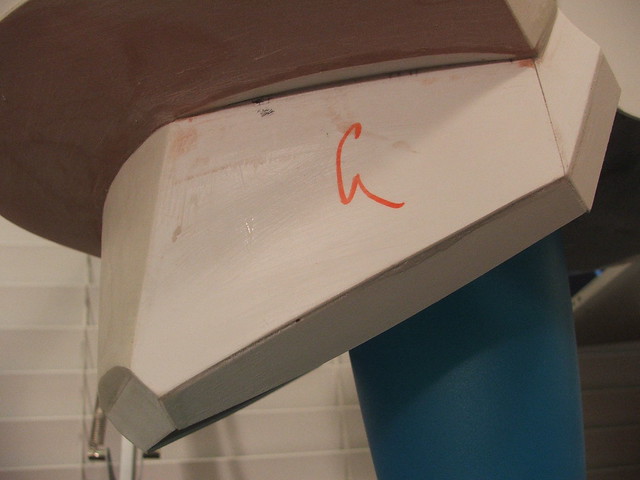
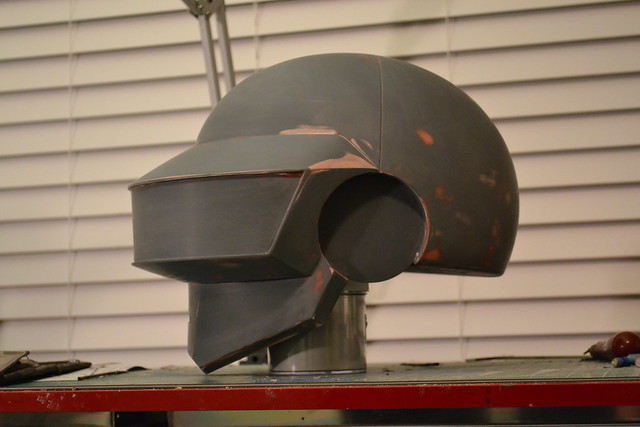
More styrene was used to make the "chin" and "cheek" sections, which rounded out the front removable section of the helmet.
Now that the visor had a place to sit, I could build the ears for the helmet. Thomas' ears change pretty frequently on his helmet from version to version, so I decided to make the ears on this helmet removable. In the future, I can make new pucks and replace the ears in the helmet to represent a Discovery, Tron, or Human After All style helmet.
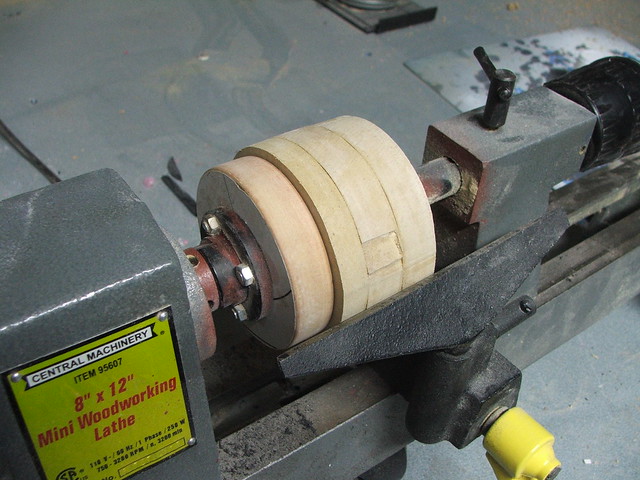
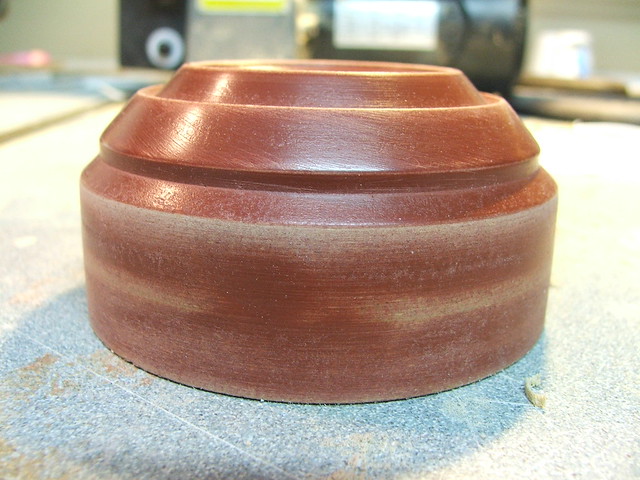
The ears themselves were lathed from a stack of MDF. For this helmet, I decided to make the ears "Electroma" style.
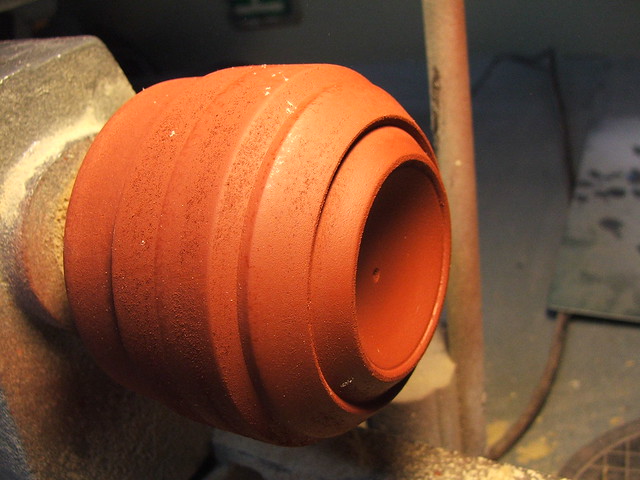
Quick mockup!
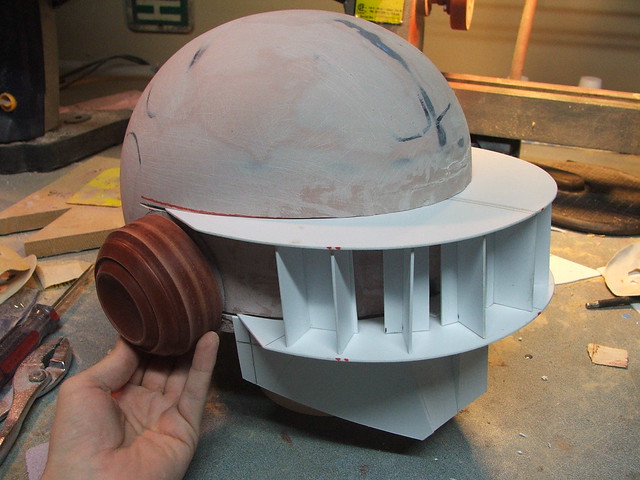
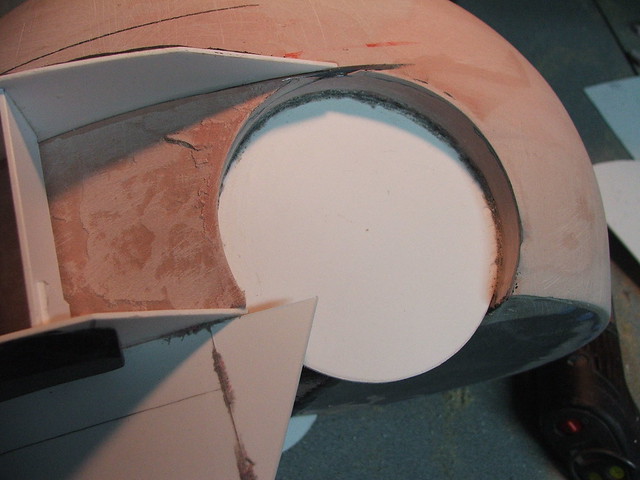
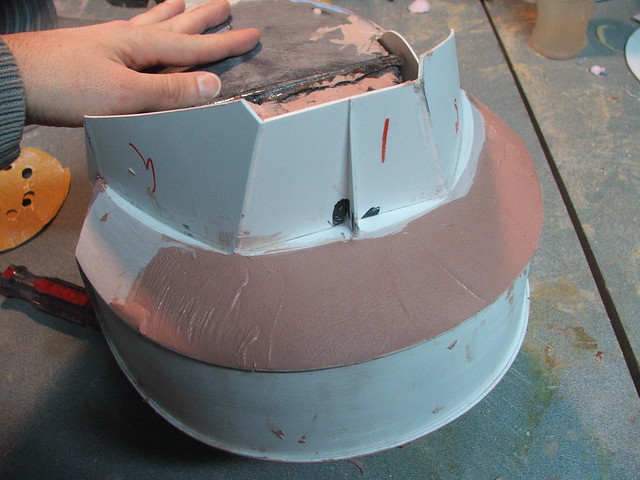
To fit the ears, recesses were carved into the foam base. Styrene "caps" were placed over the rough edges, and the interior surface was smoothed out to make a tight fit with the ear puck.
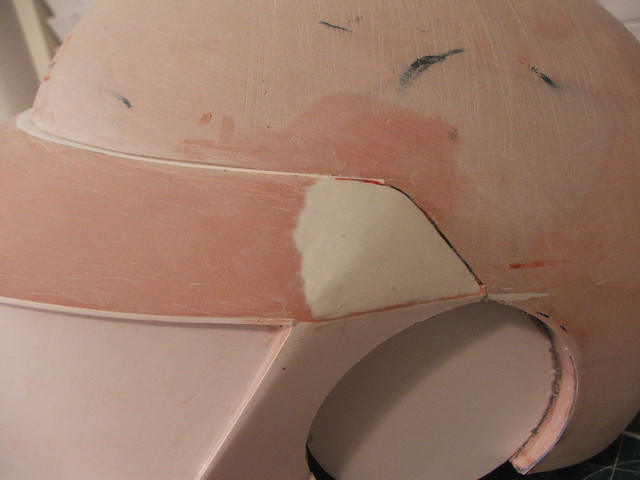
Getting back to the visor, I started working on blending the edges upward and downward into the front of the helmet. In order to make sure everything ended at the same point, I added a thin ridge of styrene at the upper edge of the visor intersection with the helmet dome.
Much like the domed shape, polystyrene foam was placed in these cavities then sanded to shape.

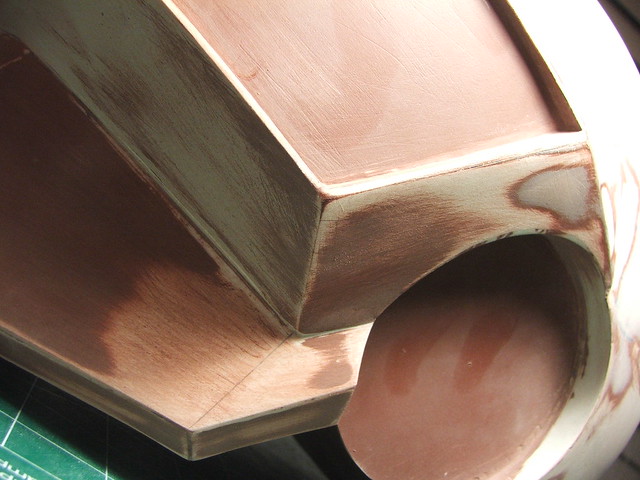
After coating the foam, I skimmed bondo over these bevels and sanded them to a smooth curve. I also added the front and side visor sections in as well at this point, with more styrene.


Details around the edges and at the chin, which were harder to accomplish in bondo, were made in Apoxie Sculpt.
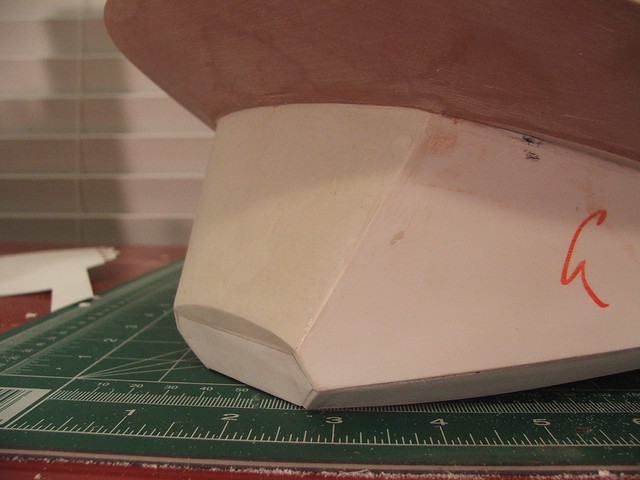
The remainder of the beveled edges around the bottom of the chin were made with about a hundred paper templates, then eventually trimmed out and glued into place with styrene.
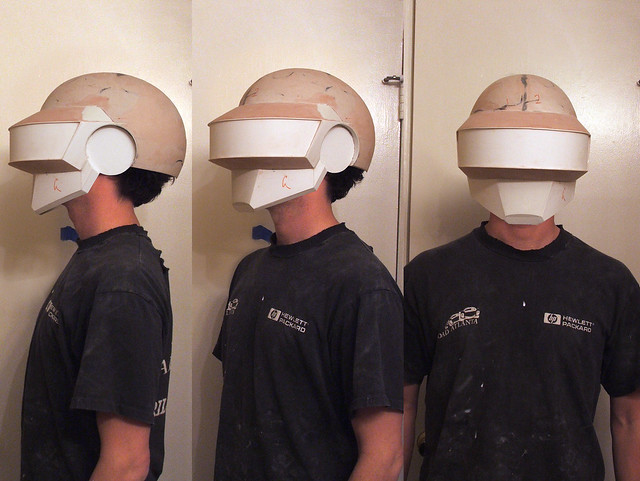
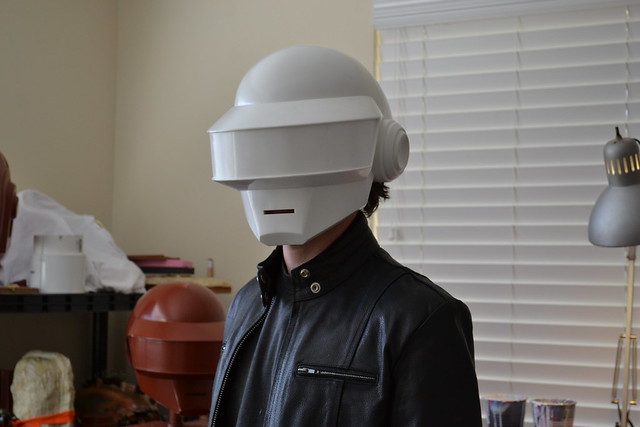
Even though the helmet was a solid piece, I couldn't resist a little photoshop testing. I set up a tripod and the timer on my Nikon, then set up the helmet on an adjacent tripod and took a few shots. By standing in the same spot and snapping a couple pics of myself, i was able to get a pretty good idea of the scale. It was perfect!
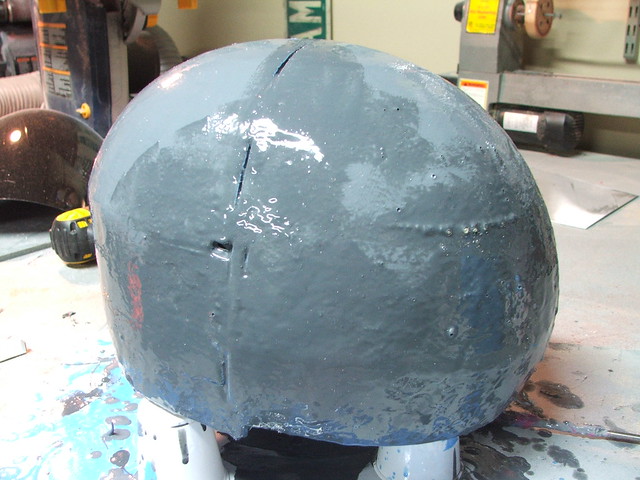
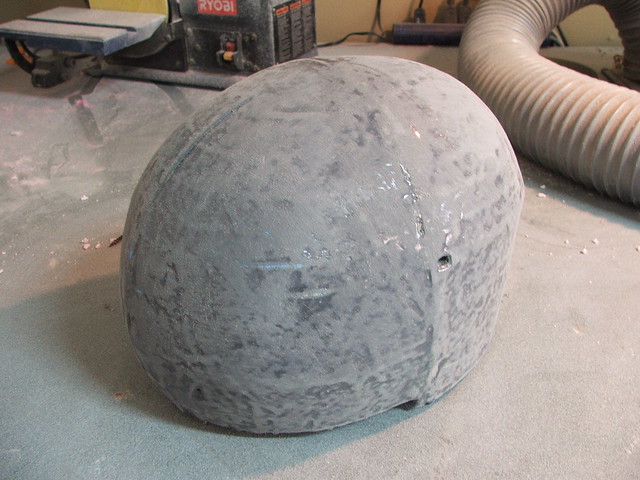
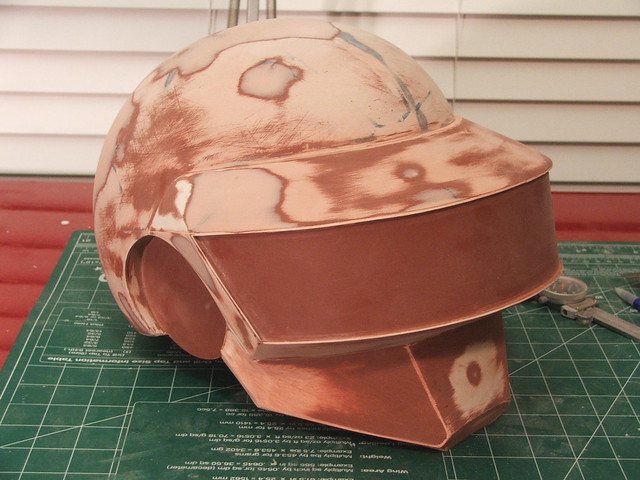
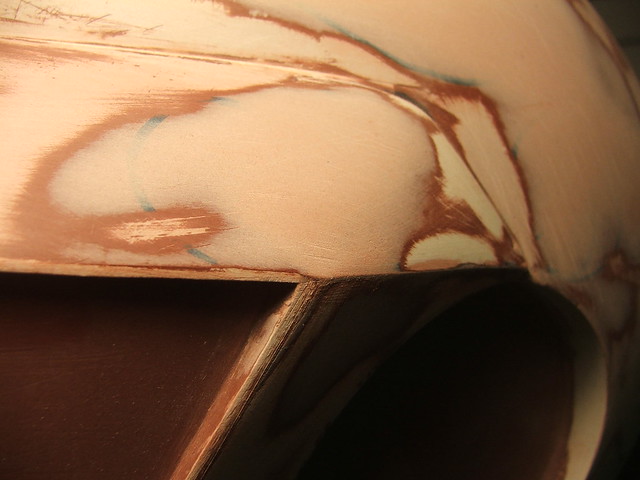
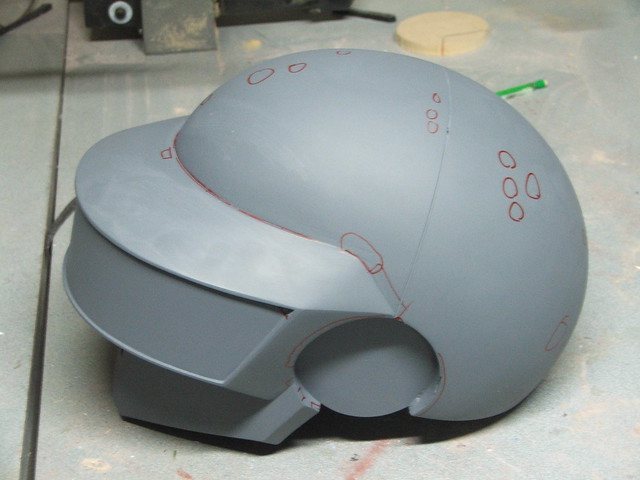
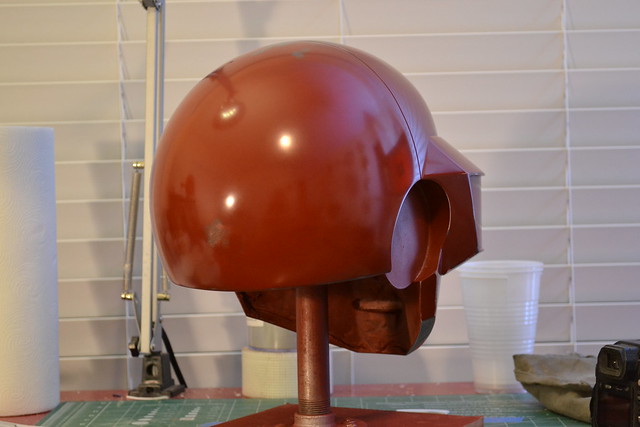
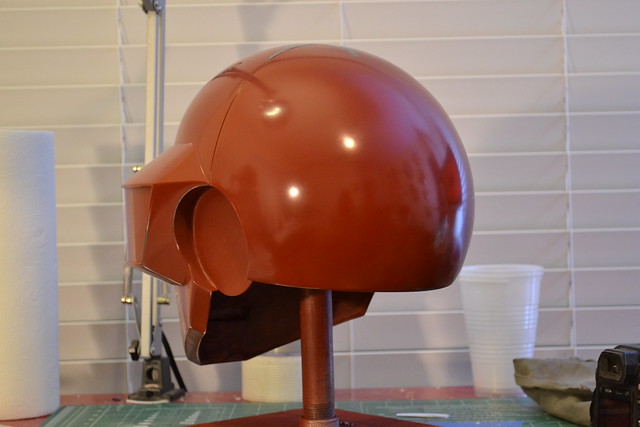
At this point, it was a bit difficult to see problem areas that needed filler, so the bucket was painted with some brown primer. Having a uniform surface makes fixing problem spots much easier.
After a few thin skim passes with bondo, details like the sharp visor edges were refined.

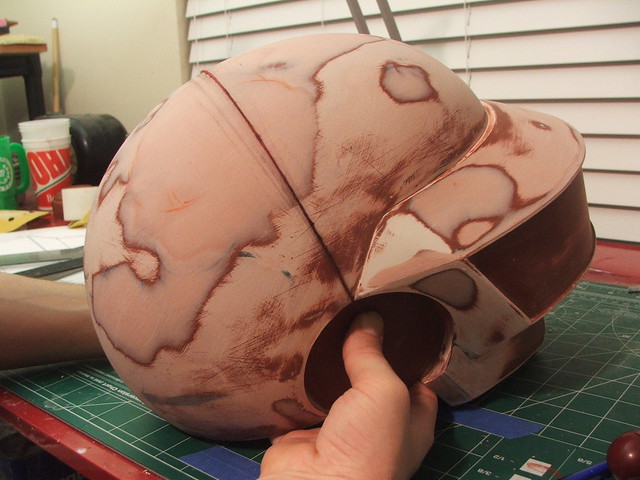
For the mouth of the helmet, I made a styrene box and countersunk it into the chin of the helmet. When castings are pulled, all you just need to hit the backside of this cavity with a dremel to open the mouth up - no tricky carving necessary!


The lower "nose vents" were scribed into the bondo with an etching tool. These didn't get the same styrene box treatment as the mouth, because making those curved edges would have been a solid pain. For these, some hand-sanding later on down the road will be necessary.


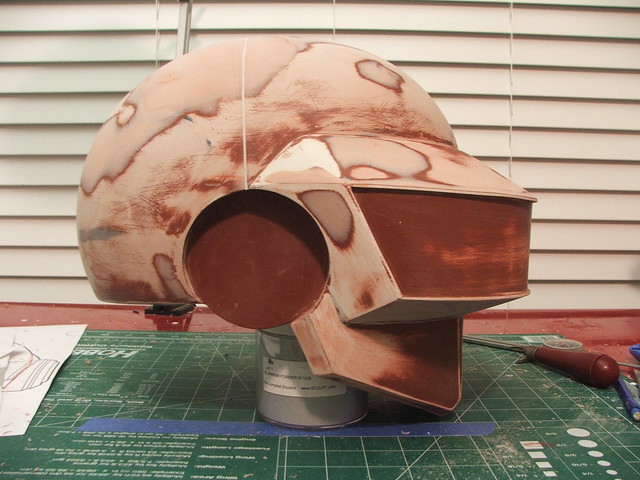
There's a seam line that runs from ear-to-ear on the top of the helmet that was a bit tricky to get right. I tried scribing this line with a tape stripe at first, but it ended up being very curvy even after several tries. I eventually figured out that using a piece of string yielded a perfectly straight result.
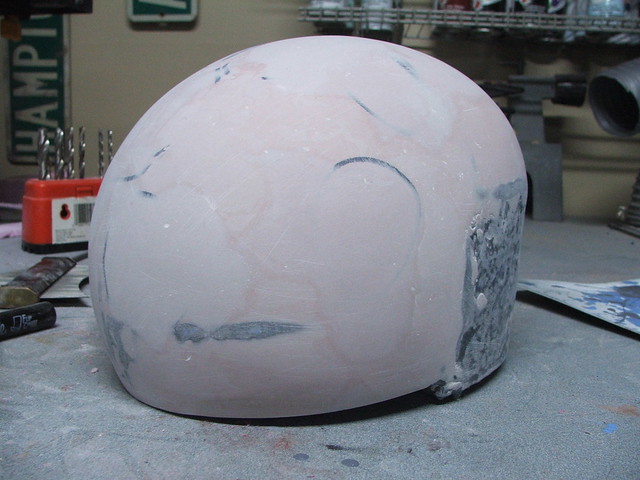
For some reason, this is my favorite look.
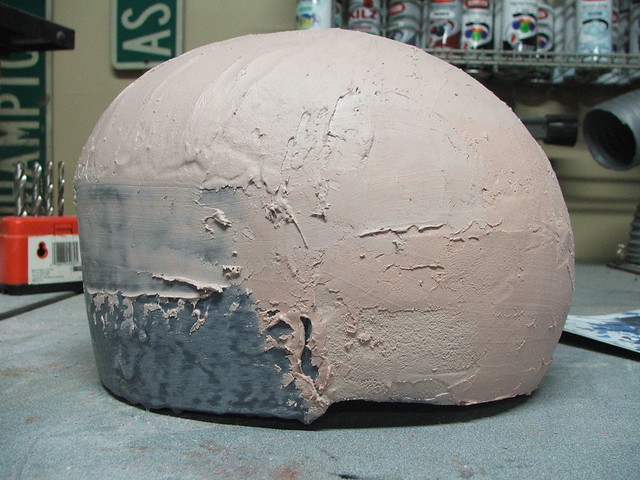
But all things must change! After another primer pass, a few small areas were marked for very thin spots of filler.
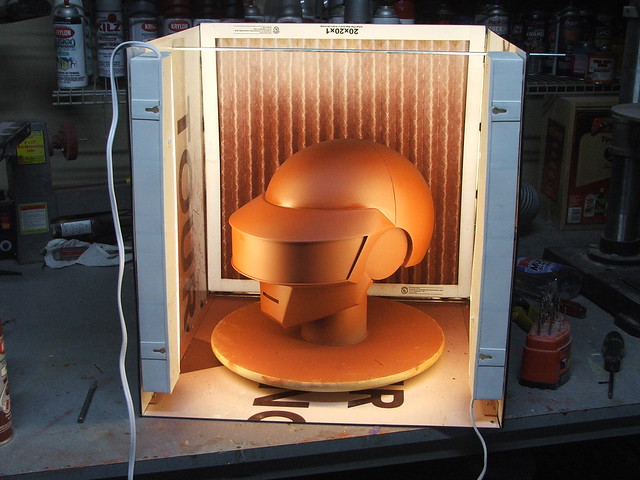
Despite the freezing weather in January, I was able to get these primer coats on thanks to my new portable spray booth. This was built mostly from scraps, but it is a fantastic addition to my shop. Now I can paint in the rain, at night, even in the cold with a space heater!
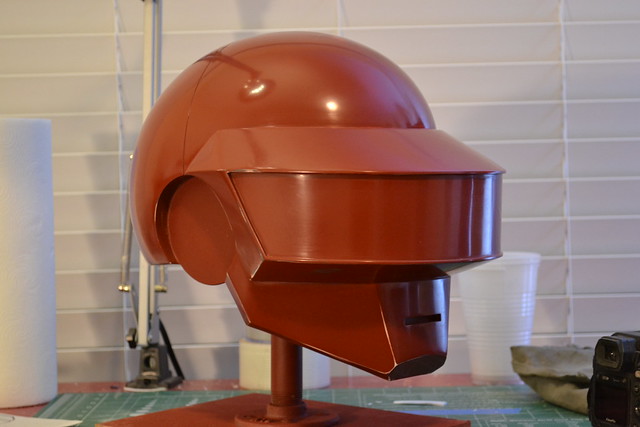
After the last coat of primer, it was time for the super-awesome-fun-wetsanding stage! I started with a sponge to get the shape as uniform as possible, then moved up from 400, 600, then 1,000 grit sandpaper.
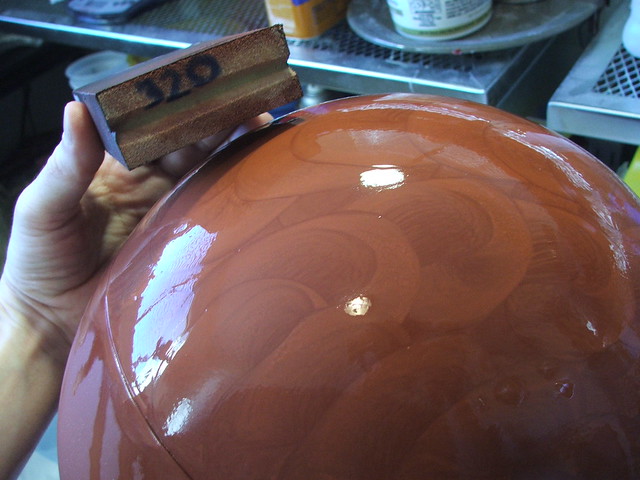
To get the form as smooth as possible in anticipation for the molding process, the primer was buffed to as mirror-shiny as primer gets.

Total time to build the completed master this time was only 4 weeks! Seeing as how Guy took me 5 months, I'd say I'm actually starting to figure out what I'm doing here.
More build pics, and higher resolution, available on my flickr page! As with the last project, this will be broken up into several sections. Look forward to steps 2 and 3, Molding/Chrome and Electronics. If you're interested in getting more play-by-play updates, check out my Facebook page. I try to post as often as possible when I have new work to show.

This one is going to be a whole new level from my last build. Check back soon for more, and hope you enjoy the read!
48 comments:
Awesome, awesome job with this one. I saw some of the electronics side of things on your facebook page, but I look forward to reading how it all comes together on here. :D
You are seriously well on your way to becoming a master of your craft. Well done.
Wow man, looks incredible! Daft Punk is my favorite group, and your Guy Man helmet was amazing...can't wait to see how this one turns out.
AWE-FRIGGIN'-SOME...!
Amazing time-improvement since the last one! That spraying booth is awesome! All of it... baffling
Beautiful craftsmanship. I would love to see you build a -third- helmet of your own design!
I've really enjoyed watching your progress on this build. I didn't see your work on Guy until you had finished it, but I have been keeping up with this one on facebook.
It's great that you have gotten so much experience on the first one. It has to be exciting when you complete steps in fractions of the time it took you before. I will be looking for more!
Simply awesome, I love the detailed write up, I cant wait to read about the casting/throwing
im guessing your gonna be adding the pics from the mold and casting process for part two?
I was so happy when I saw you had posted this! I love knowing what stage you're up to via facebook, but there's nothing like seeing a bunch of stages, uninterrupted on here. Brings me back to when I printed out your whole posts and followed your Guy-Manuel build like a bible when mine was under construction.
Awesome work.
Wow man, this is Awesome! I just want to say a thing if you can put the designs/planes etc. if you can I will be the happiest man in the world jajajaja. If for anything you cannot say it please.
Thanks Marculinuu5
there are no words!! can't wait to see the following posts!
Awesome like the other one ! Want to see the final ! Impressive !
Killer! This is super impressive. I would love to see that at a Daft show someday.
I'm SOOOOOOOOOOOOOOO glad you are a DaftPunk fan!
Your work is impeccable. As a sculptor and prop maker myself I am totally inspired by your attention to detail and ability to create such amazing works of art so quickly. Also the wide range of techniques and materials you use is awesome as well.
Soooo Sick! I will pay you to make me one of these. Seriously though???
Awesome ! How much did it cost to do it ?
May I ask what or where did you studied to know how to make stuff like this?
Or did you just went to train in the forest like a lone wolf and returned the next season wise and powerful?
Did you skip some step there ? how did you make the hollow part of the helmet ? I thought it still filled by foam & mdf, how can you wear it ?
@Cung - Freelance Photographer: Its Photoshoped.
"Even though the helmet was a solid piece, I couldn't resist a little photoshop testing."
skud99 says...
@Cung - Freelance Photographer: Its Photoshoped.
"Even though the helmet was a solid piece, I couldn't resist a little photoshop testing."
---> Thank you to point that out, I miss that line because the whole thing is so amazing ! ^_^
Hey mate, I've gotta say, you are pretty awesome. Just seen your portal gun on youtube.. epic!
Was wondering if you would be interested in swapping some links? (I'll write a blog post on my blog about your work, if you could post a link to my blog on Facebook or this blog)
If your interested, hit me up at www.rawrtechblog.com
Thanks in advance!
Volpin! Great stuff. Your work actually inspired me to create a blog and make some Daft Punk stuff as well. As always, keep being awesome (:
this is amazing, along with the guyb about building the third helmet, what about one of the Tron helmets?
Hey Mr. Krix I got a question for you if you dont mind answering it. I am curious how you were able to size your head to your blue print and how you were able to size your blue prints to the right size so you would have sculpting room. Also want to thank you for starting this blog and giving people some insight on how do design things. For instance i am trying to take a picture and make a blue print out of it like you did with the thomas helmet I am just struggling with how to take it in photo shop and size it properly so ill have room to sculpt and put in details and so i can fit it over my head once again thanks for all you have already done and if you have any pointers i am all ears thanks. nick
Superb work !! Love your work !!
Hey harrison can you make a replica of the bulletstorm assult carbine thatd be awesome to see the final build
Im thinkin 500 bucks for a copy sounds good! Stellar work
How do you carve detail into the bondo smoothly? For instance the seam from ear to ear. I know you have a line to go by but are you just basically using a dremel or something similar to create actual groove?
Is there any way I could buy both helmets when there finished with no lights, along with the handplates?
So basically if you have no money, you can't appreciate anything. Great
Question. I want to do a helmet from a graphic novel I love and I was wondering firstly if I email you with problems or questions I have threw out the process would you be willing to reply back?
Amazing work, man.
Soooooo.....
How much is one of your finished products gonna set me back?
Awesome work but i saw led on hack a day website ... where's the final project ?
Alice from franchise
This is amazing! Are you gonna put any of these bad boys up for sale?
hey volpin can you please send me the blueprints of this helmet??
Hi Volpin, I was wondering if you had a parts list for the electrical side of things.
hi ! I'm 16 and I'm a fan of what you do! I would like to make this helmet (being a big fan of Daft Punk) and I wonder if it is possible to have plans ... To make the MDF. Thanks ! And Sorry if my english is not really good I'm french ^^
Hey! It's me, 9999AWC from youtube! There's NO WAY at ALL that anybody in my family can do that! So could you make one for me plz? How much? Name your price! Plz! Help me! I'm 13 and I want to show my friends that I REALLY do love daft punk! PLZ MAKE ME HAPPY! If you accept, I'll tell you where I live!
Saw this at http://www.dudeiwantthat.com/entertainment/movie-props/daft-punk-helmet-replica.asp
But folks are wondering (like myself), how much would it cost to buy one from you?
What if I were to pay for postage, and handling, for you to make one for me....would that be okay?
And like Oshikiru said, I saw it at http://www.dudeiwantthat.com/entertainment/movie-props/daft-punk-helmet-replica.asp
what program did you use for the blueprints?
Which are the materials?
Which are the materials?
is there any possible way I can get you to make me on of these? I think this is really cool but I just don't have the equipment needed for this or the time required. I know this is a huge request but I would really appreciate it. or you know what could you maybe just email me some instructions? like step by step instructions? Thanks!
I Think I may try to recreate this, although I have no experience whatsoever, some tech teachers at school may be able to help a bit. :)
Post a Comment