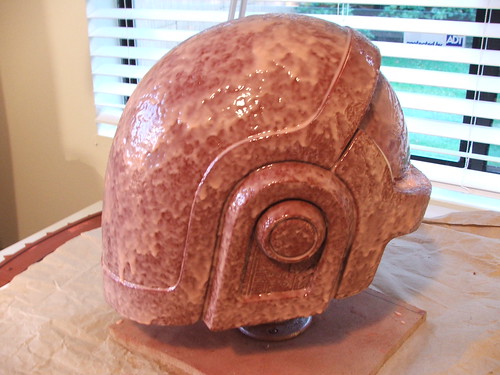
In the last post I had about this build, I ended with the finished master, ready for molding:

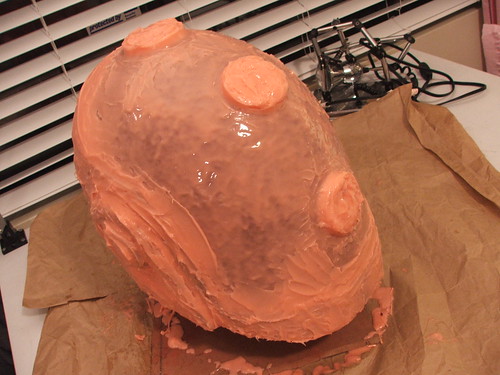
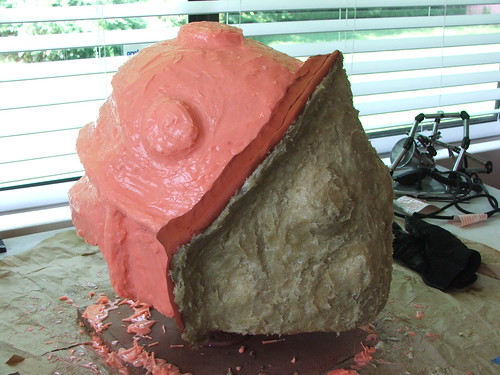
Silicone, silicone, silicone. Layered in stages, with registration keys and marks for the mother mold.


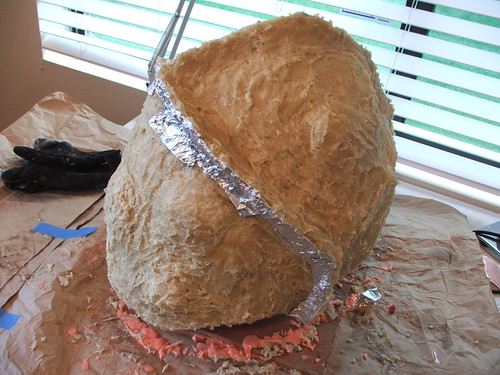
The mother mold was made with Plasti-paste. In retrospect, this makes for a very heavy mold that gives you some sore shoulders after slushcasting, and fiberglass may have been a better idea. At least its sturdy!
The detail captured in the silicone was perfect!
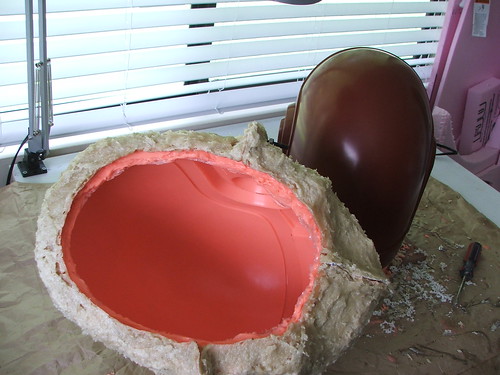
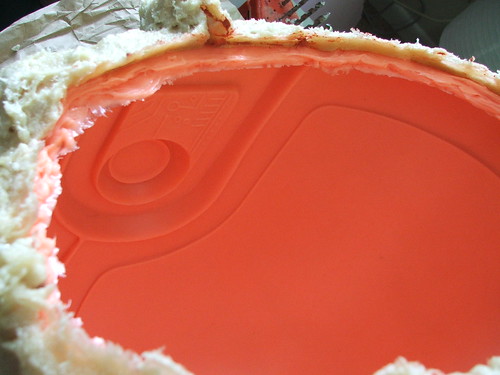
Some resin pulls. I started off with smoothcast 320, but it proved difficult to make a nice, thin pull. After switching to smoothcast 300, things got a bit more to my liking.
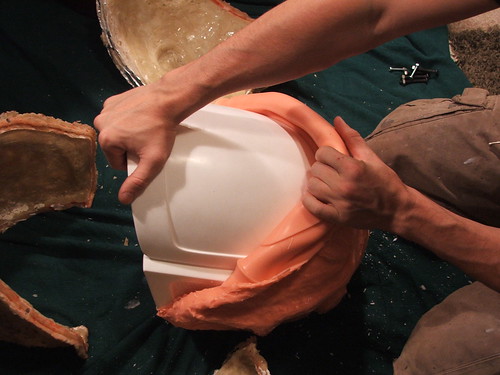

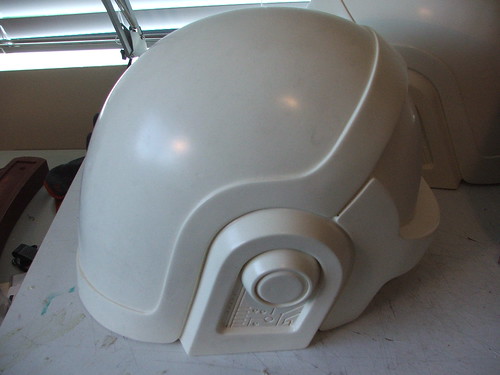
Couldn't help walking around in one.

I trimmed out a casting of the visor to make the vacuum-former mold for the visors. This was mounted to a flat board so PETG plastic could be pulled over it.

Ear areas were trimmed out for the LEDs and black plate that sits in the cones.

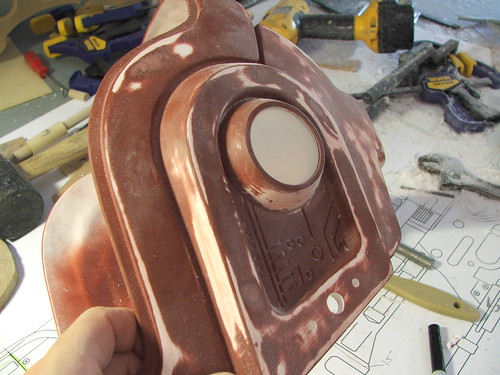
The trimmed and sanded helmets were given a coat of primer and wet sanded to take out any minor imperfections in the resin surface.
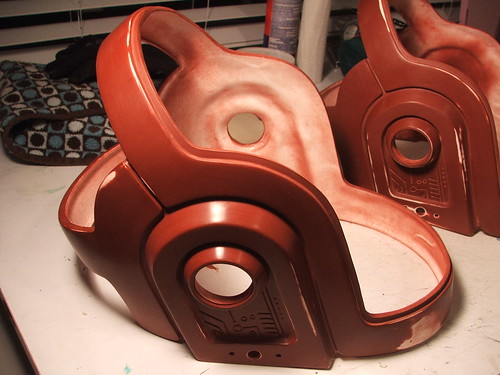
I need to take a minute aside here to go on a personal rant, and I apologize in advance for that because the last thing I want my blog to become is my own personal soapbox. This project is a large and complex one, and due to that there were certain things I had to farm out to other vendors and craftsmen. Specifically, the chrome gold plating of the resin and the vacuum-forming of the visors. I don't possess the tooling to do either of these, so I had to look elsewhere.
Metalizing:
Initially, I had planned on going to M&M Metalizing for my gold chrome work. Over the phone estimates placed the process at $125 per helmet. I agreed, and sent two of the ones you see above (wetsanded and prepped) for finishing. The day after sending the package and an email confirming they were en route with tracking number, I received a phonecall from M&M. The price had risen to $175 per helmet, without much in the way of explanation. I was in a bind an under a deadline, and I agreed.
The day the package was arrived, I got another call saying that gold plating carried an additional $25 surcharge per part. This increased my original price of $250 for 2 helmets to now $400, plus return shipping. Angry, I requested they be shipped to another company for plating. M&M then charged me (COD with no invoice) $100 for 2-day return shipping. Next-day air had cost me $46 less than a week before.
This is the condition the helmets arrived in at the other shop:
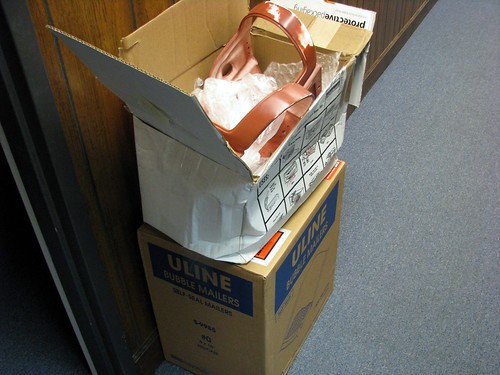

You can see the damage to certain areas noted by the arrows (larger version here) The helmets were not packaged in the box; merely thrown on top of the wrapping I had sent previously (they had been sent out by me wrapped very carefully in foam and bubble wrap to prevent the above from happening.) Additionally, the helmets themselves were greasy with fingerprints and other oils, which would have caused major imperfections in the finish.
I offer this story as an caution – and hopefully warnings like this will come infrequently – to anyone who reads these posts of mine looking for similar processes. As someone who relies very heavily on reputation in order to have a continued supply of business, I don't see how anyone can operate in this manner. My contact there was generally abrasive on the phone, and obviously cared very little for my continued patronage.
Vacuum-forming:
Mike (BlindSquirrel), a fellow prop builder over at My Dumb Projects, took care of the vac-forming for me. Mike is a fantastic guy, an amazing craftsman, and his work on this project well exceeded my expectations. Actually, his patience was the best part, as my mold proved to be a frustrating piece of kit to work with (mostly because I didn't know how to build a proper vacuum-former mold) Eventually he worked out the kinks, with stellar results:
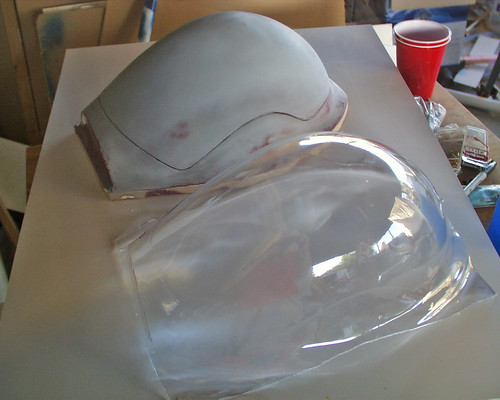

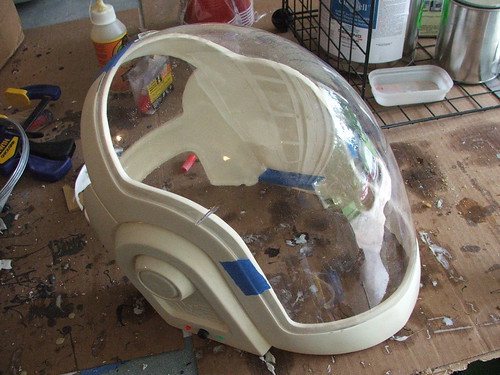
The visor was tinted on the inside with car tail-light paint, called "VHT Nightshades" The result is a nearly opaque outer appearance, but only a tinting similar to dark sunglasses from the inside. This visor, like the rest of the helmet in this post, is a test piece. You'll notice some webbing in the PET plastic in the images. No sense testing the tint on a shiny, perfect piece!


The back wire "hair" is a test piece for now, built with pieces I have laying about from other various projects. The actual plastic dome is built from the excess resin used trimmed out of the visor area. Currently the colors are incorrect, but this is just a "proof of theory" piece.
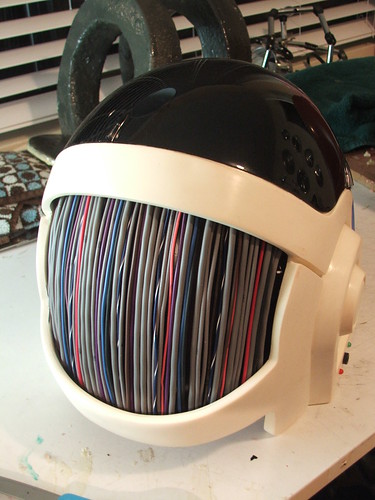
New Chrome!
The gold plating done in these shots was completed by "E7 Technologies" and is a process called Cosmichrome. While we're still getting some small issues worked out, this is a very cool technique. The people at E7 are everything that M&M are not. They have helped me and been very accommodating through the entire process, and have been willing to run test pieces for me in order to achieve the best result. The images below are a shot of the "dud" helmet, which had too much orangepeel and issues with the finish to be called a success.


Neat video of the chroming process:
Part three should be the final chapter in this build, with everything coming together. Look for it around Halloween!
Still to come....

38 comments:
WOW! I've been waiting so long for the second part of this etry and now i'm impatience for the 3rd part.
So bad for the guys at M&M, but such a great finall chrome work.
For the vacuum mold I think you should remove the "non-visor" areas, but ur friend will tell...
Aplauses!
Unbeliveable the things that you do! I watch your complete blog trough the pages and I must say: Your are the man! Especially this helmet project. And all this without blueprints! Keep on the good work!
I bend my knee ...
This needs to be on Boing Boing or something. Awesome!
I love your blog. I want to be a prop/costume fabricator, so watching your projects is extremely valuable to me. Could you perhaps make a post detailing where/how you learned your current skillset and listing some resources and materials for people who would like to break into this sort of work?
Best,
-Eli
Incredible work. I really appreciate your attention to detail. I have yet to see a project from you that is not impressive in every way.
I work in manufacturing in southern Louisiana, I do 3D cad modeling as well as waterjet cutting. Please let me know if I could ever be of assistance.
Also, I second Eli's request above. Would love to hear more about your background and training, though I suspect it is mostly learned through experience.
My boyfriend and I are both die hard Daft Punk fans and we're so amazed by this! I love the level of detail you're putting in the proyect, I'm really looking foward to see the final product!
*shouri
Hi man ! Your work is amazing !
hurry up for the 3rd part ! :)
Big up from France ! ;)
Oh dear god I hope you'll sell kits!
You know, I've been seeing a few props around the place the past while that have really caught my eye then I find out most of them are made by you!!! Keep up the good work, your stuff is defiantly an inspiration.
In fact because of you it's daft punk for Halloween next year (old school Optimums this year).
I havn't been on the 405th in ages but I've been following your work on the RPF
F*cking rad. That's all I can say.
When can I buy mine? ;)
Man, just reading at what those con artists pulled at M&M infuriates ME! I feel your pain.
On the upside, you did a fantastic job nonetheless! And thanks for documenting and photographing your process. It's a learning experience every time I drop by here :)
Wow.. I must say.. you produced a very professional art piece.
Nice!!
Floored. Fantastic work.
- Z
So will your incredible work be for sale later?
You are the best !!!
Greets from france
Where did you get the Leather jacket from?
amazing! Everyone should have one of these. Perfect work
You have realized the very best homemade hemlet!!!
I'm ipressive by the quality of your works.
Greets from france to ;-)
could you post step by step directions on how you made this?
I'm actually working on making one and this is the best one I have seen
just some of your steps are a little hard to follow from an amatures strandpoint
My write-ups are as detailed as I'm prepared to make them. Sorry, but I'm not going to go into details on where to purchase materials, how to mix them, and other minutia.
For that, use google. Thats how I learned.
can i buy a raw cast helmet *white one in picture 11*
Congratulations for the great work, I'm Italian and I am preparing to create the helmet following your work. But I want to ask you some things, such as quantities of materials such as silicone, the smooth cast, and more because since I bought online from the U.S. site, because they are not here, I realize how I need to buy as not to risk little. And then I understand the 'only thing I can not understand, how to create a helmet with the resin?, Use two dies', or pour into the mold of a small amount of silicone resin and do adhere to the walls slowly.
I do not want to reveal all the details, but since we are thousands of kilometers away a tear to the rule you can do?!
Excuse my bad English, I hope to receive your response.
Hello thanks
spectacular
GREAT JOB MAN!!! I LOVE THAT SHIT XD
you rock!
Hi, I would like to know If it's possible to buy you a daft punk Helmet ? Could you answer me please to the following mail alexandre.cardoso@free.fr
Thank you
And Bravo for your works
wow... Can you please email me? jashugan0@hotmail.com I am looking for the 2 helmets. thanks
Hi Boss, I would like to know If it's possible to buy you a daft punk Helmet ?
mail me please contact@ap3com.com
Thank you
Pascal Pastor
Could you please tell us what kind of silicone you used and how much smoothcast it took to make one helmet?
Thanks! Awesome work!
Ok so quick question, after you made the silicone negative of the helmet, how did you fill it in to leave an opening for the head?
hola felicidades es maravilloso tu trabajo me preguntaba si están a la venta los cascos son fan y e tratado de hacer el casco pero no me sale muí bien bueno si están a la venta me gustaría saber cual es el costo mi coreo electrónico es game_m.44@hotmail.com te agrade seria mucho si me contestas el mensaje
Your helmet looks amazing! I have a question though. On all of the smooth-on how-to videos they pour the resin in the mold, but it is solid. Did you use two molds? I am really confused :(
I can't wait to read the next update. This helmet would provide for the best halloween costume ever. Freaking awesome.
Hello your model is amazing, I have tried to made on but the result is very bad. I want to know if I can buy your helmet. I am a french fan and your work is wahoooo ! If you sold a helmet can you contact me at "thomaspiccolo31@gmail.com". Thanks you to deal dream at us ^^.
Just came across your blog here, and I must say I'm very impressed! I was wondering if you could put me in contact with your visor guy? I'm hoping to make an EVA helmet from Halo: Reach and would very much like to pick his brain on the process of vacuum-forming visors. Heck, I'll probably ask how much he'd want to do it for me, once I have a model for him to use.
Thanks, my email is adam.archambeault@gmail.com
How much did you pay to make this?
hey can i buy a visor from u...i need the glass part
nobody ever explains the plastic part, could you please tell me why that is neccessary if you already have made a helmet? i just ccant seem to figure this out. Thanks.
Hello
I would to know how made you so that the helmet of Guy-Manuel of daft punk remains hollow after the molding in smoothcast 300
Post a Comment