
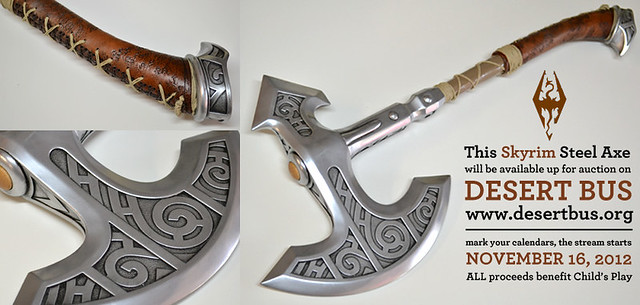
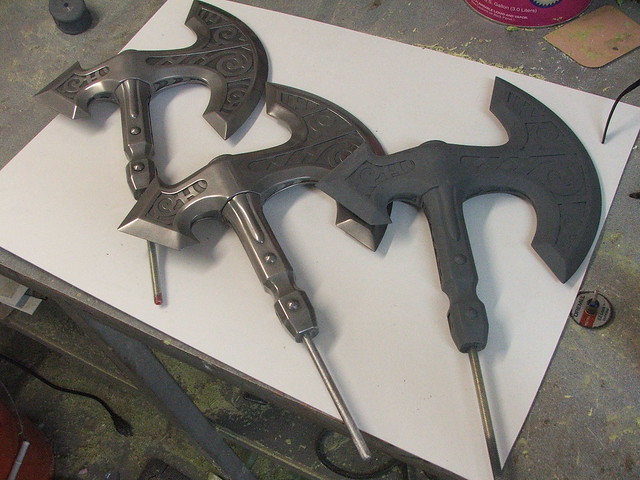
One of these axes will be for sale through Desert Bus 6 this year. It is one of only 3 made, and the only one being offered for public sale!
Continuing with the Skyrim trend, but not a helmet this time!
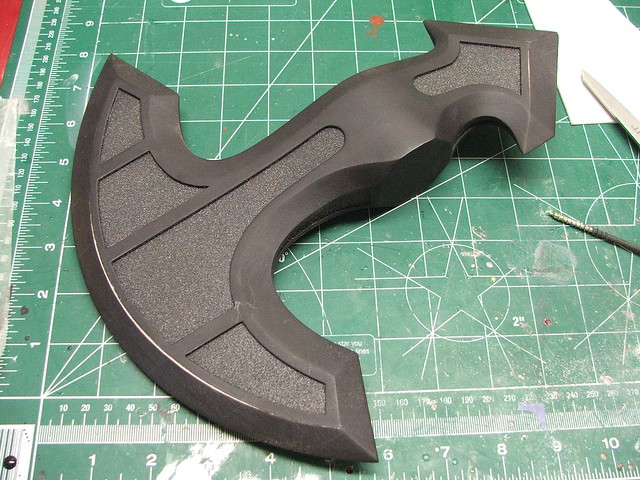
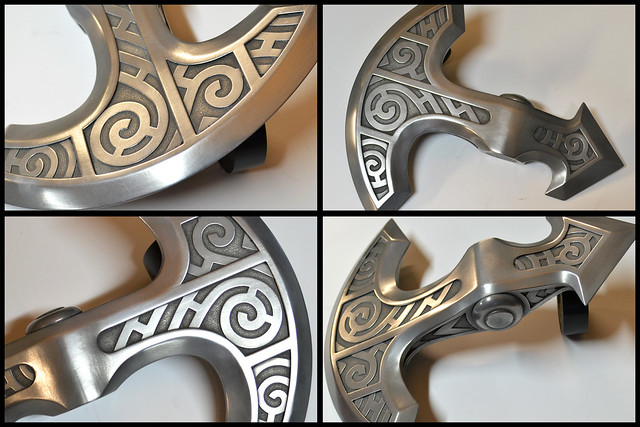
There are all sorts of intricate and complicated weapons in Skyrim, but the Steel weapons - low level though they may be - possessed a very cool concentric circle pattern to them that I thought looked particularly awesome. When a client asked me if I had any interest in making the one-handed axe, I jumped on the project.
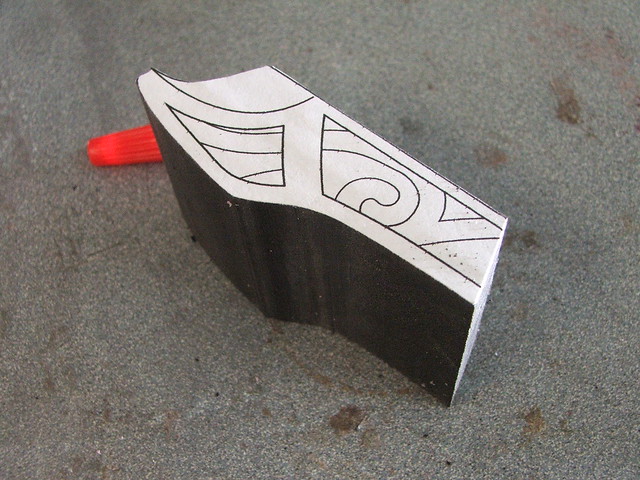
The base shape of the axe was laid out in illustrator, and I used these blueprints extensively in making the mold master.

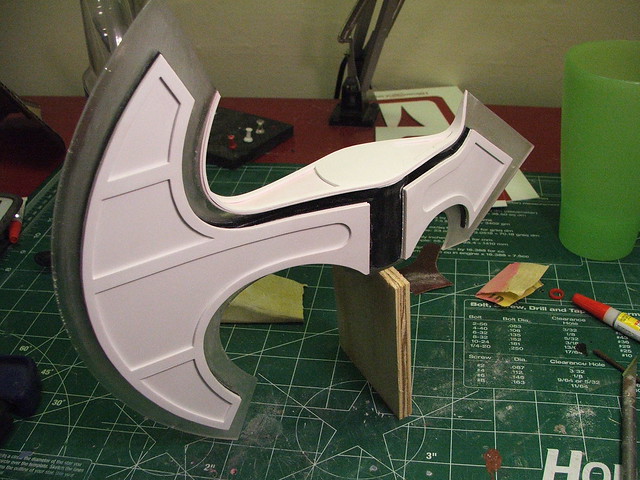
The axe head was where I started my efforts, and this began with several layered pieces of laser cut acrylic. Having the blueprints in vector format made transitioning to laser cut pieces very easy.

Angled risers in the center make up an internal frame structure that makes sure the layer on top has the proper curve to it. The facing edge was added in thin styrene sheet in order to make the curve from the center of the axe head out to the blade.
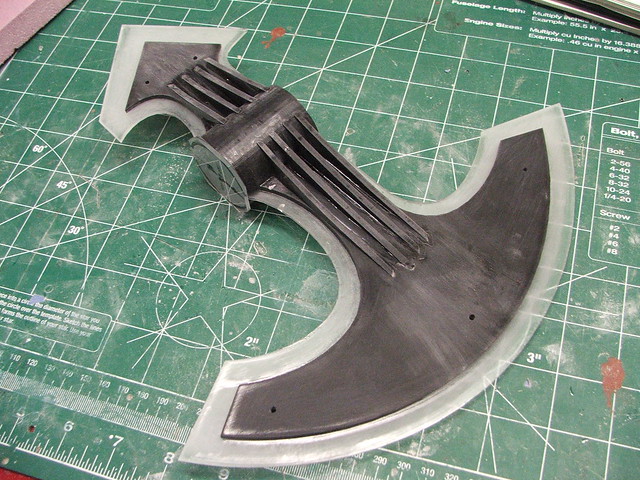
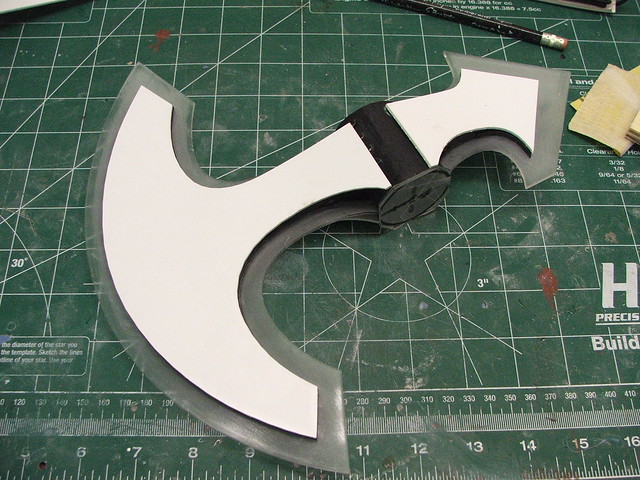

The whole project was really an exercise in layering. More styrene was cut on the laser to make up the outer perimeter edges of the axe, which surround the concentric circle patterns. Panels like this were added to the top and bottom as well as the sides of the axe.

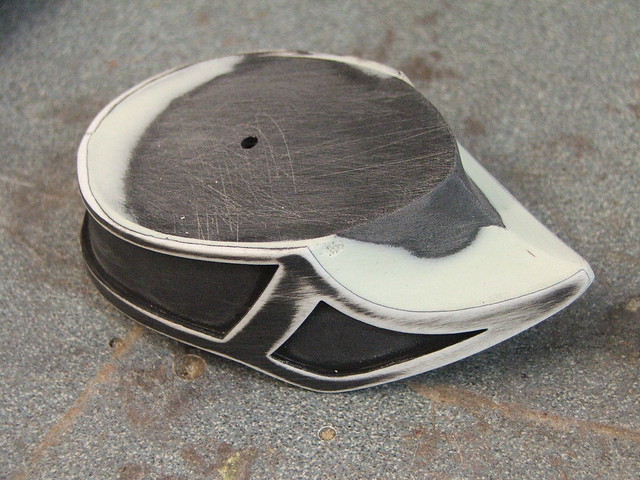
Things don't come out of the laser cutter perfect though. There was a lot of sanding and cleanup in order to get the edges crisp and round.

With the base form done, the blade sections of the head were filled in with apoxie sculpt, then sanded down to a pointed edge. There was a also a bit of cleanup needed in the center area of the axe head where the styrene edges curved into the middle.

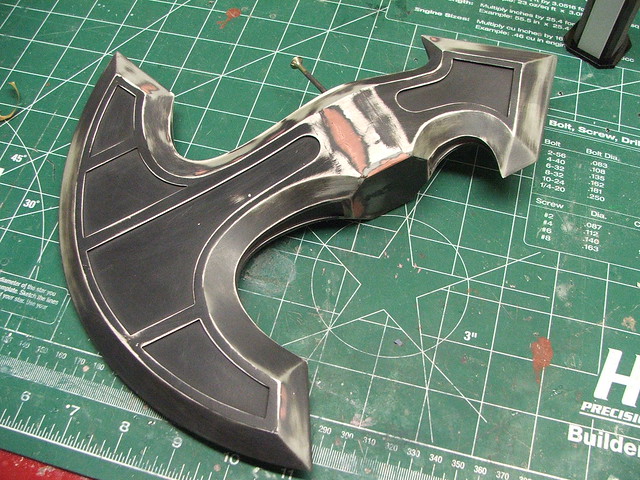
Behind the raised filigree patterns is a stippled texture. This was simulated with Rustoleum multicolored textured spraypaint. I've used this in the past to make a grip texture on pistols and rifles, and the effect it gave me here was pretty spot on to what I saw in the game renderings. The outer edges were masked off first before spraying.
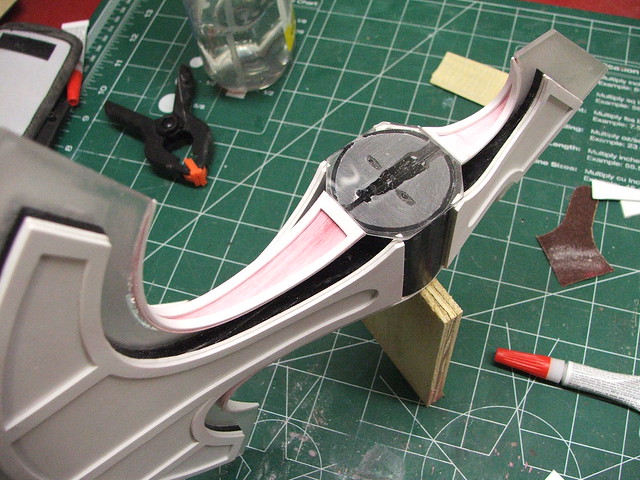
The filigree parts were laser cut (man I love that thing!) from .020" styrene. The outer edges trimmed out before were .060", so this very thin stock provided a small raised section while still sitting lower than the surrounding parts.


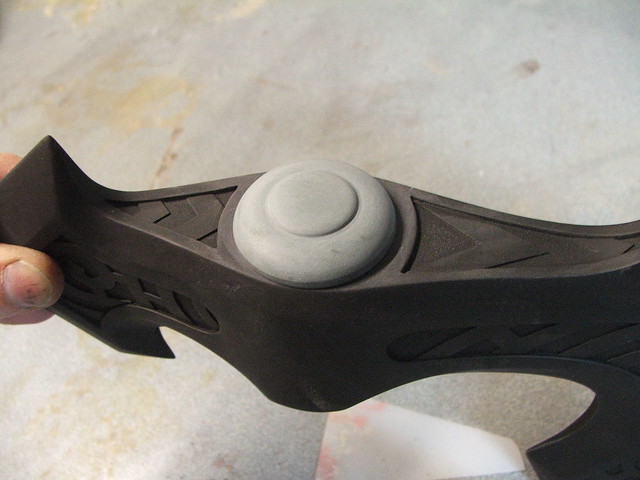
The last piece needed for the axe head was the top nut, which was lathed from a resin block and glued to the top of the axe head master.
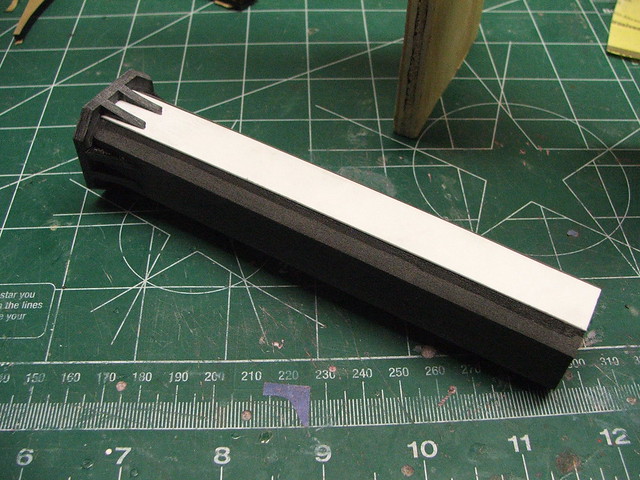
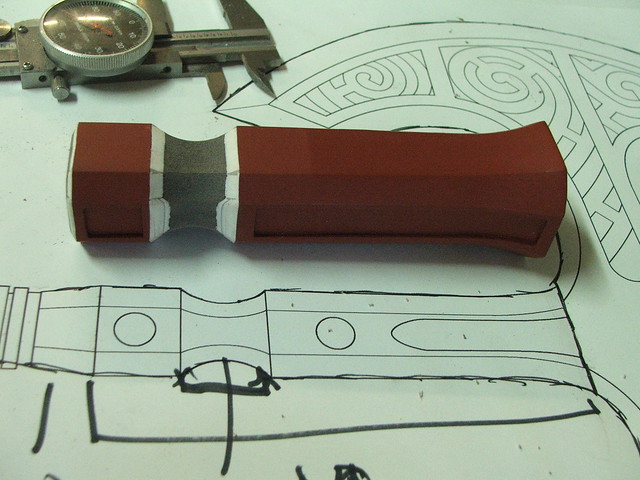
Next up was the neck and pommel. These followed a similar technique to the axe head. I started off both with blocks of sintra, then layered on styrene to build up the perimeter shapes. The neck part was more geometric, while the pommel was a bit more of an exercise in free-form dremel and belt sander sculpting.
The neck section at the beginning. The little tabs at the base serve the same purpose as the ones in the axe head, giving shape to the styrene layer which will go on top.
This technique needed a lot of putty on the seams to make everything flush and pretty, but the end result was great.
A bit of apoxie sculpt on the sides, then some furniture tacks for rivets and filigree parts cut from .020" styrene.
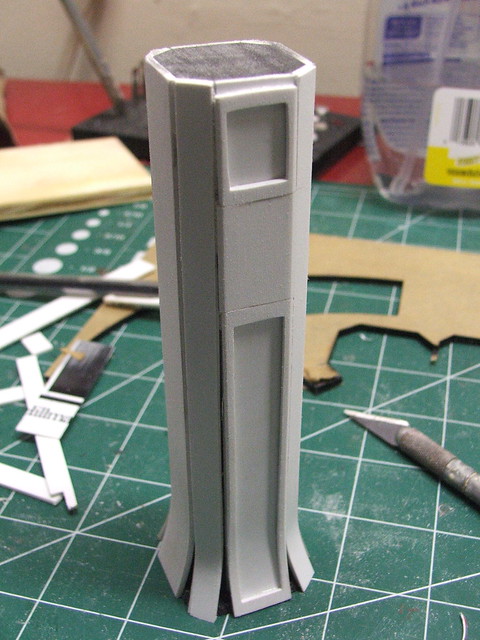
The pommel had essentially the same build process, but with a little bit of bondo filler tossed in to make everything smooth and even on the curved panels.

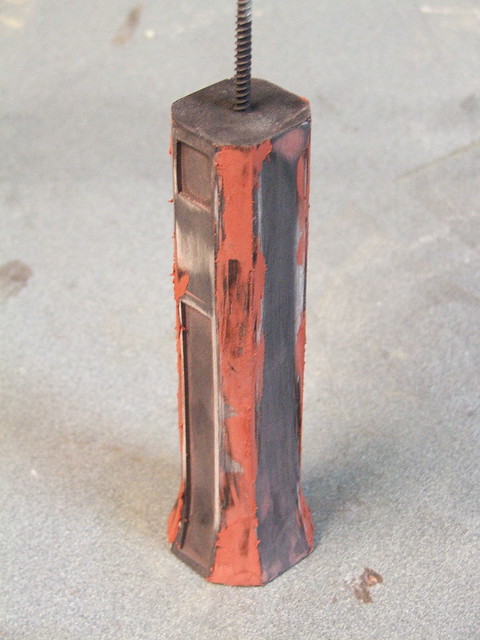
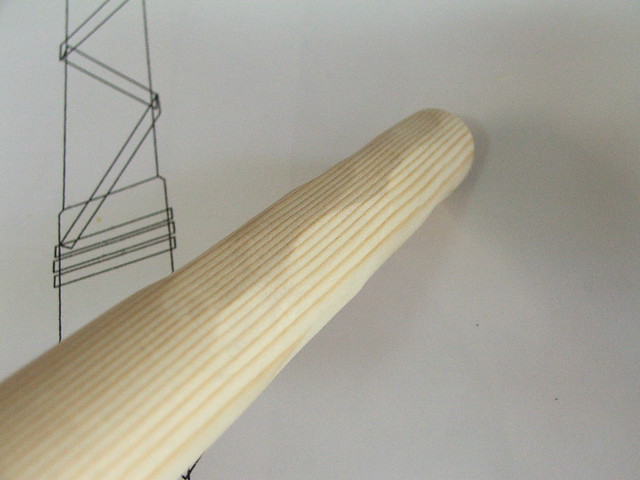
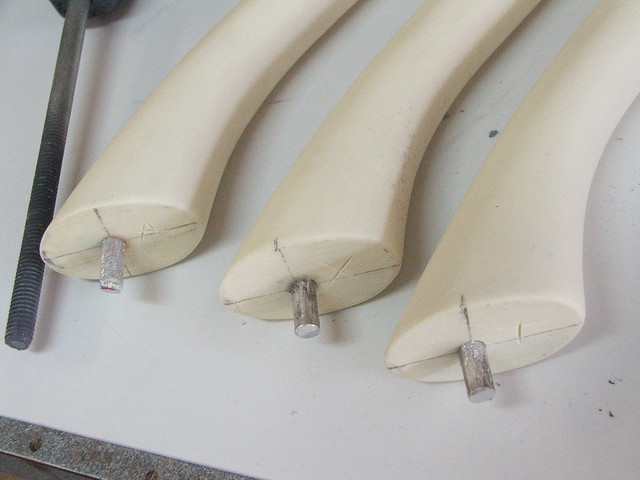
Handle was up next. It's wood, right? Let's make it out of wood.
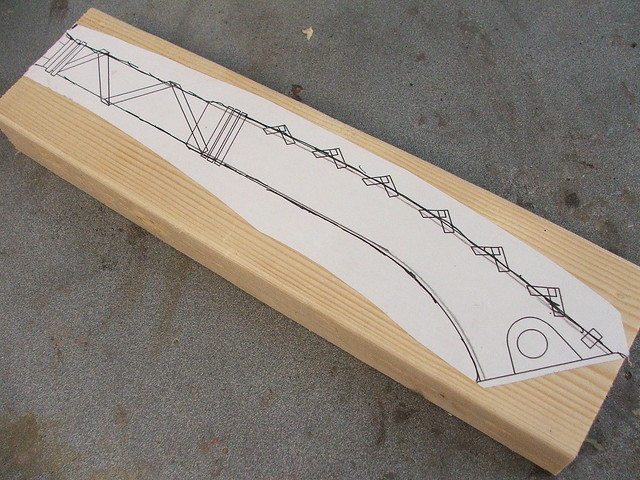
What started life as a simple humble 2x4 wall stud has a much more glamorous existence now. Sometimes I feel bad for all the sheets of MDF at Home Depot that have to live as shelves instead of space guns and cool weapons. Anyhow, I added some chunky cuts into the upper area of the handle to better match the game art.

Last part! These little guys are the rivets that would hold the pommel onto the handle. They'll be decorative on my axes, in order to make the handle wrap easier to do later on.

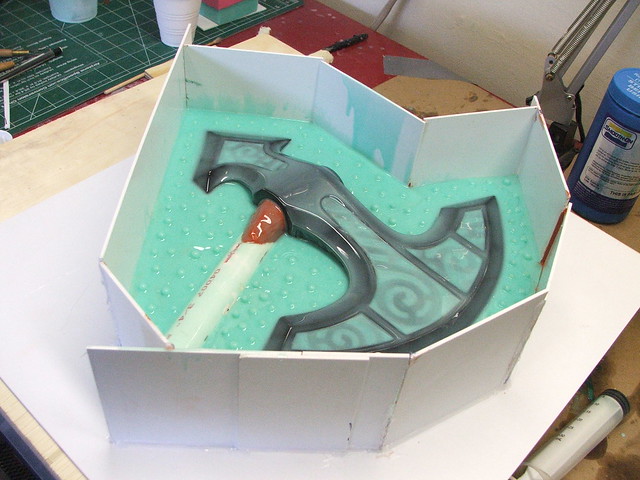
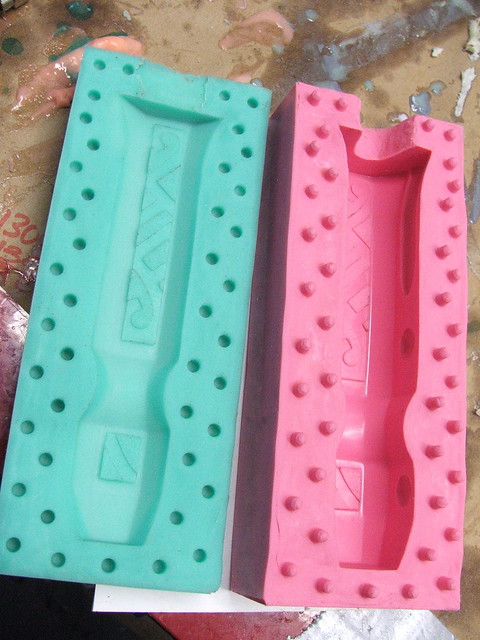
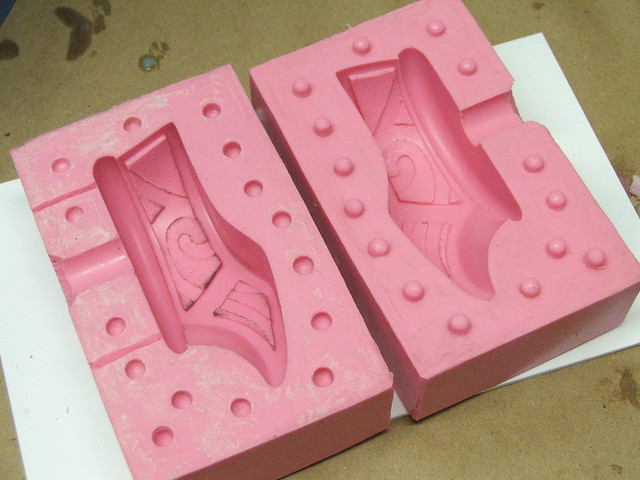
Now toss everything in clay and throw some rubber on it. The pink rubber here is Mold Max 30, the greenish stuff is Mold Max 40. 40-weight is my new preferred material for block molds like this.

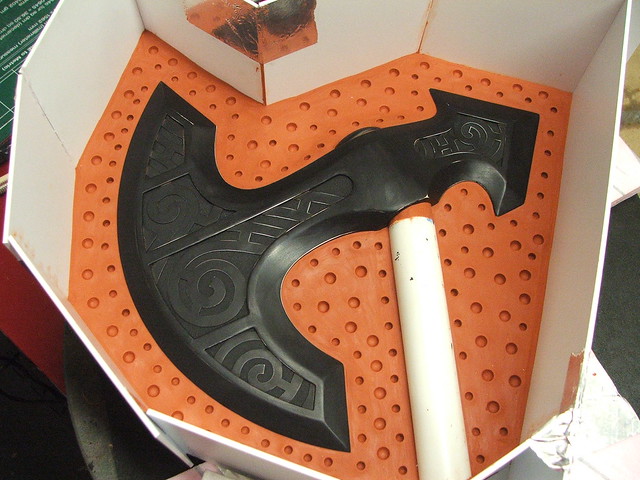
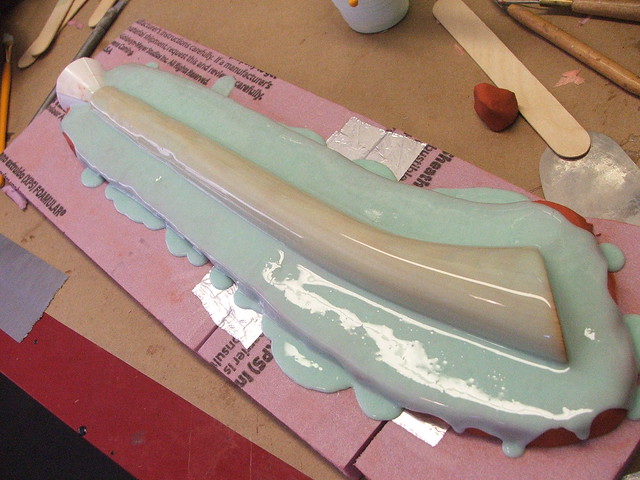

Wait 12 hours, then repeat.
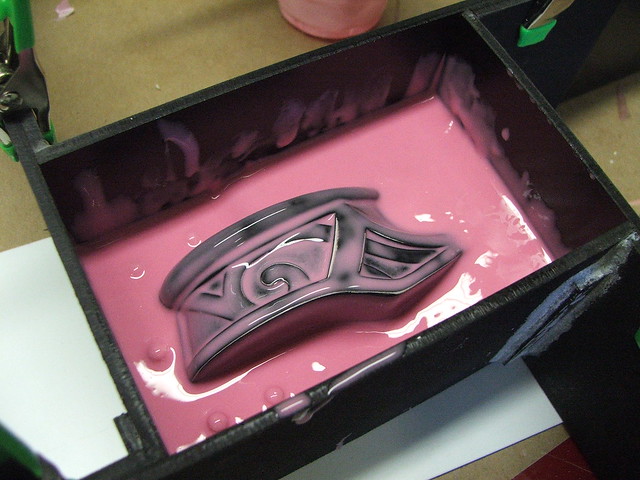
Molds finished!

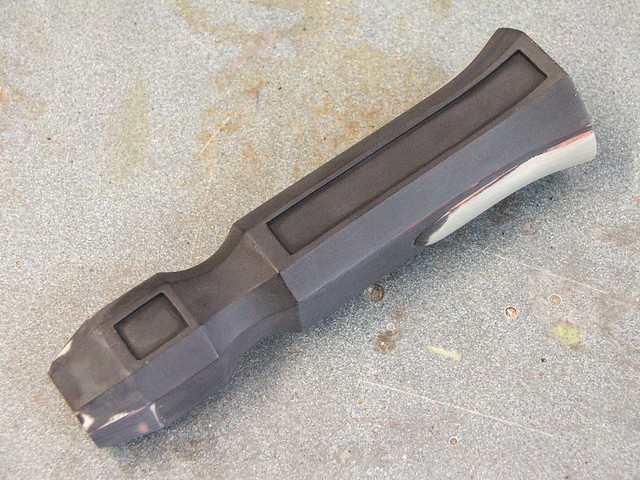
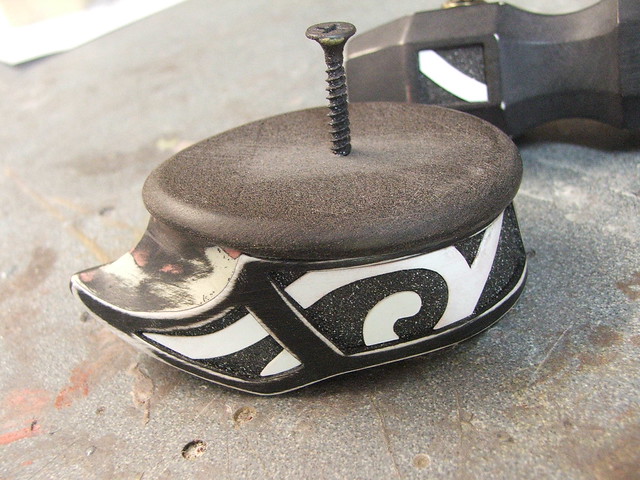
These parts were cast in Smooth Cast 320 urethane resin with black tint. There's a process called "cold casting" which I've done on my helmets in the past, but only for a subtle metallic texture underneath paint and weathering. For these parts, I first powdered the molds with aluminum, then poured in resin with aluminum powder mixed into the plastic.
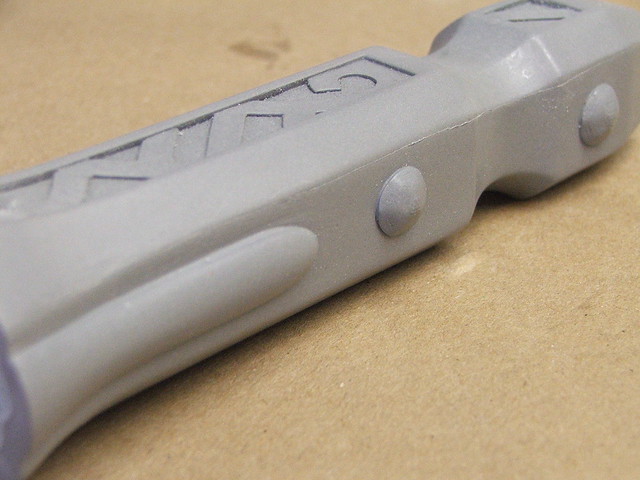


Once the part is cured, you can buff it with 000 steel wool, then polish it to a bright metallic shine. I used Mother's aluminum mag wheel polish on my parts to get them this shiny.
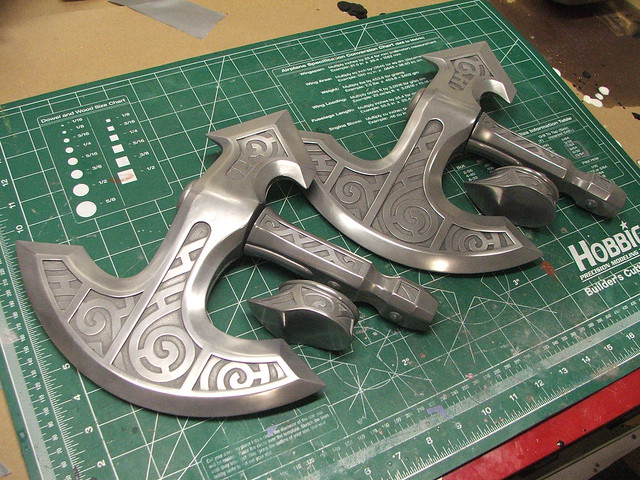
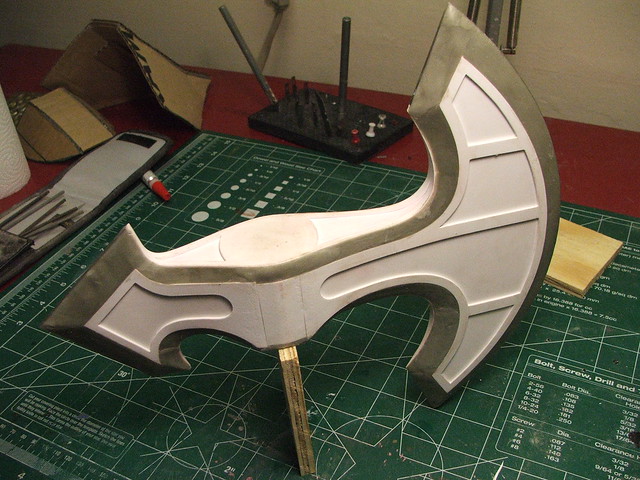
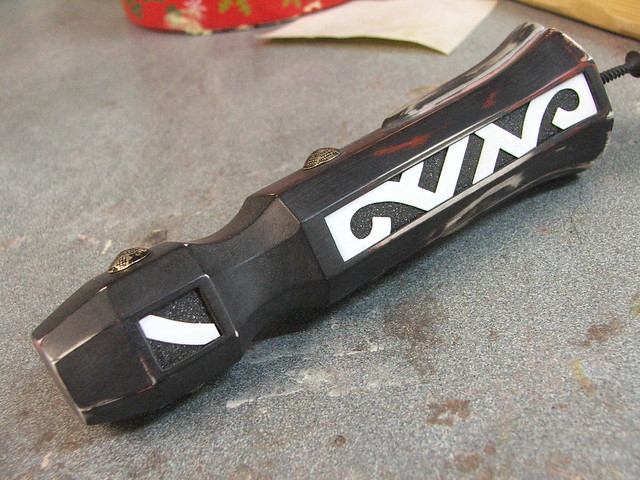
Plugs and rods were inserted into the neck, head and pommel then epoxied into place. A 3/8" steel threaded rod runs the entire length of the handle on these pieces, making them extremely rigid.
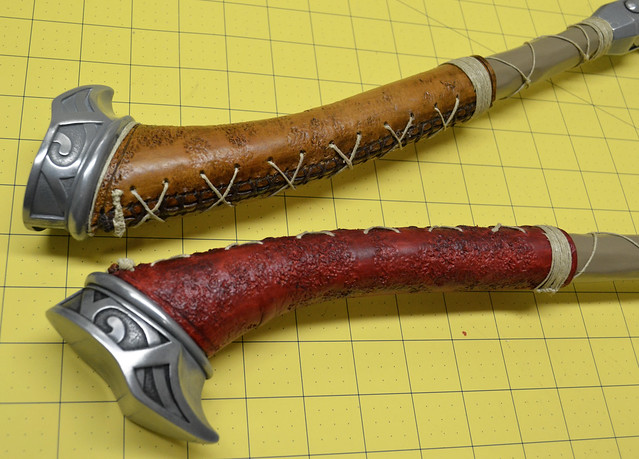
My friend Cathy over at God Save The Queen Fashions did the wraps on the handles for these pieces. The axe that was sent to my client has the correct tan color to it, but I have a thing for the color red, and asked that my handle wrap look a little different.
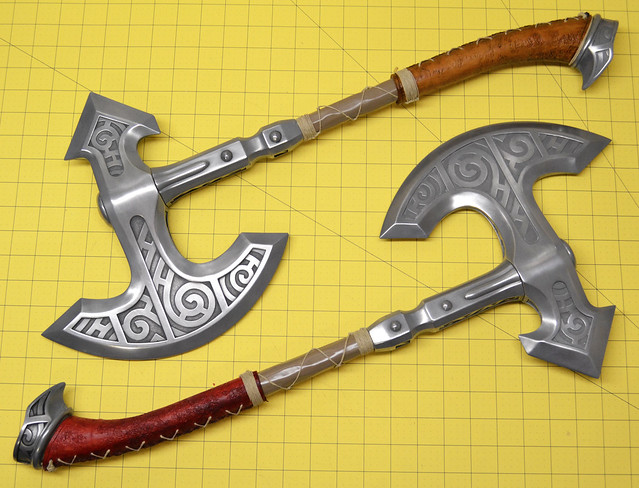
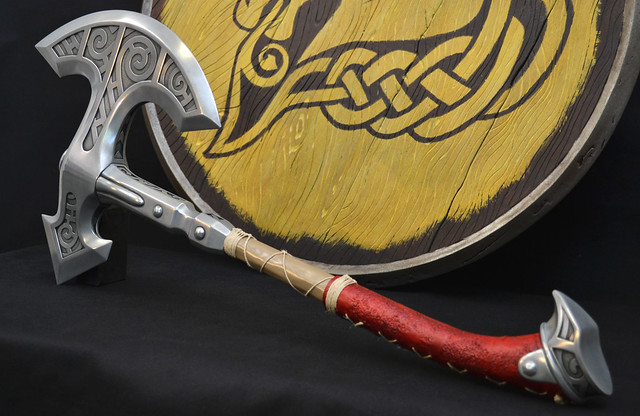
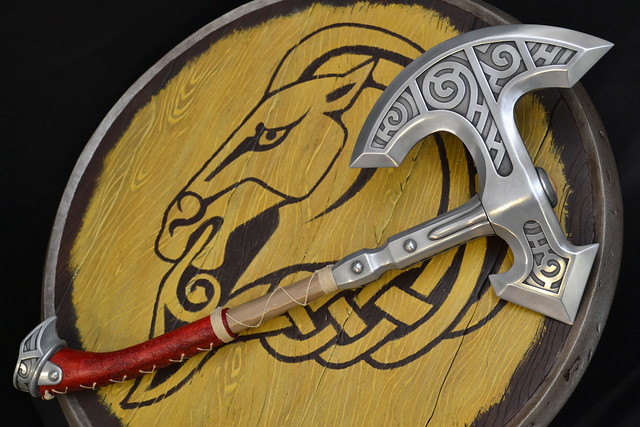
After a light pass of weathering to darken the recessed areas around the filigree, the project was finished! The final piece weighs about 2.5lbs and measures 26" long.

The Shield of Whiterun is another project I wrapped up over the summer which still needs a writeup. It'll be a short one, but expect that to come soon!


More pictures of the build process in higher resolution are available on my Flickr page and in the Gallery if you're interested in learning a bit more detail about the project.
Thanks for reading!
