
This year, at Celebration VI, 40 artists were asked to portray their interpretations of helmets belonging to Clonetroopers and Boba Fett. I was asked to modify one of the Fett helmets.
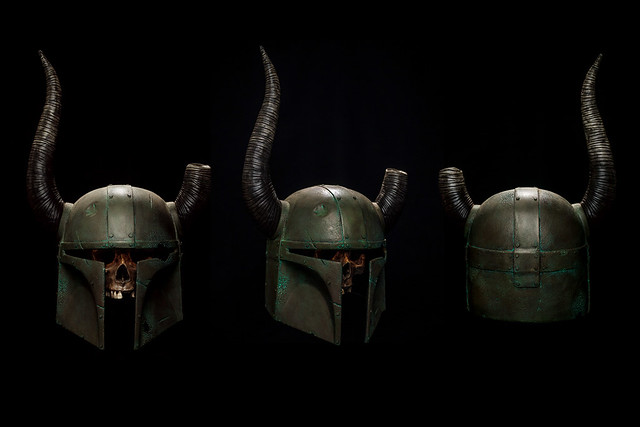
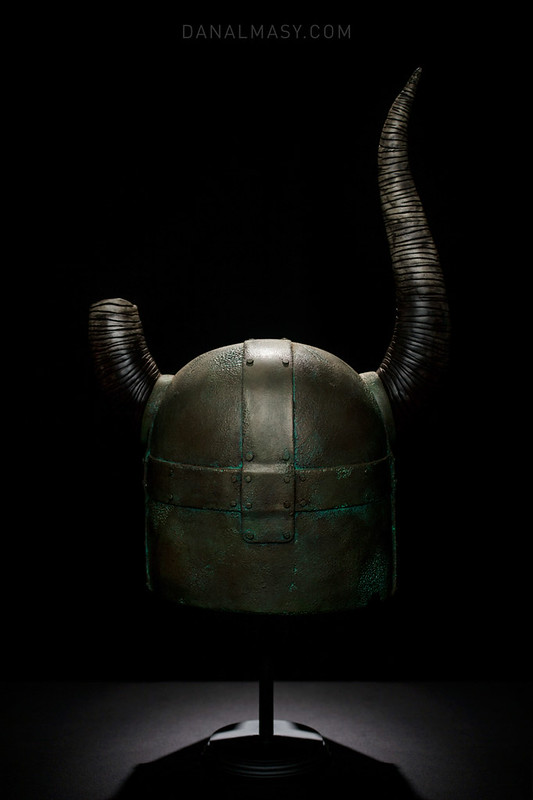
My Finished Product!
I should note that I am in some terrifyingly professional company here. This project will eventually feature helmet redesigns from artists like Sandy Dhuyvetter (who painted three of the original screen used Boba Fett helmets) to full scale production giants like Legendary Effects (who's work you may have seen in The Avengers, Thor, Ironman, etc) and WETA Workshop (Avatar, The Lord of the Rings, etc.) Intimidating, but also quite an honor to showcase my stuff next to theirs.
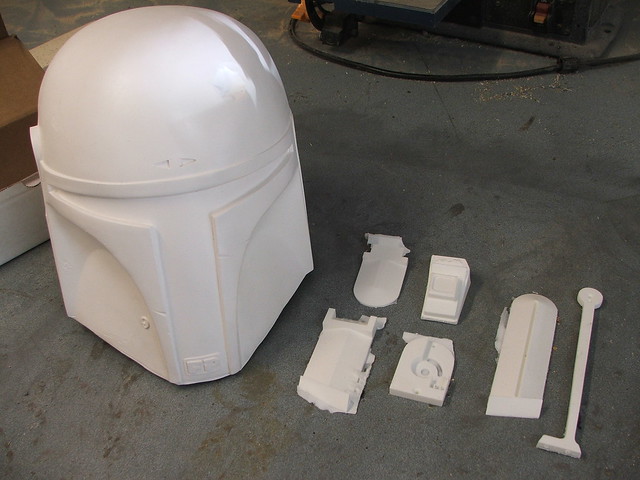
I received the helmet blank casting in the mail - this is a reproduction from a screen used piece, and many of the iconic marks can be traced back to original paint and weathering. Some people may balk at hacking something so accurate to shreds, but it was actually pretty fun!
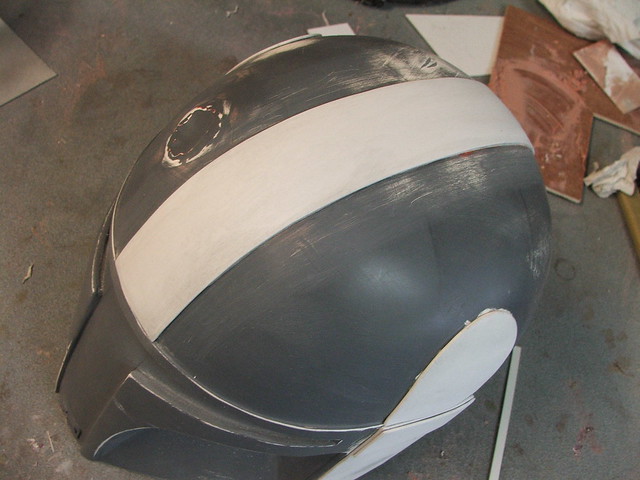
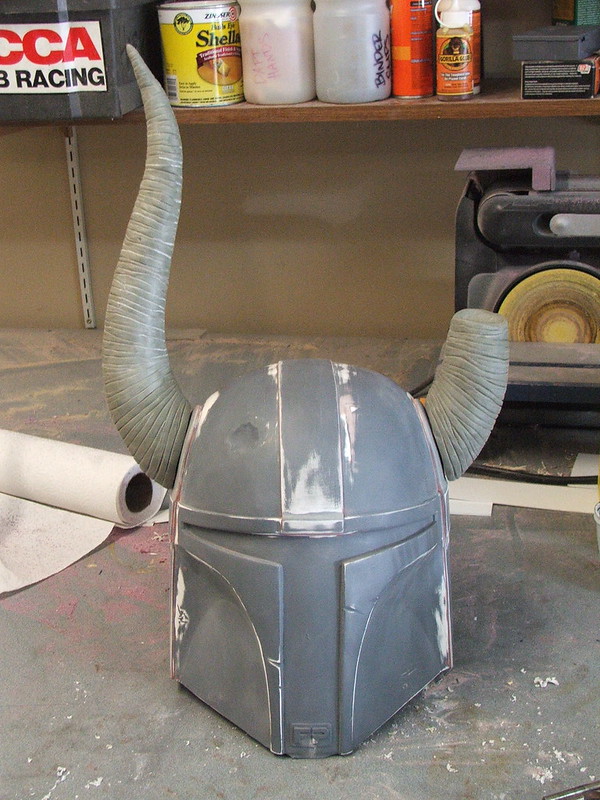
I started out by marking off where I would cut, trim, sand down and add panels. If you couldn't tell from the image above or the title of this entry, I would be making my helmet follow an aesthetic similar to the helms in Skyrim. I've been playing a lot of that game over the past few months, and I guess it has made me want to bolt horns to everything.
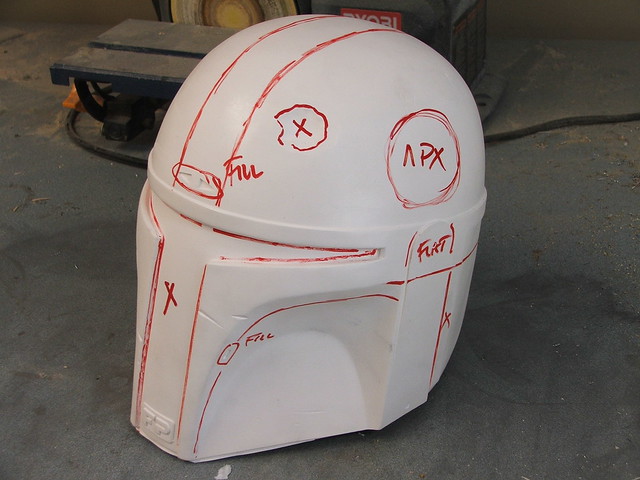
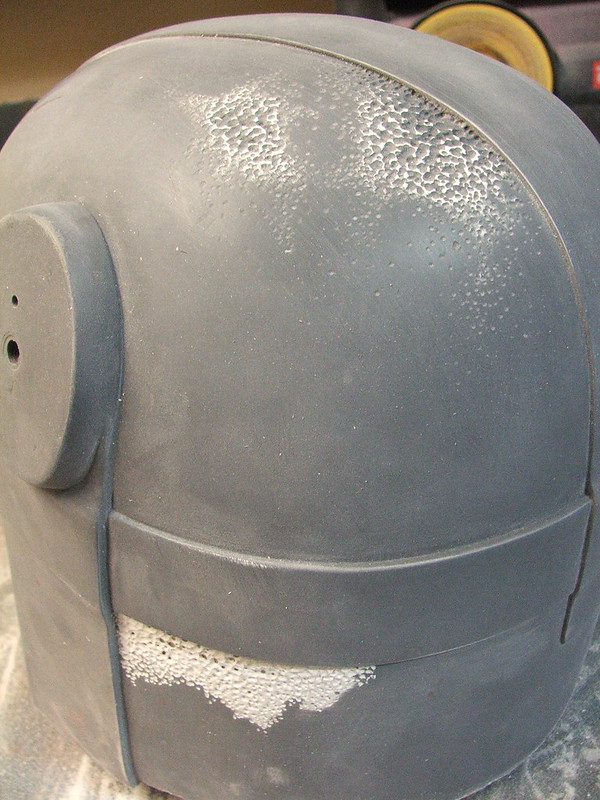
Because I'm a bit of a jerk, I decided to make a bit of a jab at the Fett helmet following by migrating the iconic "dent" to the wrong side of the helmet. Personally, I've always thought someone would take the time to hammer this thing out, but I guess Boba is a busy man. (As a side note, I briefly considered molding the dented area and constructing a helmet made up of nothing but hundreds of dents grafted together.) Cut out areas were taped back in place with tin tape, then resined back into position with some chopped strand fiberglass mat. Other ancillary bits were shaved flat or filled in to fit the final design idea.

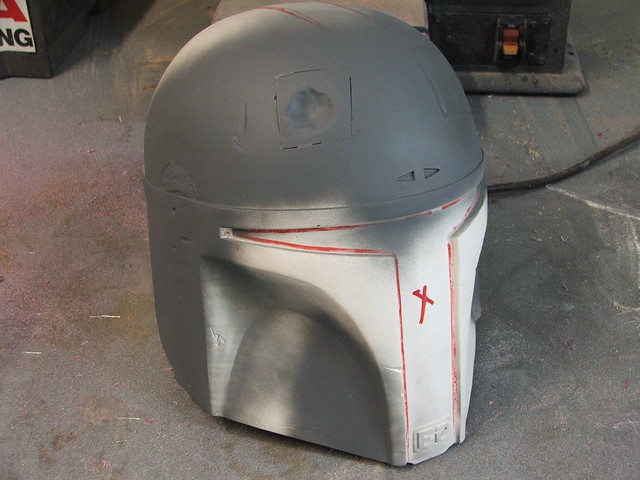
A bit of bondo and filler, and the modifications started to blend back into the helmet shape.

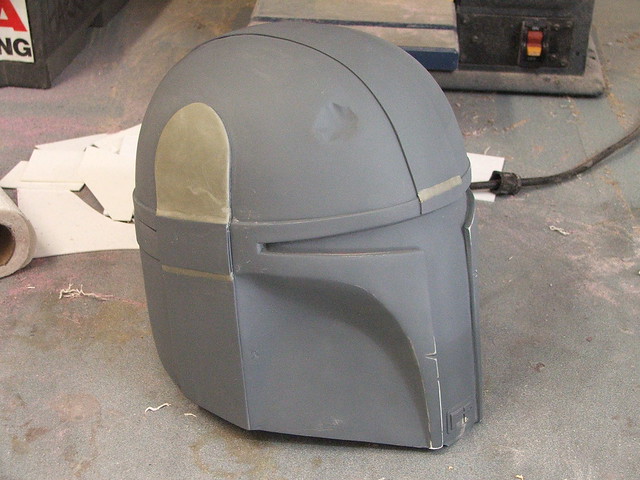
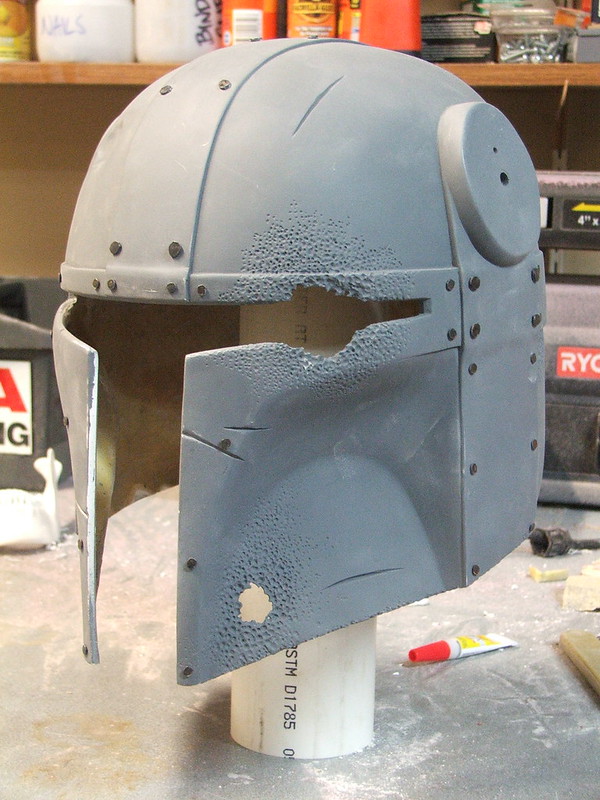
Lines were scribed for the raised helmet frame sections, then styrene plates were heated to shape and glued to the helmet base.

I wanted the visor area to look like a band of metal that went around the base of the helmet and riveted to the dome. I had to extend the back line with another piece of styrene to make this look the part, then fill in the resulting gap with filler to blend it into one shape.

Apoxie sculpt was used to blend the styrene into and over joint sections to give the raised areas the illusion of sheet metal bent over underlying shapes.
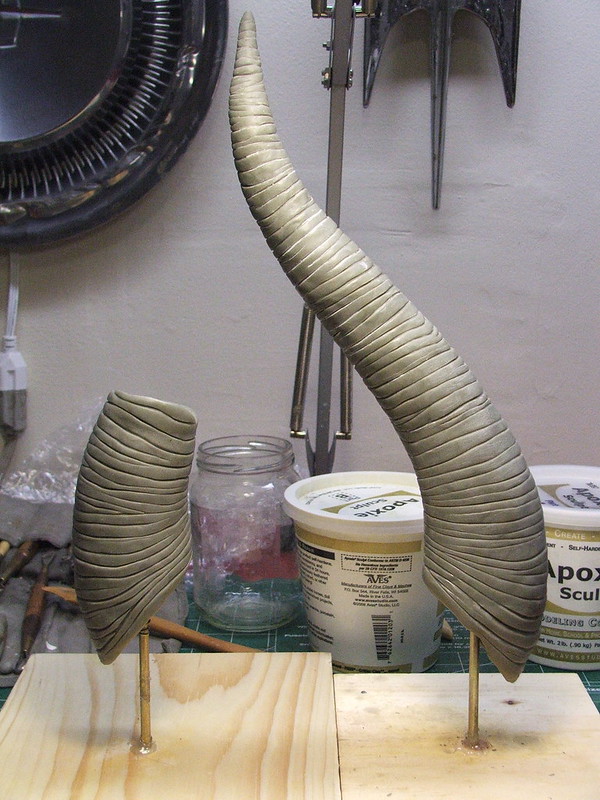
With the base shape starting to come together, I needed to shift focus and start work on the horns. My idea was to show one of these cracked in half, and to have the rest of the helmet display similar amounts of damage and neglect. I wanted a piece that looked like it has just been unearthed and put on display.
The horns started out as pink insulation foam, trimmed with a bandsaw then shaped on my belt sander. After grabbing one and snapping it in half, these were coated with brushed-on urethane resin and rough sanded.


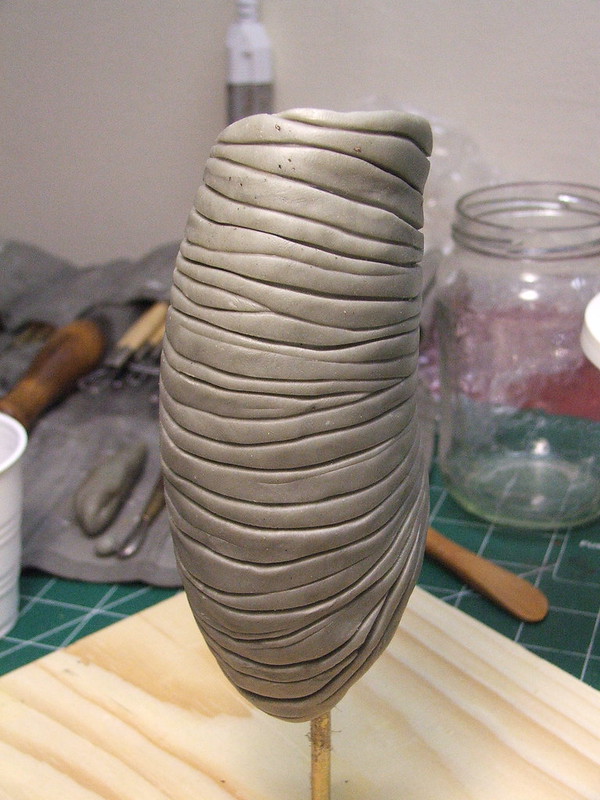
The horn texture was made with more apoxie sculpt, first layered over the entire horn then scribed with varying depths of lines to give them a more organic feel.I don't get to work on a whole lot of organic stuff, and while I admit I'm still learning how to get these sorts of textures to be convincing, this was a really fun step in the process.
To affix these to the helmet, I drilled a depression into the foam in the horn, then inserted a threaded rod. This chamber was then filled with casting resin to secure the rod in place.

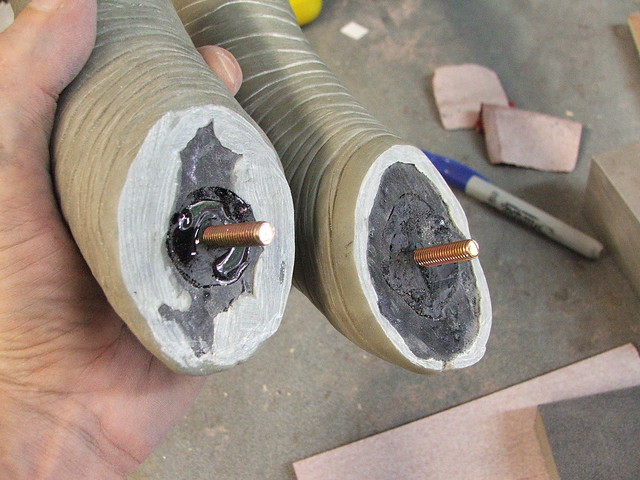
Drill a couple of holes in the sides of the helmet, and we've got horns!
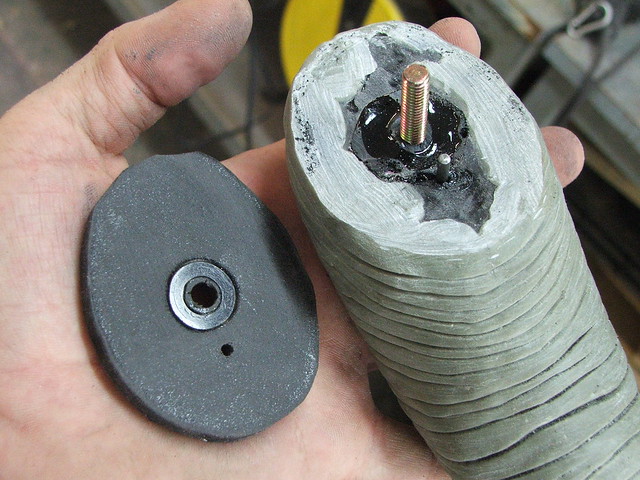
For the horn base, I started by cutting a disc of sintra and heating it until it conformed to the contour of the horn itself. A dremel was used to shave down the perimeter so that the plate matched the horn exactly. These plates were glued to the helmet, then blended into the base with more apoxie sculpt. I also added a small pin to the base of the horn to act as a registration key so the horn will always be mounted in the same position.


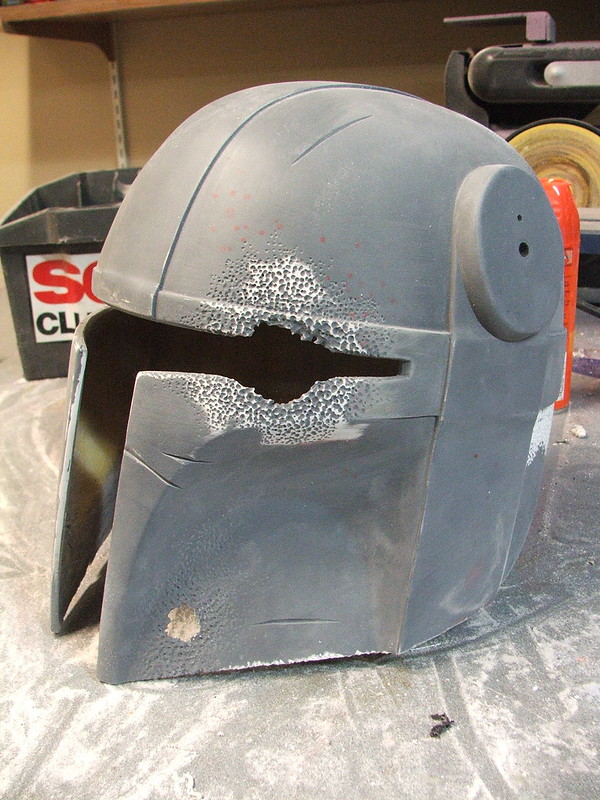
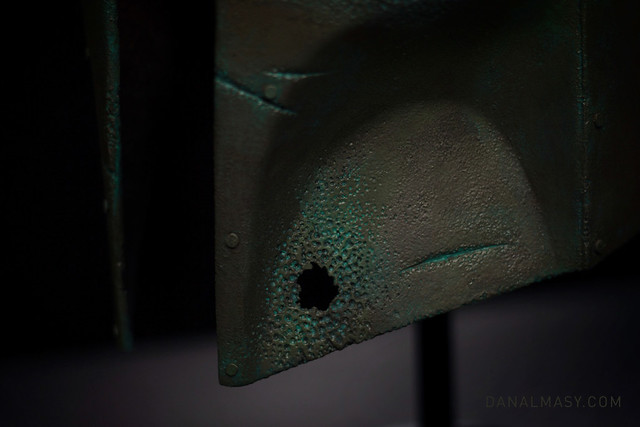
With the base form complete, I set about weathering. I wanted this thing to look old. Old, and very beat up. Using a dremel tool with a couple different ball engraving bits, I started hacking into several spots and building up a "corroded" texture where it looked like the metal had been eaten away. For the spots where the texture breaks through the surface, I sanded away from the back side to create an uneven organic opening.

This method was repeated in several areas around the helmet.
Carpet tacks were used to simulate rivets on the bands of the helmet. I used two different sizes to vary the appearance a bit. Pre-drilling these is a necessity. I also trimmed off the pointy bits on the inside.
The ball engraving bits were used again around the perimeter base of the helmet, along the edges of the bands, and next to the heavy gouges to give more texture.

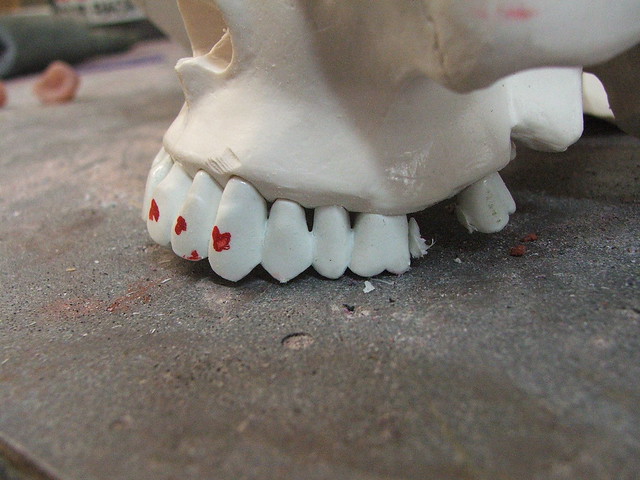
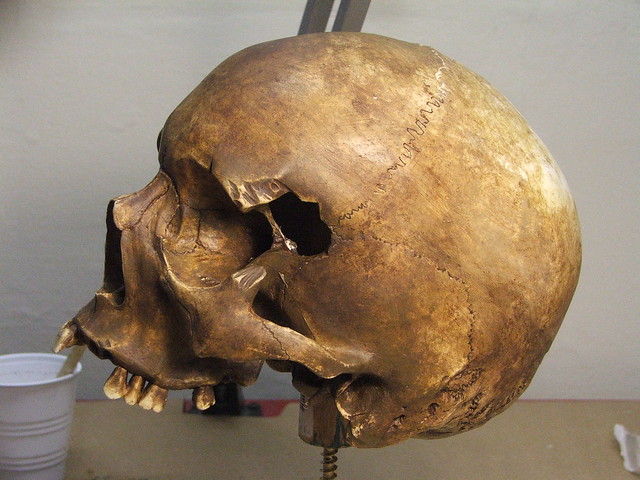
At some point a while ago, it was decided by some friends and me that a skull mounted inside the helmet would be a perfect finishing touch. Since I'm still getting my footing with organic sculpting, I opted to purchase one to modify. Mine came from eBay, and its original purpose was to assist in educating future dentists. Not today, buddy.
I started by cutting out several of the teeth and removing the lower jaw and mounting points. The teeth were molded as one part, so I had to cut them into sections then grind down the remaining plastic.
After a bit of thought, I eventually decided that Mr. Skull needed to have a gaping cavity in his temple that would line up with the large crater missing out of the visor. That was a bad day for him. To make up for it, I decided to glue his head back together - the yellow line in the shot below is a bead of epoxy where the skull has originally been sectioned into two parts.

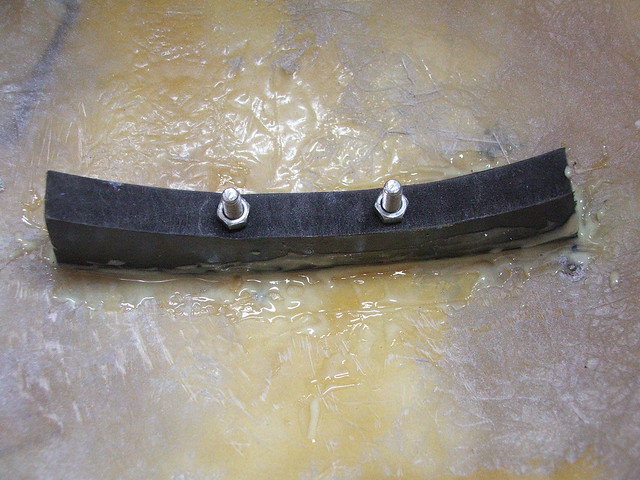
Two holes were drilled in the crown of the skull to act as mounting points. These line up with a sintra "spine" that has two bolts embedded into it, epoxied on the top inside of the helmet.

Weathering the skull was a blast. Lots of brown and yellow washes, the older the better. I would constantly forget I had done this and spook the hell out of myself when I walked into my shop to see this creepy thing staring at me.

With the skull weathering complete, I started on the helmet. Admittedly, this was a new attempt and everything from this step on was pretty experimental to me. I had done some tests on scrap plastic though, and felt at least halfway confident I wouldn't ruin all my previous work.
I started by taking black acrylic paint and mixing it with cabosil to make it thicker. This was sponged over the helmet using an organic sea sponge to build up texture. I taped off the bands for the first pass and textured them later so they would have a differing pattern than the surrounding surface.

This texture got a coat of gray primer, then a quick scuff with a sanding sponge to knock down any pointed high spots.
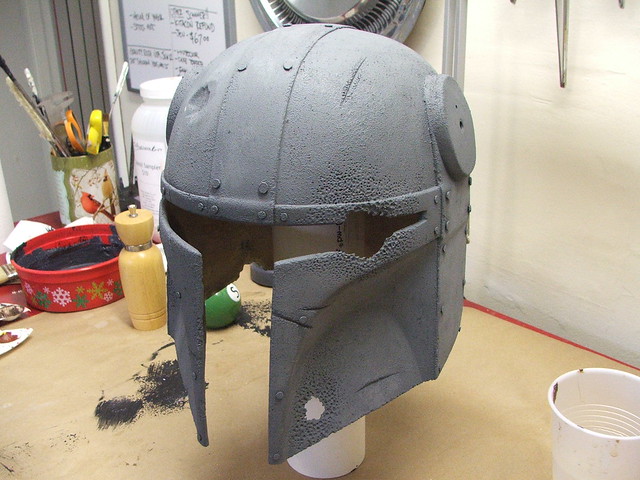

After allowing to dry for a couple days (acrylic this thick says spongy for a while) the helmet got a basecoat of copper/brass paint. This is actually a mix of 5 different cans of spraypaint – from a nearly black-brown to a reddish copper – that gives the finish a mottled mix of colors.


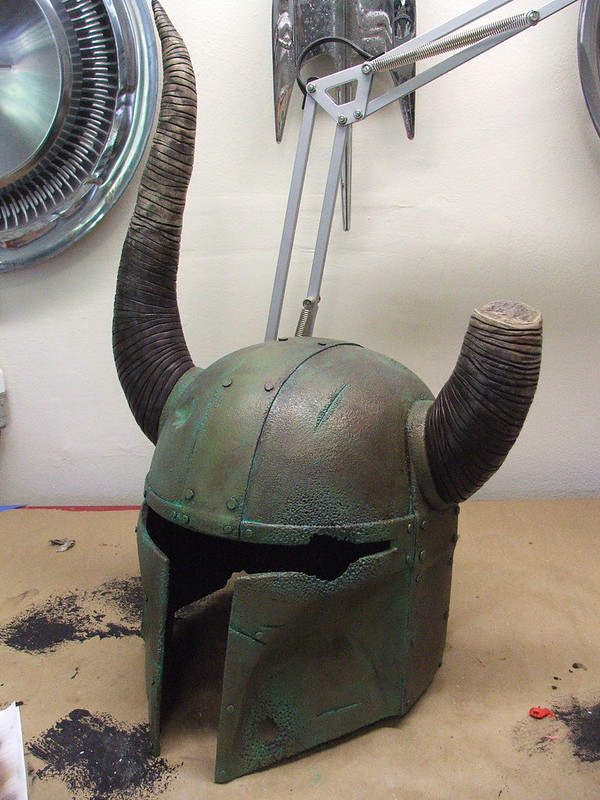
Weathering began once this was dry. I started by sponging on a pale green wash of acrylic over the whole helmet, concentrating on the deepest areas of weathering.


This was followed up with a coat of satin clear to seal in the acrylic.

Afterwards, the helmet got a wash of dark browns in the seam areas, followed by a very bright teal/green along the seams and heavy pockmarks. The green was again done with the sea sponge.

For the horns, I started with a coat of textured off-white. I also made a mounting plate that secured to a lazy susan I use for painting in order to make the weatheirng easier.
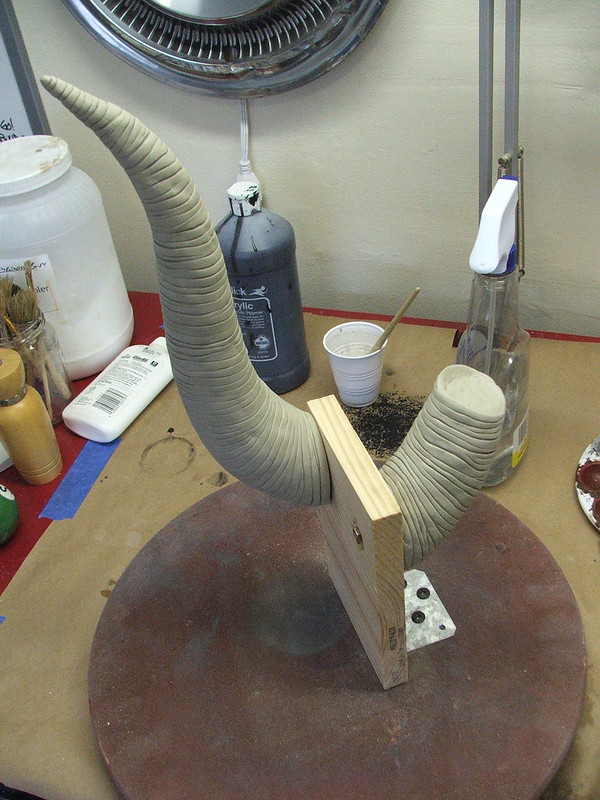
These got several washes of brown and black, deeper in color at the base and fading out as they went up. After they were finished, the horns were sealed with matte clear. For matte clear, I prefer Krylon #1311.


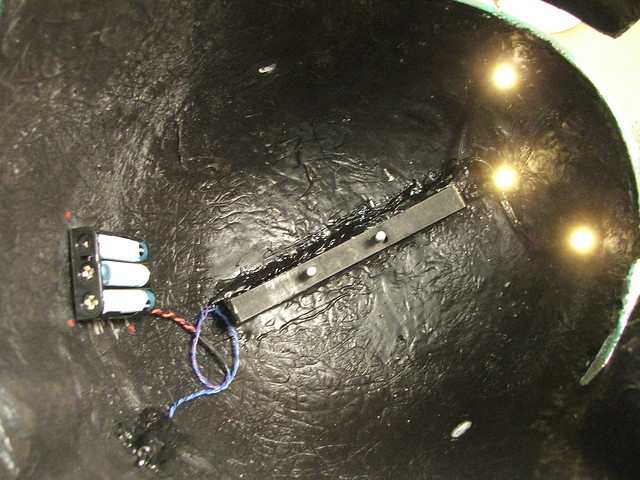
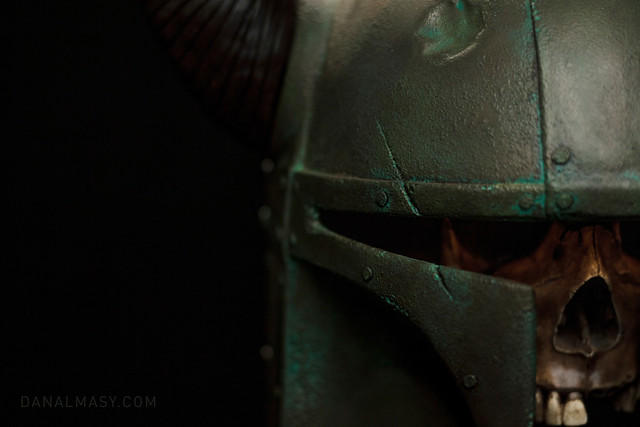
After mounting the skull inside the finished helmet, it seemed like the darkness of the helmet was obscuring all the weathering work I'd done. The solution, of course, was LEDs!
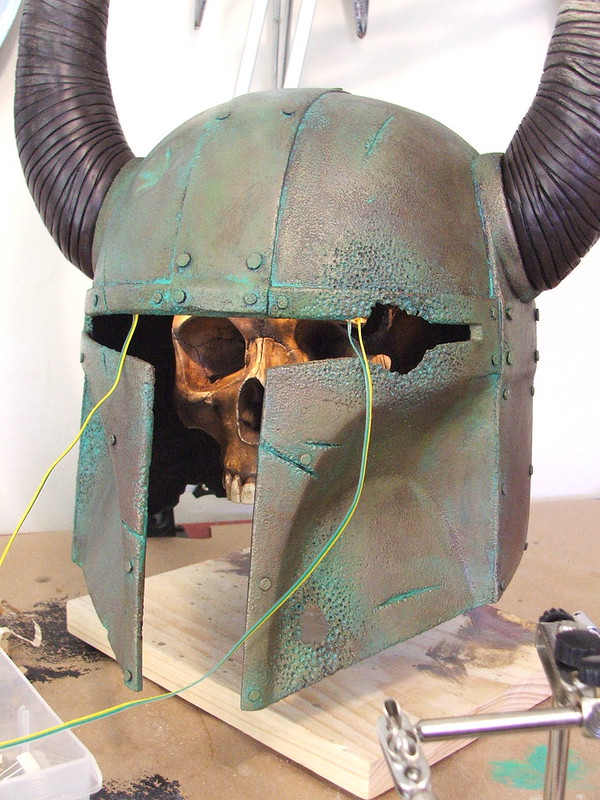
Three warm white LEDs were mounted to the inside of the upper brim of the visor to illuminate the skull when mounted in position. They are powered by 3 AAA batteries and controlled by a toggle switch in the back of the helmet. As much of the wiring as possible was painted flat black.
My very good friend Dan Almasy volunteered to do the final photography on this piece, and the photo session wrapped up just a few short hours before the helmet went in a shipping crate off to the auction handlers.
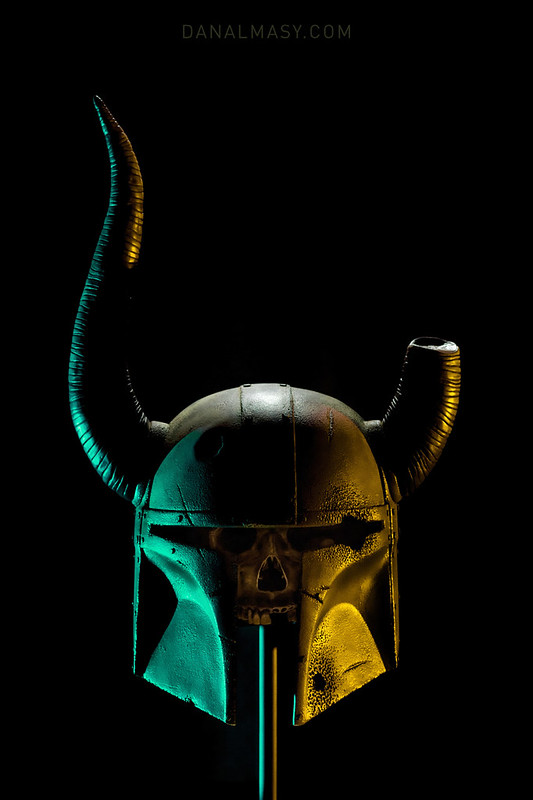

I am extremely happy with the weathering on this, and it was an excellent opportunity to be able to test out some techniques I haven't had the ability to try before.

If you're at Star Wars Celebration, stop by the display and say hi to Dovahfett!

More pictures of the build process and final result (in huge resolution!) are available on my Flickr page.

Be sure to visit the As You Wish Helmet Project on Facebook to stay up to date with these helmets. The final build will be available for purchase on eBay in the late summer! I'll have an update at that time here as well as on my own Facebook page.
Thanks for reading!