For this year, I knew I had to keep up the momentum (or die trying!) A longstanding "someday" project of mine was the Gravity Gun from Half Life 2. I never had anyone actually commission one of these from me, so I decided the Child's Play auction would be the perfect place to release it. It sold for a staggering $21,000 - and here's how I made it.
Well, first, this is possibly the longest entry I've ever written. That's really saying something considering the length of some of my other write-ups, but I felt a warning should be in order. Get a cup of coffee and a comfy chair; its gonna be a while.
Alternatively, if you're like me and "patience" isn't something you've got in abundance, then please enjoy this less-than-two-minutes video of the finished product.
Onto the build!
The biggest problem with the Gravity Gun is the somewhat incomplete reference of the piece. The in-hand model only shows 3/4 of the backside, and the world model is woefully low resolution.
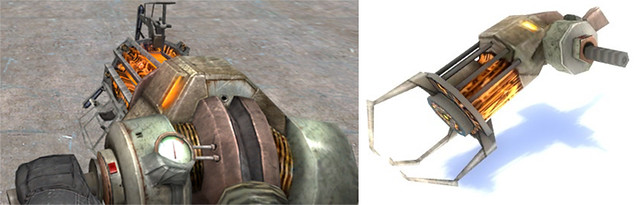
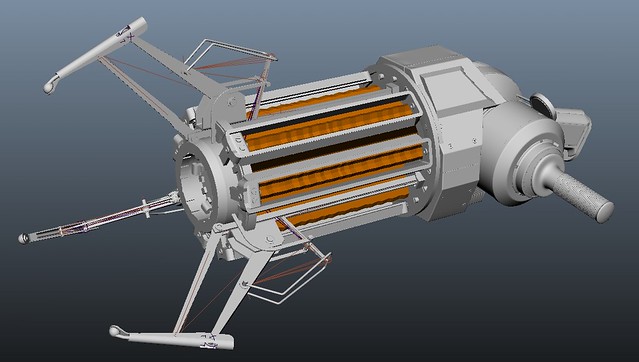
As luck would have it, when I brought the Portal Gun to the dinner last year, the guys at VALVe offered a tour of their facilities. While I was there, I met one of their designers named Tristan Reidford who had been working on his own very detailed model of the Gravity Gun. He gave me a copy of the files to work with, and now I had the best blueprints I could possibly hope for!
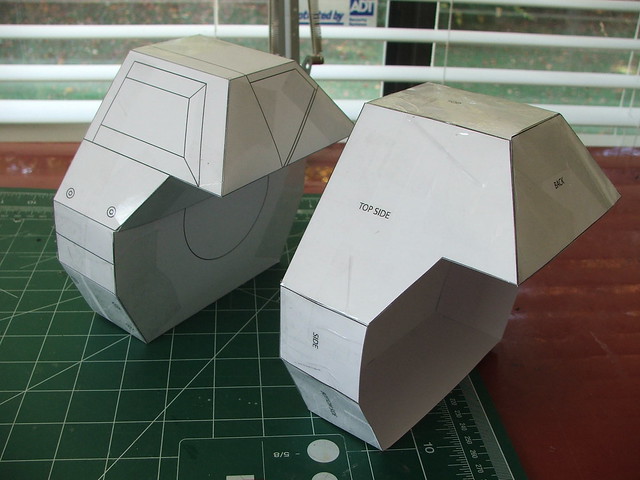
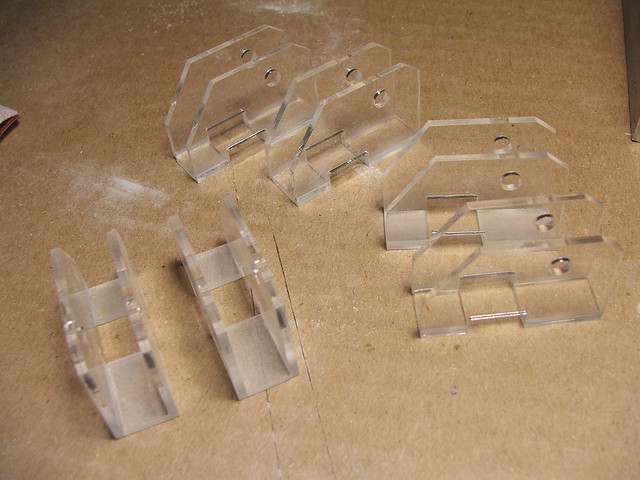
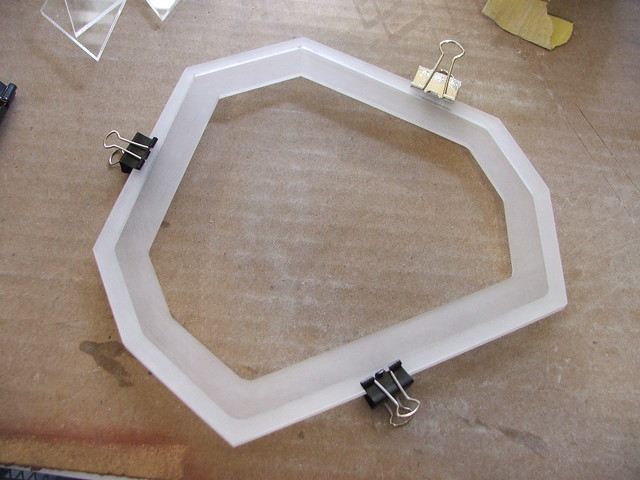
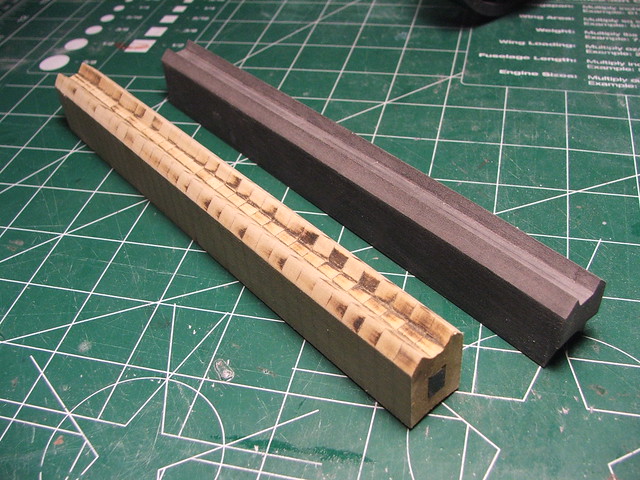
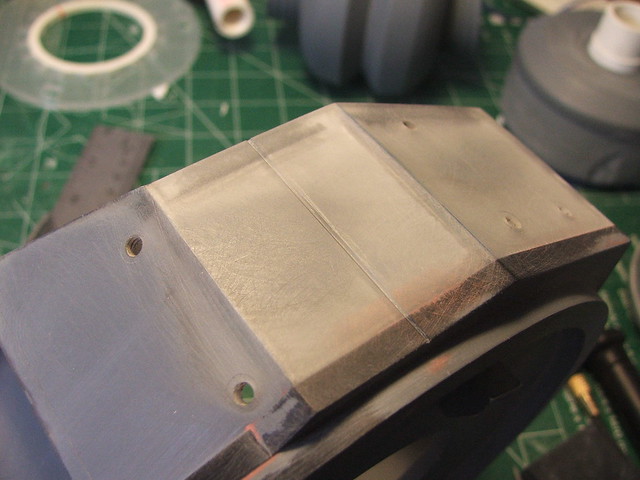
This project marks my first foray into the world of laser cutting. A lot of the geometry needed to be exact, so I spent about 4 days working out all the project parts in Illustrator. Parts were all cut by Ponoko, in various thicknesses of acrylic. Before I sent the files out though, I made paper templates to make sure all my designs were accurate. Below are two mockups of the main gun body - both were slightly off, so its a good thing I made mockups before committing!
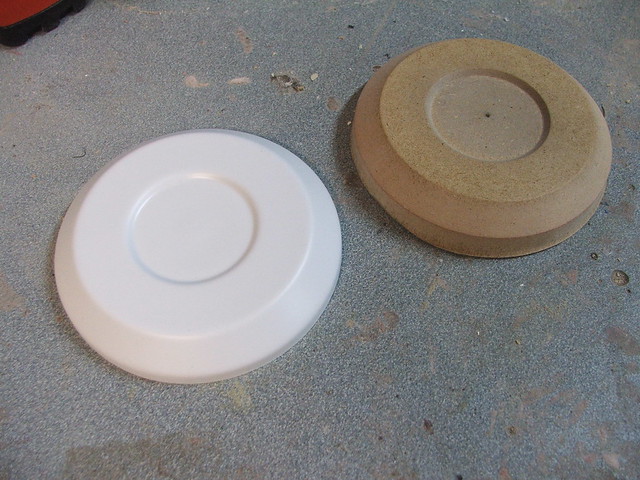
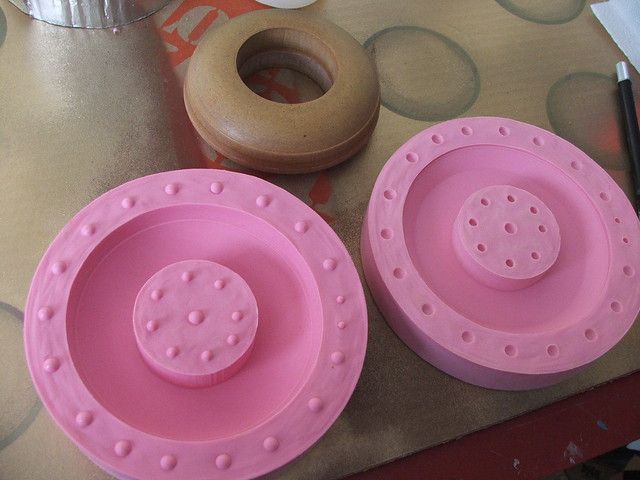
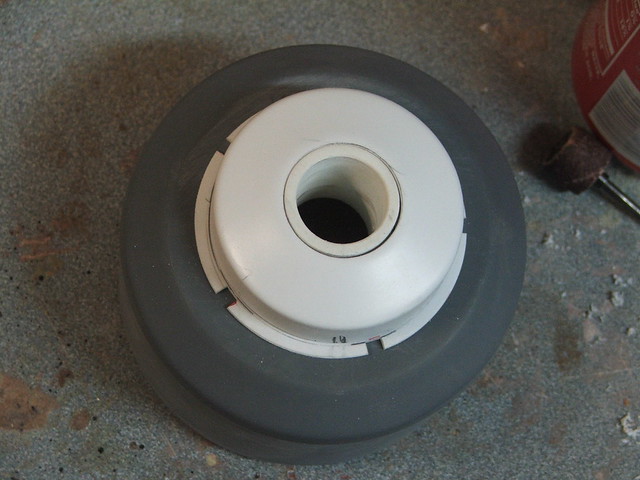
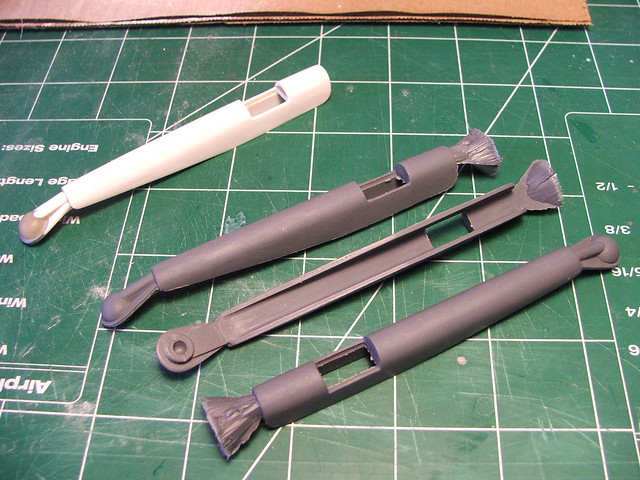
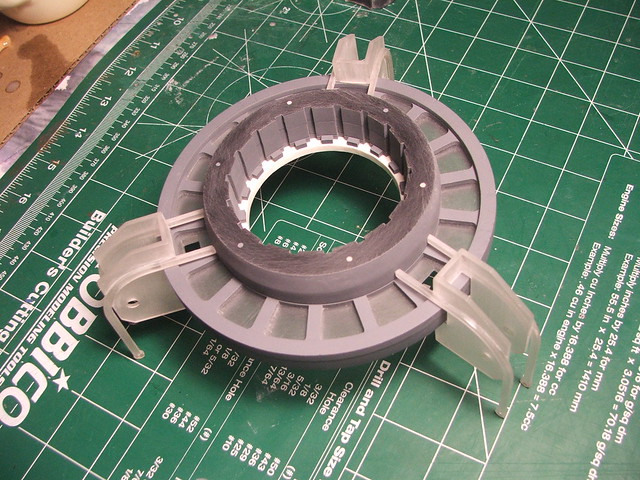
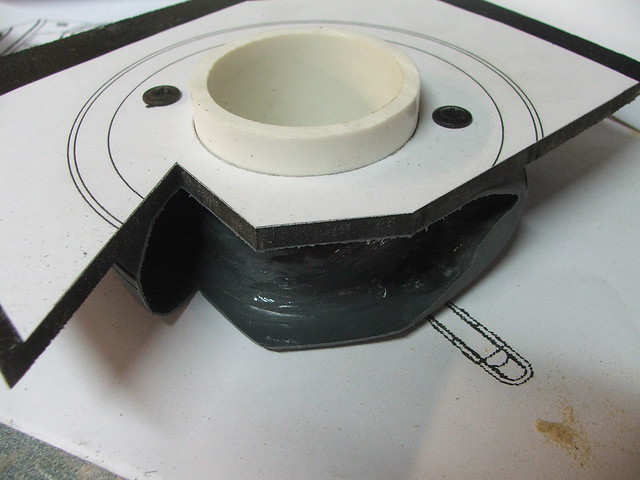
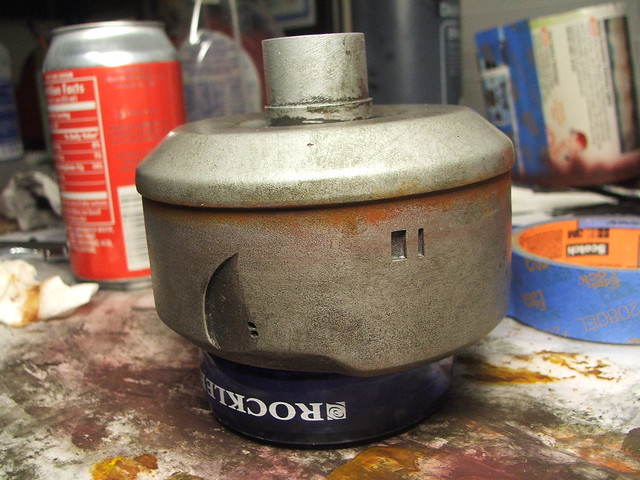
While waiting for the laser cut parts to arrive, I started work on the handle portion of the gun. I started calling the cylinders toward the back the "drum assemblies" as I had absolutely no idea what they were supposed to be. Both would be molded then cast in resin. I started the smaller drum by vacuumforming the outer "cap"
The rest of this part was a hodge-podge of PVC and Sintra, beveled on my router for the funky edge along the inner section.
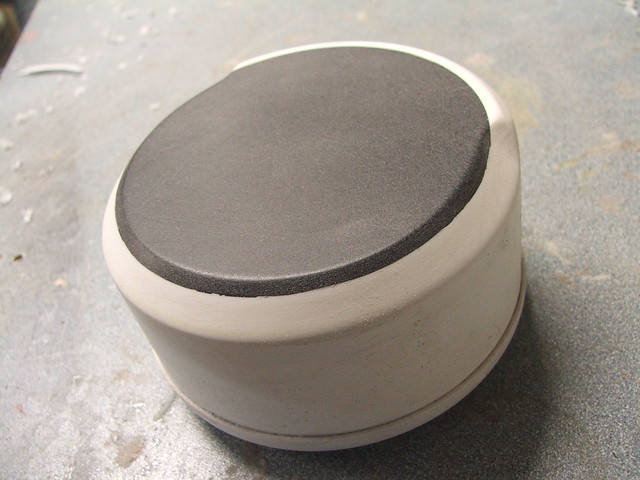
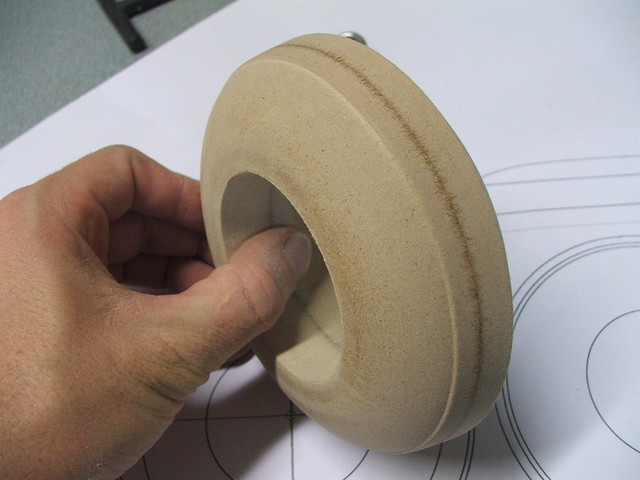
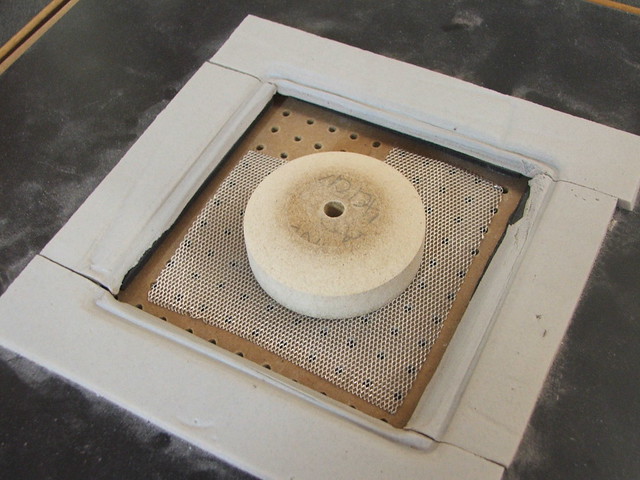
The inner drums were easier. Just lathe some MDF and cut out the middle on the scrollsaw.
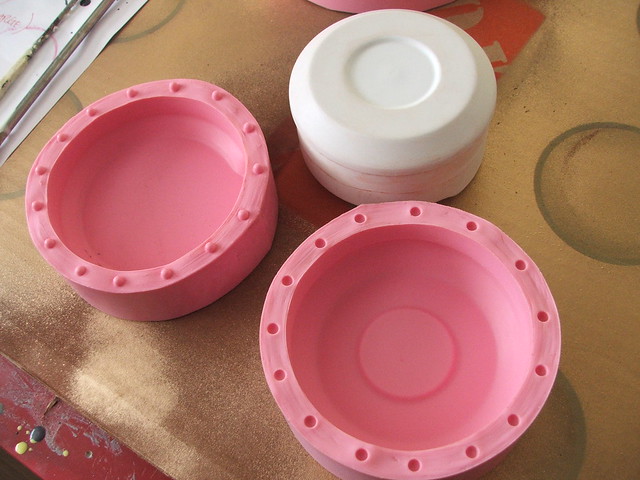
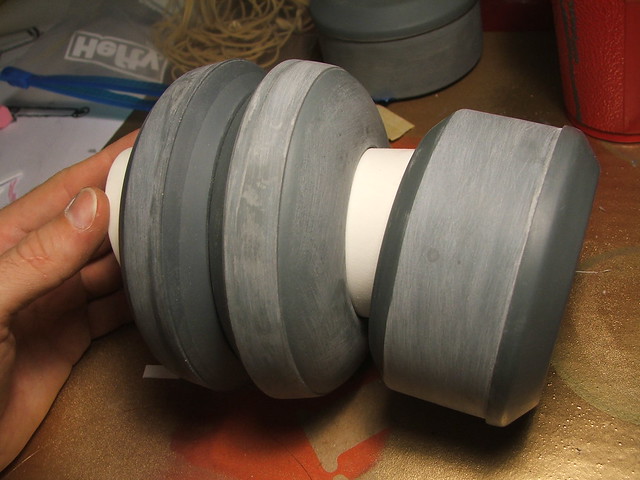
Everything molded and parts pulled! These were molded in Smooth-On's Mold Max 30 and cast in Smooth Cast 320 resin. Took a little practice to get the parts hollow with a uniform thickness.
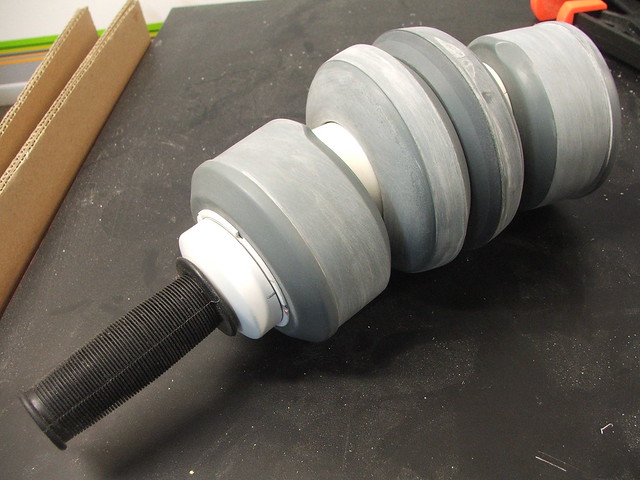
A few more details were needed for the handle area. The endcap was turned from MDF then vacuumformed like the larger drum cap, then set over a .75" PVC connector.
The .75" connector allowed me to make the handle removable in order to ship the thing. That bike handle was a pain to track down. In the end I bought 4 of them in case I ever repeat this project so I don't have to go searching again - they're an odd length, somewhere between an adult and a child's sized handle grip. eBay to the rescue! All of these parts are mounted on a piece of 2" PVC to get the angle and spacing of the elements correct.
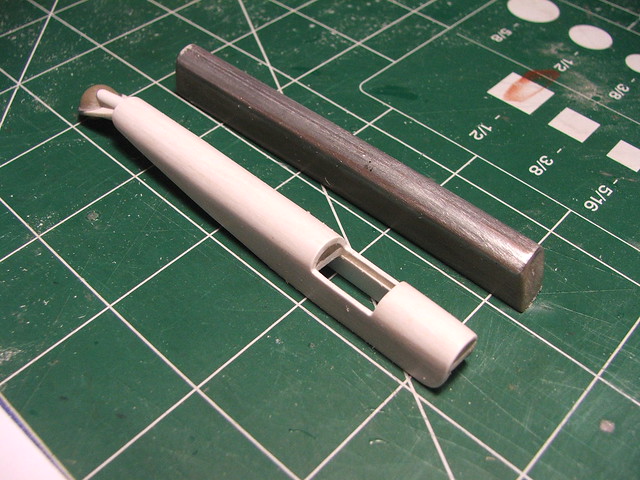
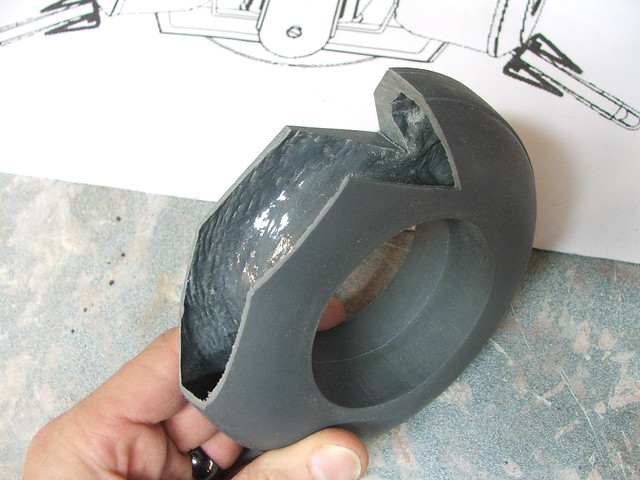
At this point I still had some time to kill before the laser cut acrylic was delivered, so I set about making the prong-claw ends. The pic below is a vacuumform master (right) I used to make the curved shape of the prongs with in styrene. The rest of the shape was done with apoxie sculpt, some half round stock, and a 3/8" OD washer.
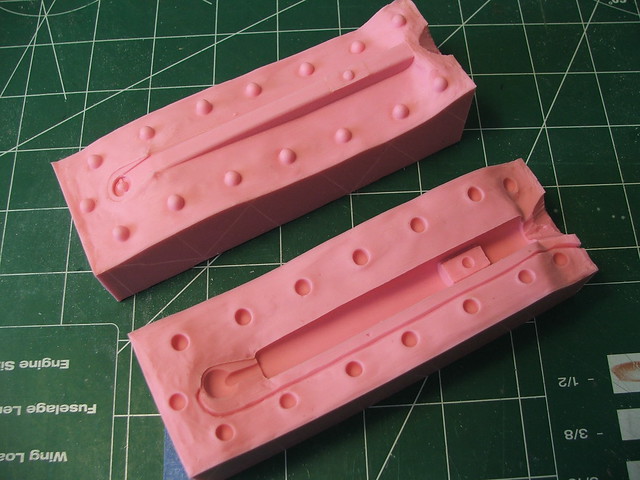
I didn't want to have to repeat that nonsense three times, so I made another mold. I'm pretty proud of this one, since I don't usually cast parts this small. These came out perfect!
The next day, these showed up:
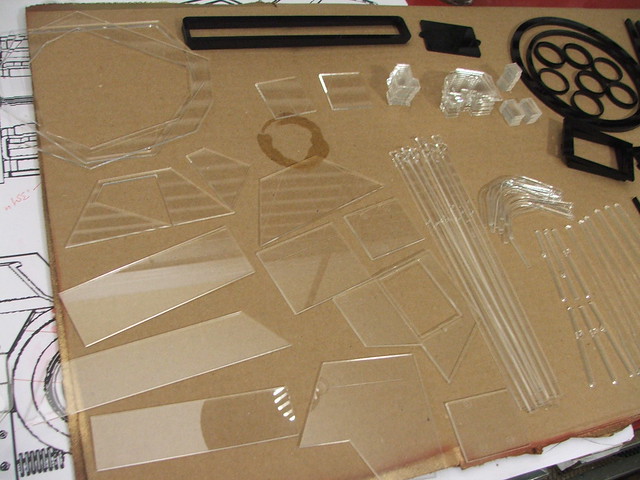
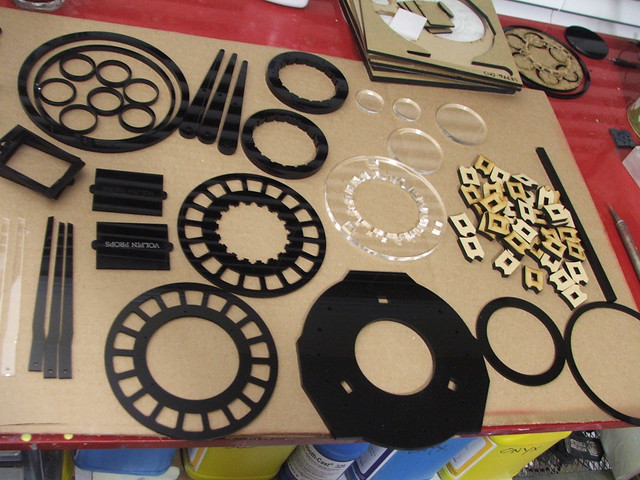
Hoooooooly crap, I had a lot of work to do. This was about 2 weeks before the auction deadline, too.
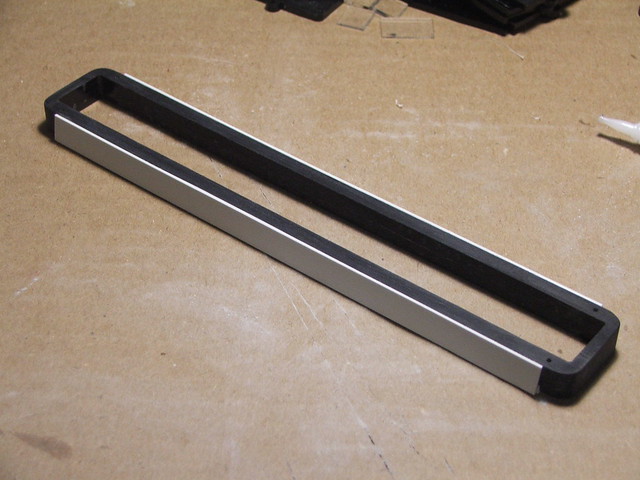
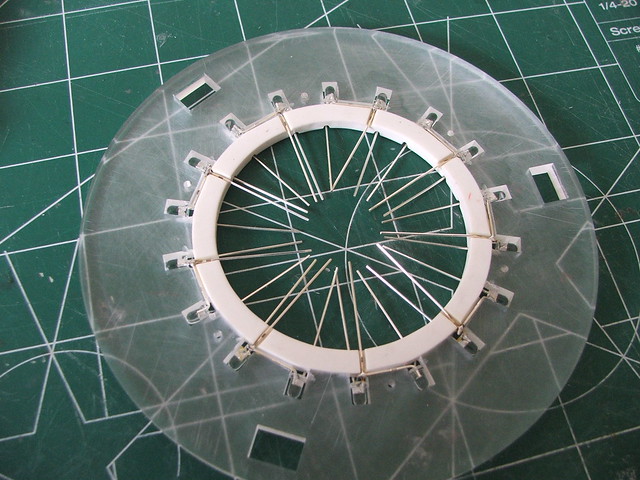
When designing the parts, I made 1/16" holes in parts that were supposed to be joined together. The idea was that I would insert steel pins into these to act as guide holes and keep everything aligned during assembly. The parts below are the long rectangular brackets that sit above the glowing Xen crystals along the body of the gun.
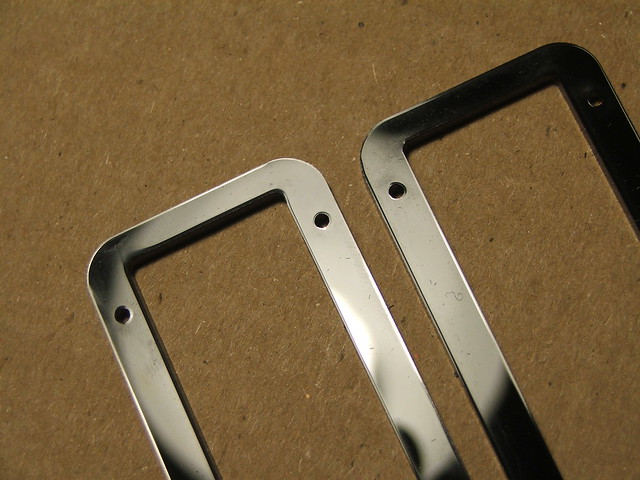
I built this in three sections of acrylic to get the proper thickness. There was a lot of sanding to get all the edges flush (fun fact, laser cuts aren't exactly 90º!) but here is the end result, with some styrene accents.
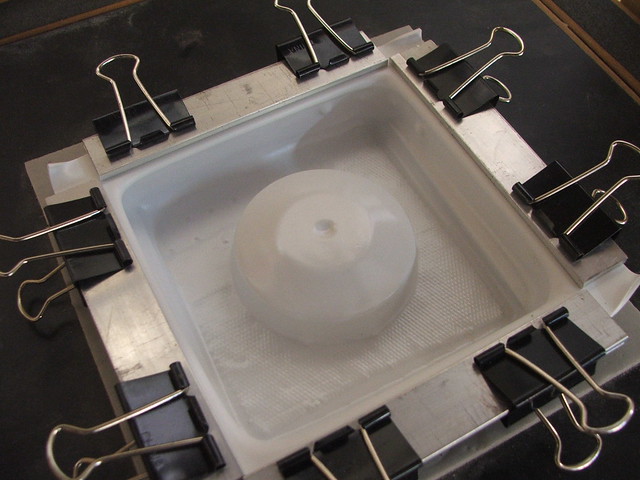
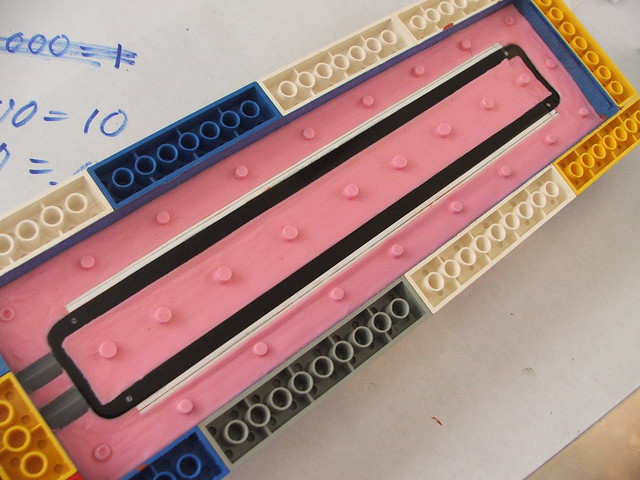
Aaaaand more moldmaking! Lego mold box, because that's the way professionals do it (?)
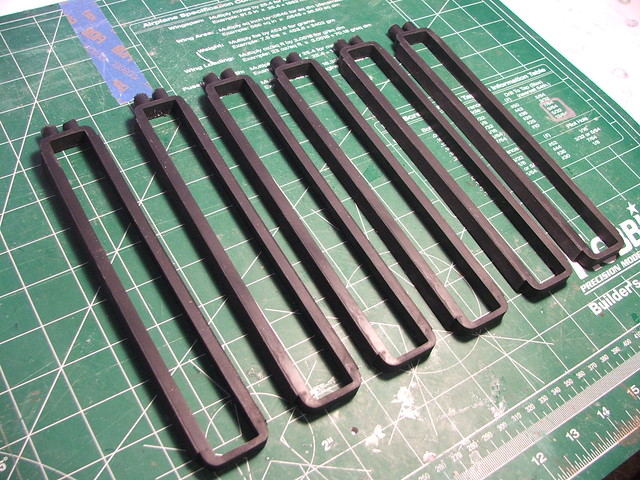
I also set about assembling the various flat-packed IKEA-style Gravity Gun into something a bit more recognizable. All of these parts had to be sanded before assembly, since the laser makes a slight lip around the edge from heating the plastic which would keep them from layering correctly. Also, lasers do cut glass-clear on their edges, but not glass-smooth; all of the facing edges also had to be sanded to remove the tool marks.
The main barrel assembly. For this part alone I was happy to have gone with laser cutting. 8 total layers make up this part, and each of the claw arm bases around the perimeter are another 8 parts a piece. 32 parts worth of acrylic, some only 1/8" wide... I'm really glad I didn't have to cut all of these by hand!
More parts. This is the assembly of the rear body.
The rear larger drums intersect with the main body in a fairly odd manner. After struggling with a good way to get these parts to fit together, I eventually settled on making a jig out of sintra and cutting the funky angles on my bandsaw. Went together better than expected!
Not everything was planned in advance though, a few parts still had to be scratchbuilt from raw material because I had NO idea how to make them until the rest of the gun was assembled and in front of me.
The lower heat fins, for example. This was a really fun part to piece together by hand! The black parts are all leftover acrylic, while the white fins are .060" styrene.
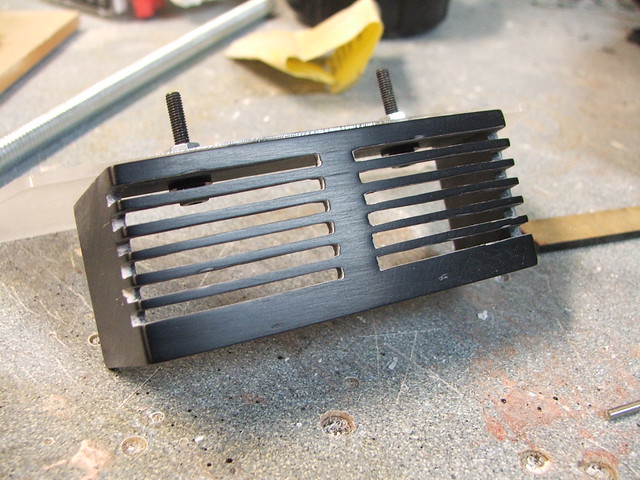
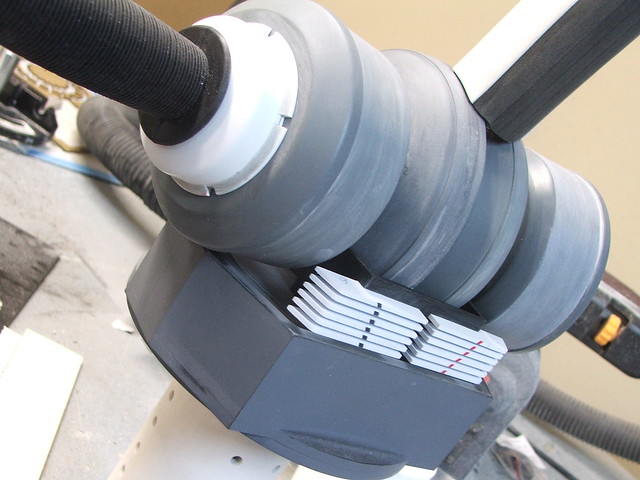
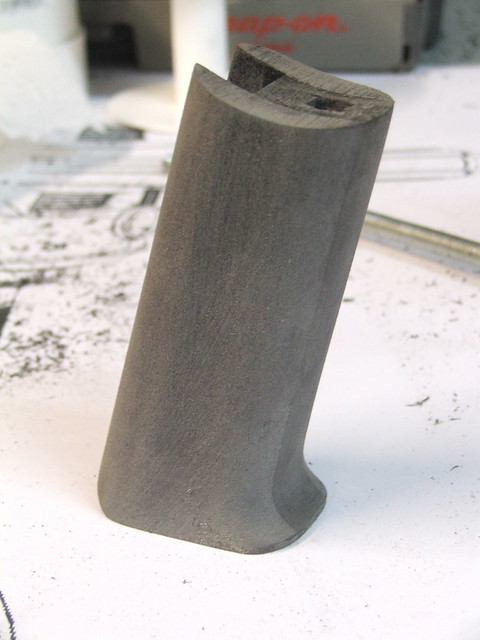
The pic above also shows the completed handle, which was cut and shaped from a block of sintra and some styrene/acrylic/wood mishmash for accents.

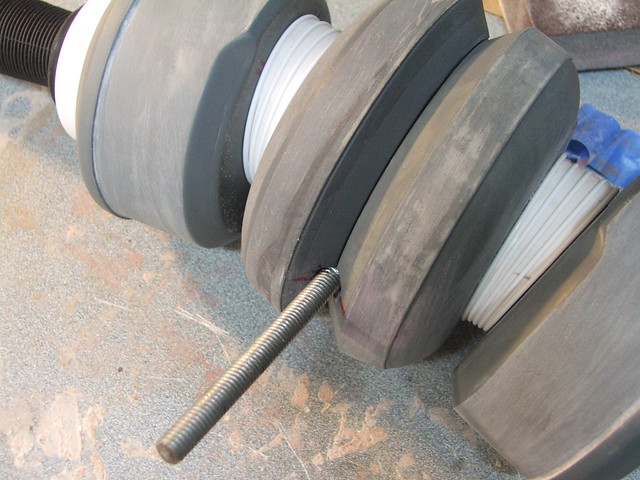
The handle fits over a 5/8" threaded bar bolted to the rear drum assembly. This in turn is bolted with a similar bar to a piece of PVC that the Xen crystals, barrel, and long rectangular brackets mount to. Its a delicate balance, held in place with about 60 screws and bolts!

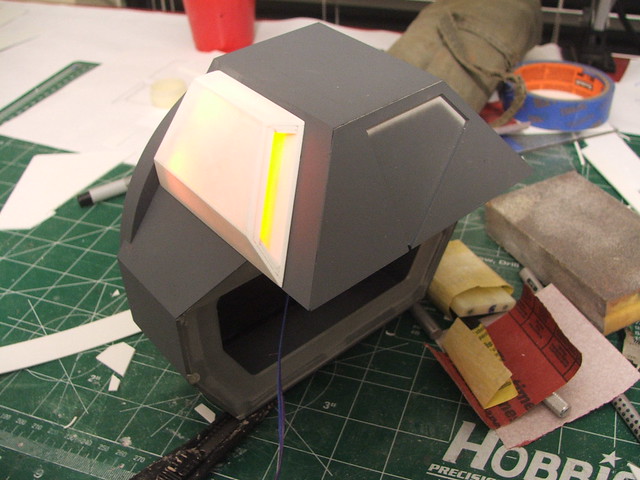
I had originally intended to make the Xen crystals out of laser-cut MDF, but the "not-quite-90º-cuts" made this plan a loss. I remade the Xen crystal master out of a sintra block, and cut the "M" shaped bevel with my table router. That was a bit of a nervous experience, but it worked!
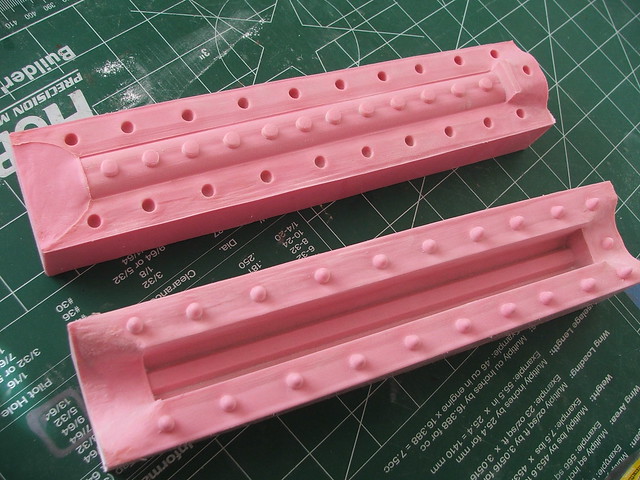
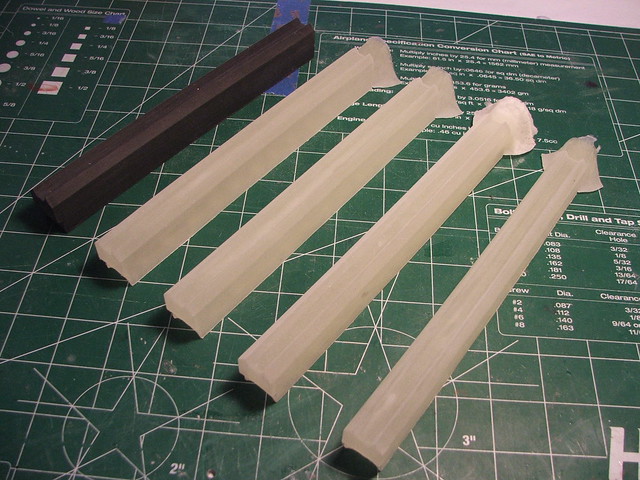
More moldmaking! To get the pieces to show light, I drilled out small pucks to act as lenses in the material and scatter the illumination from a series of LEDs that would be mounted underneath. The parts themselves were cast in Smooth Cast 325 plastic, which dries translucent white.
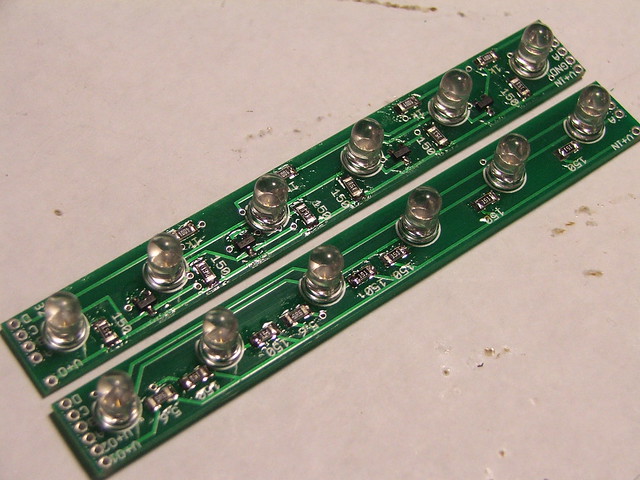
The LED boards, designed in Eagle and printed at Batch PCB. The free version of Eagle only lets you design in a 5"x5" work area, so the 7.5" long boards needed to be sectioned in two halves and jumpered together after assembly. Fun!
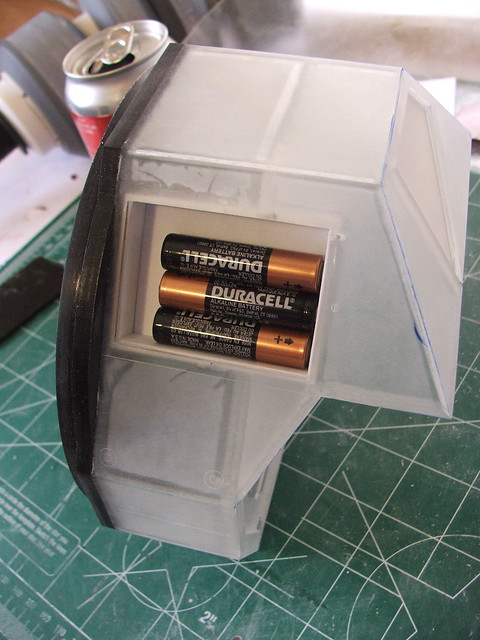
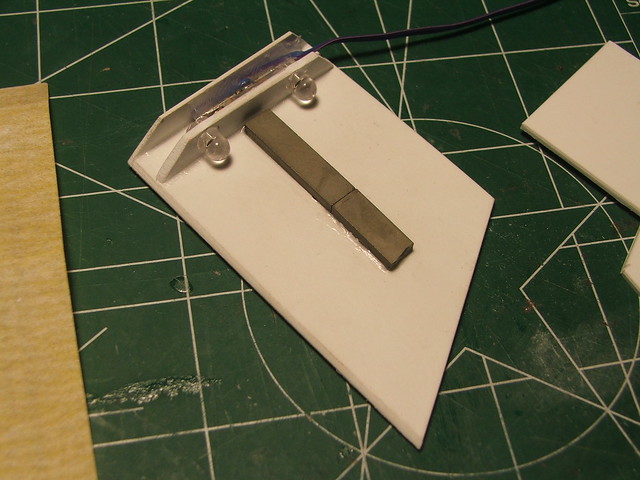
More illumination was needed for the "vent" piece on the main body. This panel has 2 rare earth magnets inside it, securing it onto the battery tray on the side of the gun. Illuminated battery doors, why not?
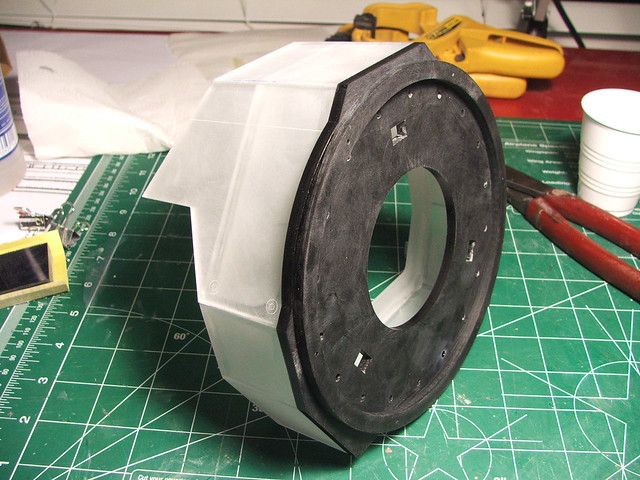
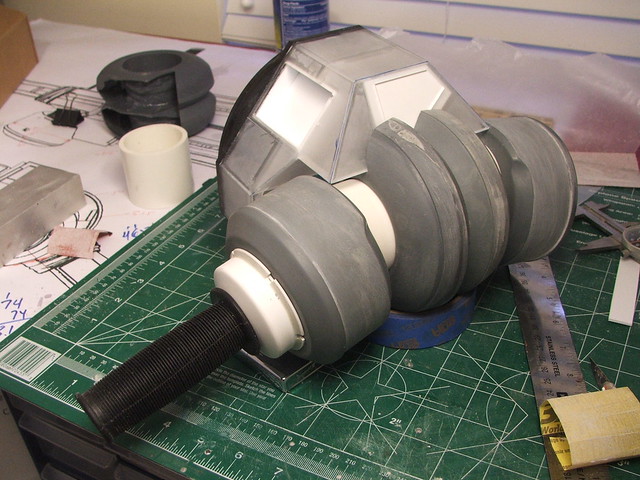
With almost all the parts finally cast and assembled, it was time for a test fitting!
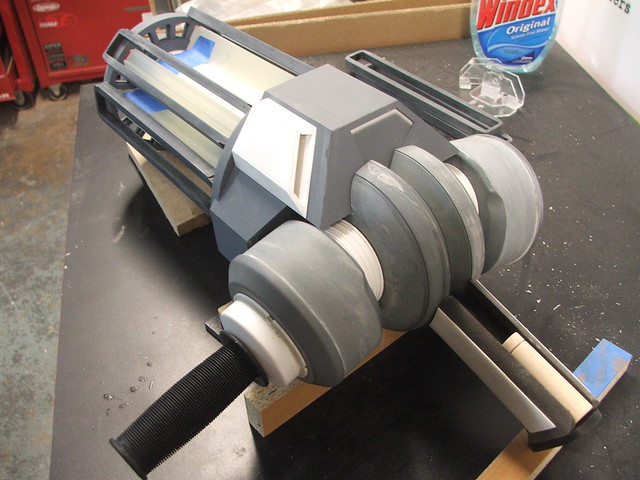
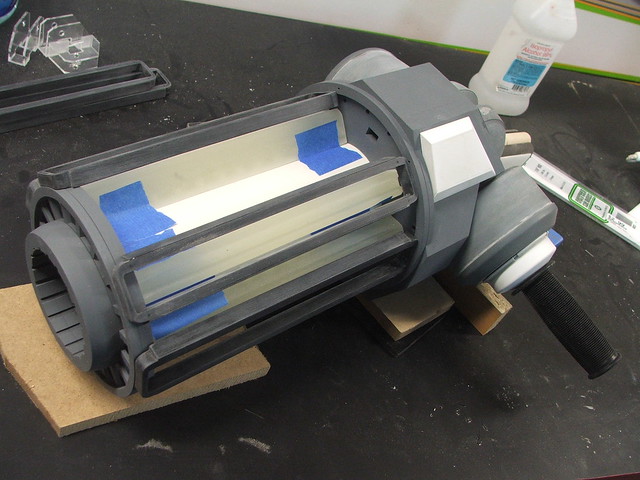
There was light at the end of the tunnel, but still some parts left to be built.
The barrel needed some modifications - I had neglected to make the mounts for the brackets when I had the acrylic cut, so these were added with more scrap acrylic and screwed to the barrel surround.


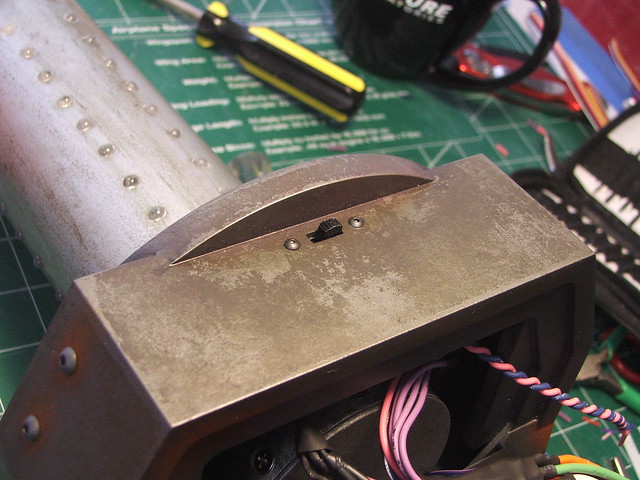
There was also the matter of that little gauge near the handle. Emphasis here on little - this thing isn't even 3/4" in diameter! Its secured to the gun with duct tape in the game, but using actual duct tape would be a poor idea. It will shrink over time and leave behind a gross residue. I needed something more archival. By mounting the gauge to the handle drum with painter's tape, I blocked out a rough shape of the tape form.
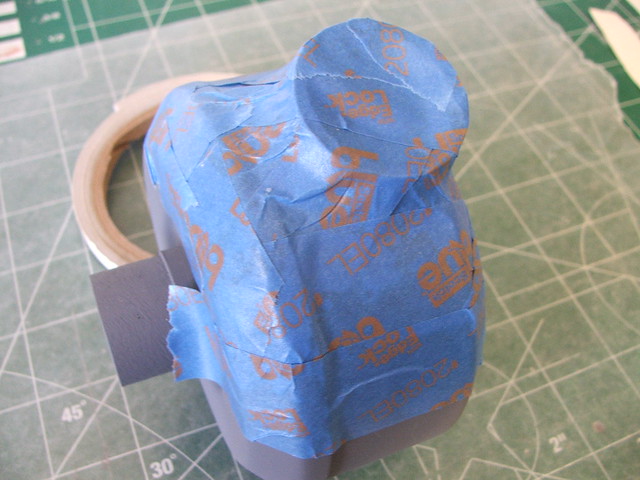
I used this as a sort of mold to lay strips of resin-soaked cloth on top of. Once the resin was fully cured, I popped it off the tape and cleaned up the edges. Just needs a little paint and we've got faux duct tape!


A fellow forum member on the RPF extracted the texture of the gauge face for me, which I remade in Photoshop and had printed onto adhesive-backed vinyl. Some people think the "U2" in the upper right should have read "200" but its debatable...
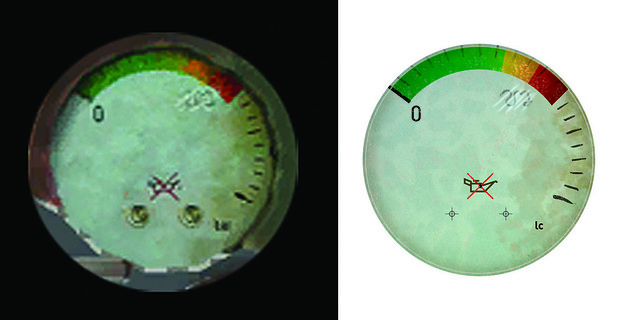
Teeny tiny screws were pirated out of a dead walkman (never toss out old electronics!) and the needle is made from a shaved down roofing staple mounted to an earring back pin. Hacked-together? Yes, but it looks the part!

Those were the last parts that needed to be built, so it was onto paint!
...after I scribed some deeper panel lines first.
Okay, now paint! Everything got a layer of gray primer first...

Followed by a whole bunch of silver. The metals on the various parts of the gun are a whole bunch of different colors, so some parts got darker basecoats than others. There were somewhere around 60 separate parts that all had to be painted individually before weathering, then assembly. This stage took the better part of a week.


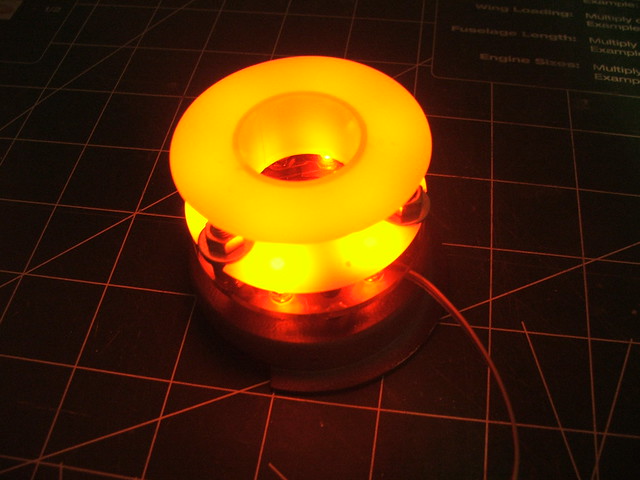
While I was waiting on those bits to dry (I need to occupy myself during that time, I'm the sort of person who will get fingerprints all over wet paint due to my complete lack of patience) I turned my attention to working on the weathering for the Xen crystals.
Each part was painted first by dabbing black acrylic paint over the entire surface with a piece of rolled-up newsprint. After this dried, I went back and scratched off sections in vertical strokes along the length of the part to give the surface a bit more variation. When lit, I was hoping for the effect of red-hot metal, or perhaps lava. The results were great.

The clear section of the barrel also has LEDs - these illuminate the small windows in the barrel front and pulse in time with the Xen crystals. Parts like this are also what makes laser cutting such a great solution for propmaking.
Lastly, I wanted something to look at if you were to stare down the barrel of the gun. This little assembly is more hackery with found parts - 6 LEDs illuminate a plastic solder spool salvaged from my "spare plastic" bin. The effect at the base of the barrel section is pretty cool to look at.
Only two more steps (ha!) before final assembly: weathering and wiring. Its really easy to rush here, but I think weathering will make or break a prop. I had to summon as much of my non-existent patience as possible.
I think of the Gravity Gun as a utilitarian piece of technology. It seems like something that may have been at home in a lab, but has been re-purposed by the resistance in the world of Half-Life and forced into more heavy duty than it was originally intended for. I don't think the scientists behind the design would have spent time with rust preventative paint a fancy finish. This is a piece of tech meant for work, not aesthetics.
The rust here starts off with a basecoat of purple acrylic airbrushed around seams and screw holes. These areas would see the most "wear" and stripping of paint, so they would be the first to start rusting. After the purple dries, a dark red is stipled on with a small coarse brush. This is followed with a lighter orange, and eventually yellow on top of that.
Certain areas (like the seam line in the image above) also had a small amount of water dripped onto the wet paint to give the surface rust a little bit of a run.

All of the parts were weathered and clearcoated individually before assembly.

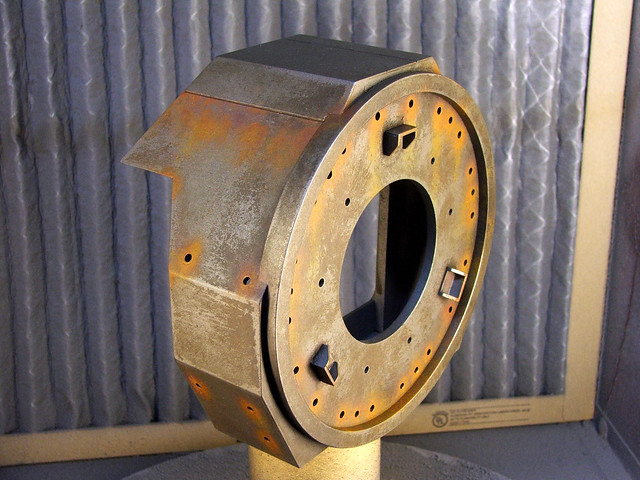
Assembled, the rusted joints start to (hopefully!) make some sense.

Sub-assemblies started to come together, and for the first time I felt confident about making my deadline! (note the red button there - another salvaged walkman part!)

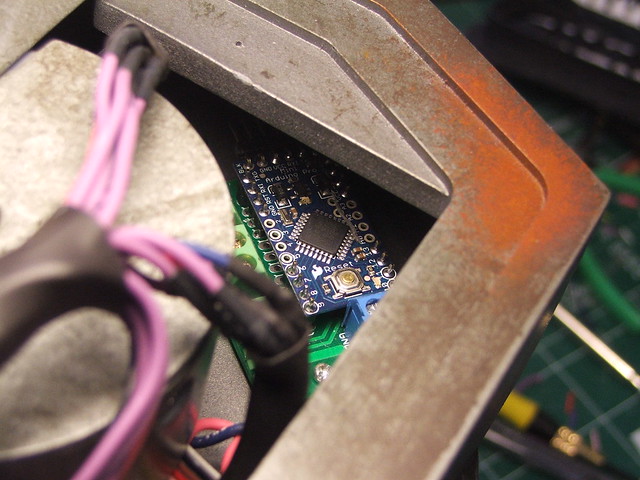
The electronics in the gun are controlled by an Arduino mini. Each of the light bars has 12 LEDs that pulse in 4 random patterns along the barrel. The arduino is turned on and off with a small switch on the underside of the main gun body.
First test fire! I used some screen mesh material to give the barrel interior a little more texture between the LED circuitboards.

Details, details. At the last minute I remembered I had forgotten the handle wrap and the valve pressure lines!

This is a HUGE post, and to anyone who has read this far I salute your perseverance. Believe it or not, there's actually lot of this build I've left out of this entry. If you want the entire play-by-play, then check out my Flickr stream here for more images and notes on the project. I could easily fill 2 more entries of similar length to this one with the nitty-gritty, but I have a feeling that may be overlkill...
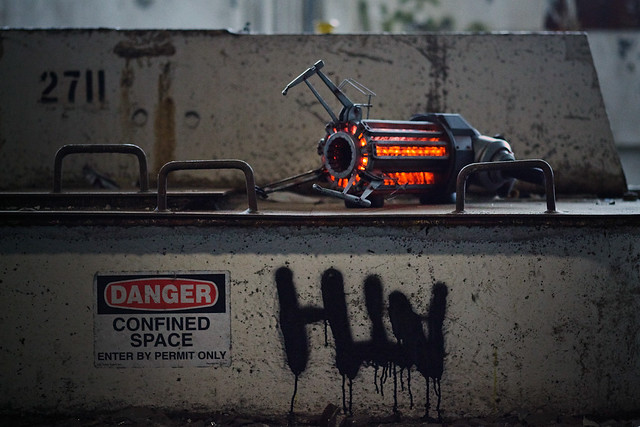
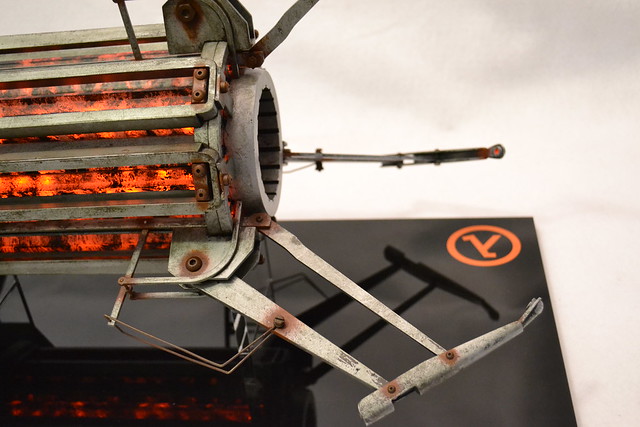
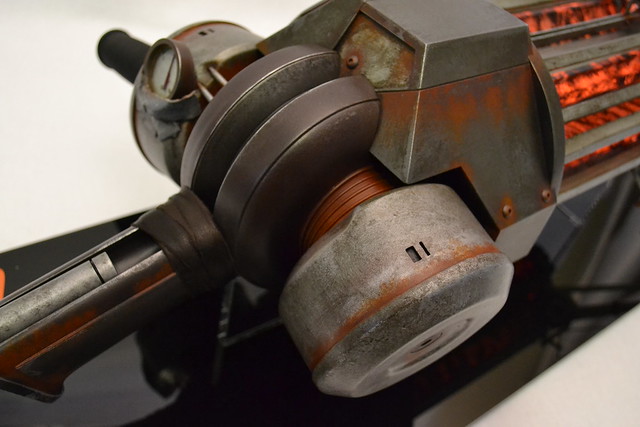
The finished product!

If you haven't seen Dan's awesome photography already, be sure to check out that entry here. Below are a few more close-up shots of the finished gun that show off more of the details.


Thanks for reading, and happy 2012!