Don't make excuses. A loss is a loss. - Cassandra
Classic.
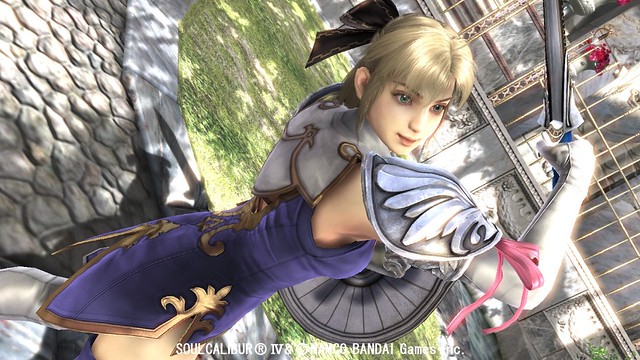
As a personal project of mine, I had decided at one point to make Cassandra's sword & shield from the latest installment of the franchise, SoulCalibur IV. My wife mentioned "If you make the armor, then I'll do the rest of the costume."
And thats where we find ourselves now.
The "armor" amounted, really, to a pair of shoulder pauldrons. I liked the challenge of this project - it seems like lately all I've been making is guns, and the chance to do something organic and sculpted. It may not be the world's best method, but I started out by making some 2D illustrated flats of the pauldron and arm cuff. Since they're symmetrical front to back, making a single pauldron and molding it seemed like the best course of action.

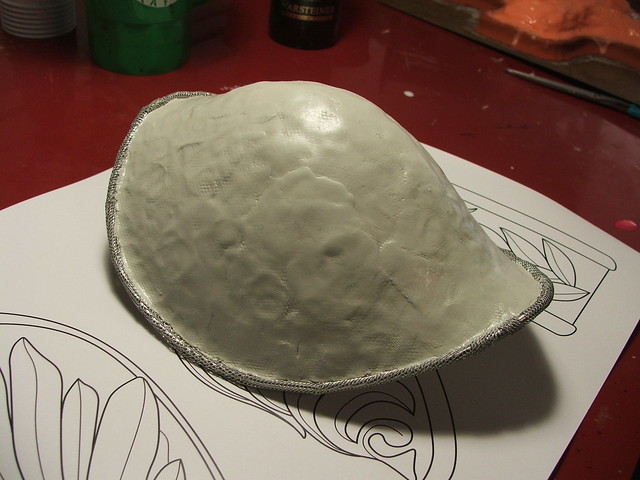
Starting off, I made a base from sculpting armature wire and mesh.

This shape was skinned in a thin layer of apoxie sculpt to define the shape and give me a base to work over.
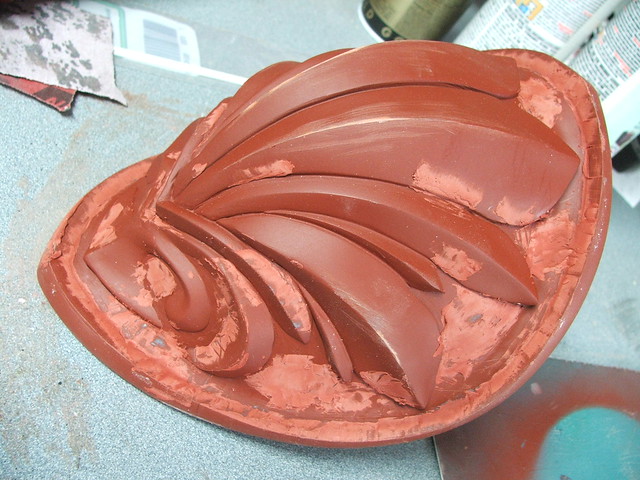
I wish I had a more scientific method of doing this, but from there I pretty much just eyeballed the blueprint drawings onto the surface of the form. after working with a dial caliper and ruler on my more "geometric" builds, this took some refining to get where I liked it.

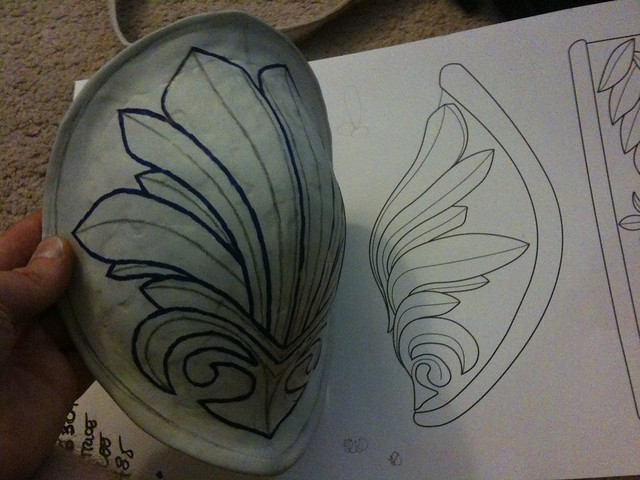
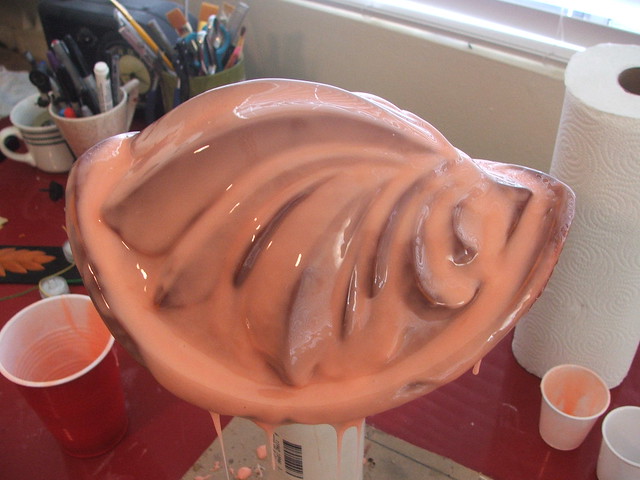
More apoxie sculpt followed (and I was trying to use the very last of that awful tub of orange colored clay I had) to build up the shape of the filigree.
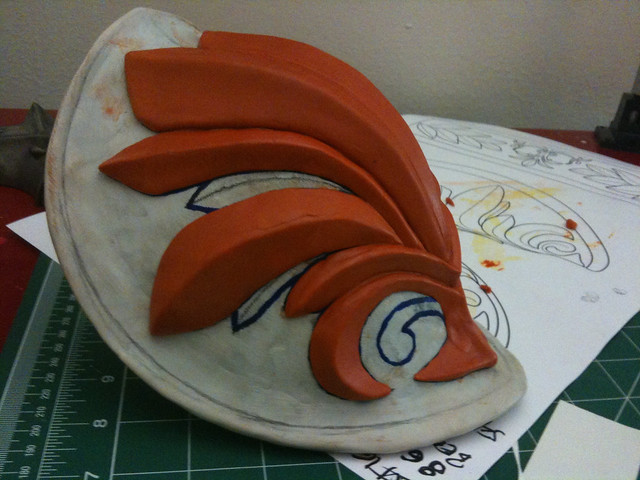
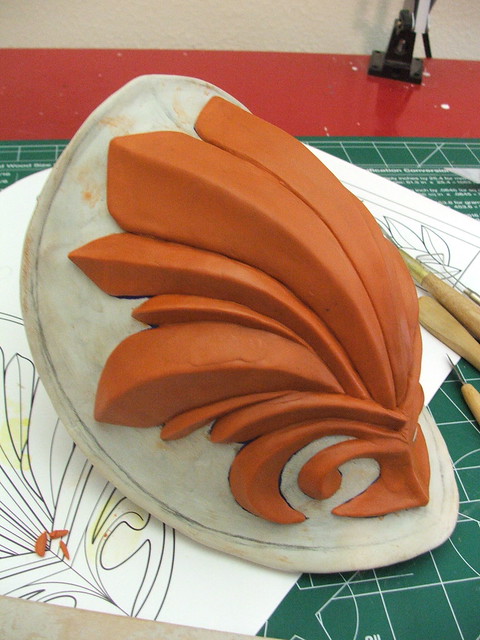
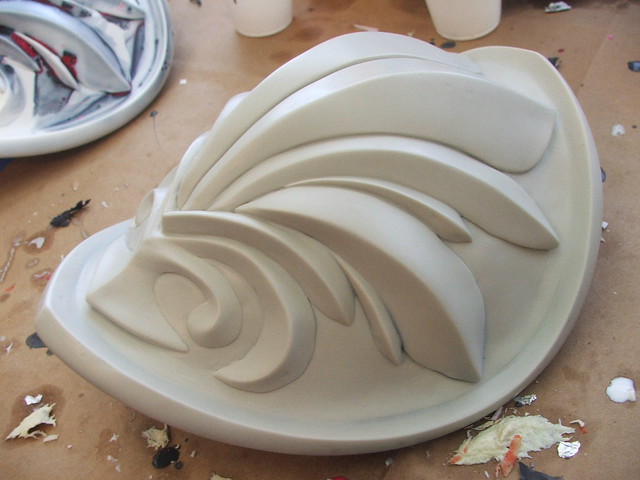
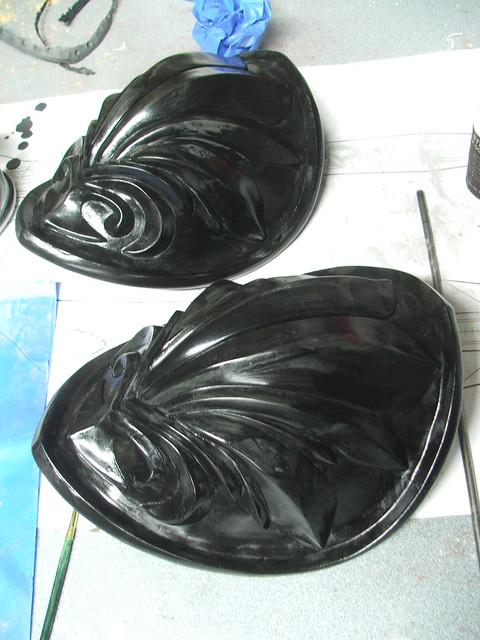
Since my sculpting skills are a C+ at best, there was a lot of sanding to be done after the clay had dried.
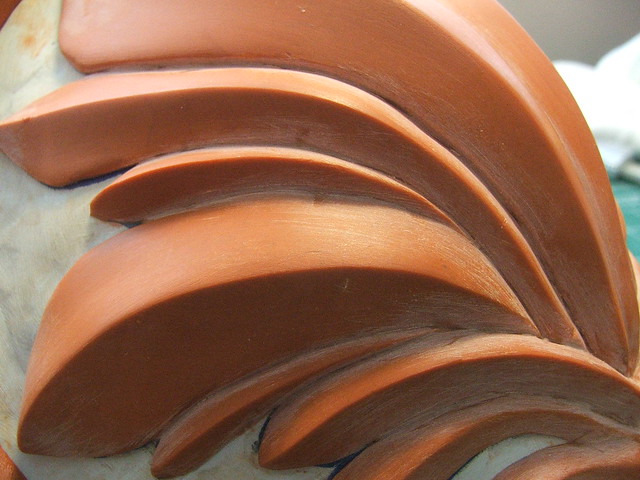
After shaping the feathery bits, the edge was also added in more apoxie sculpt. The whole thing was starting to get pretty weighty at this point, so its a good thing I decided to go with molded pieces for the final.

Sanding...
Spot Putty...
More sanding...
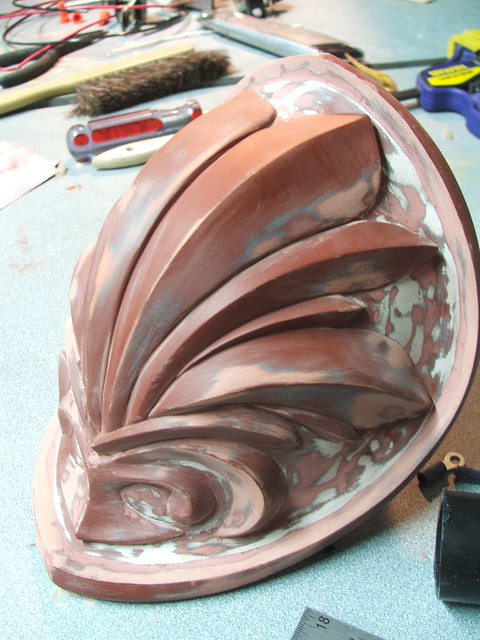
And some primer...
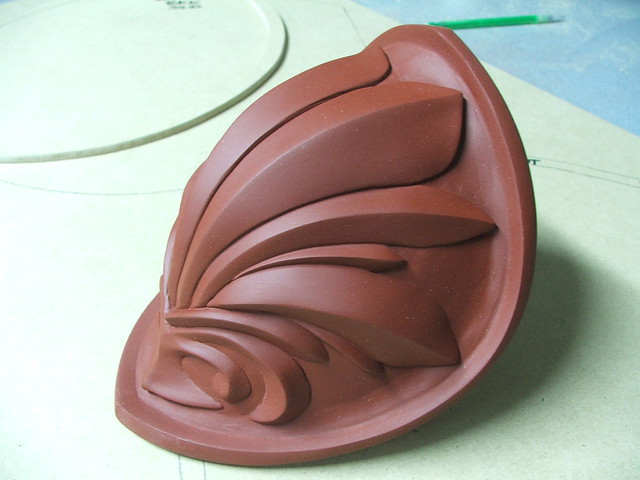
Then we're ready for molding!
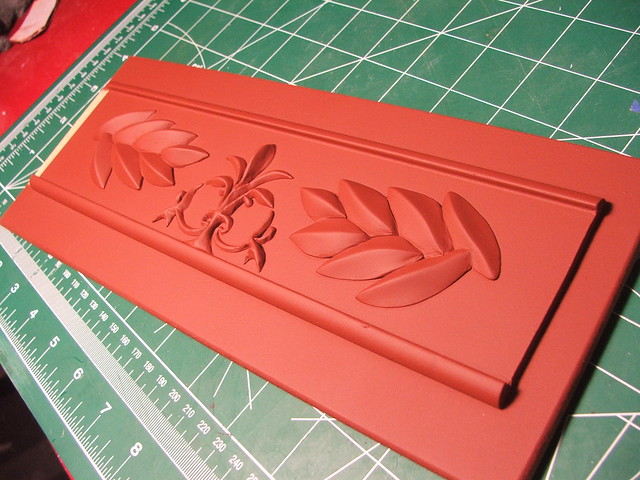
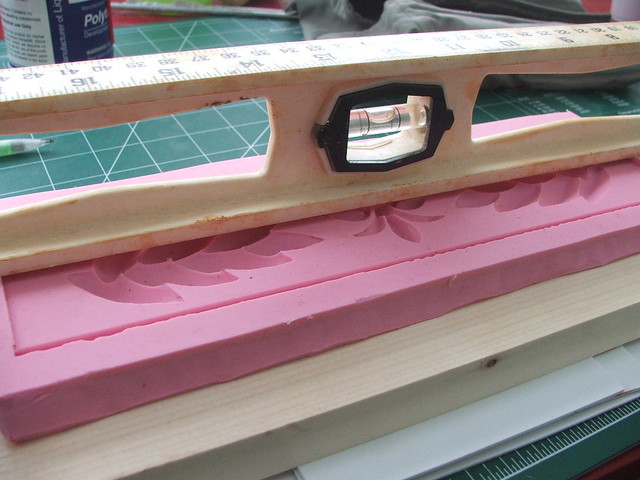
The arm cuff followed a similar process. I measured the circumference of Emily's bicep to figure out how wide the base piece had to be to wrap around her arm. A piece of sintra served as a base to sculpt on top of, and the top parts were made with apoxie sculpt. Sparing you the details of sand/bondo/repeat, here's the jist:


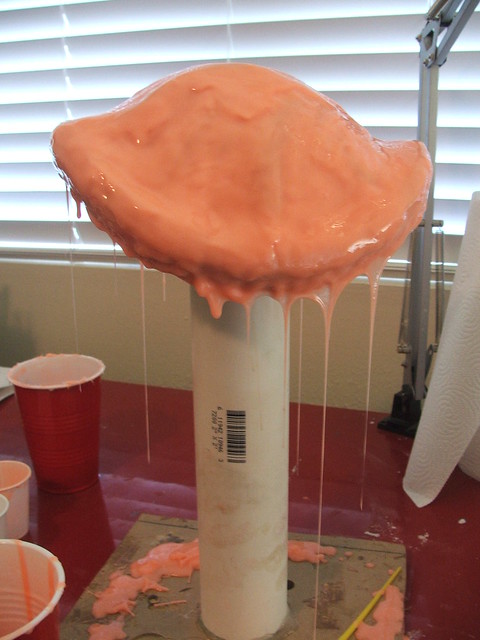
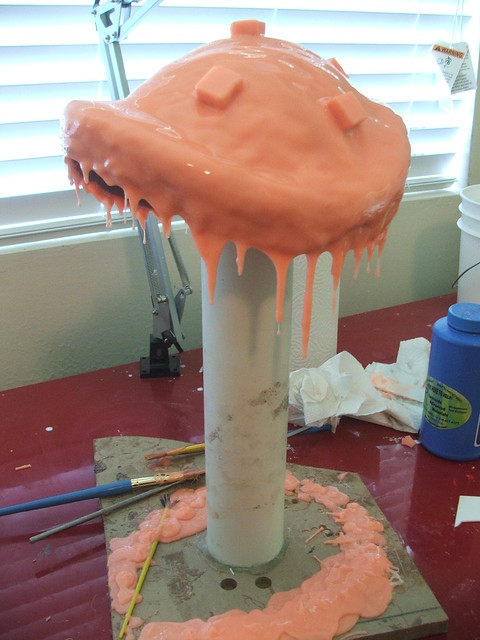
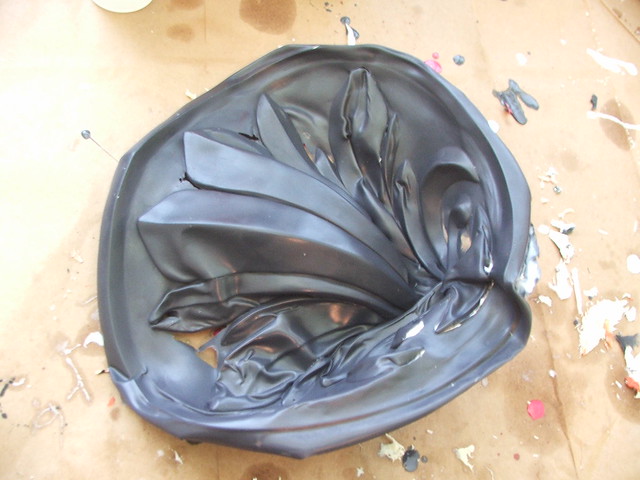
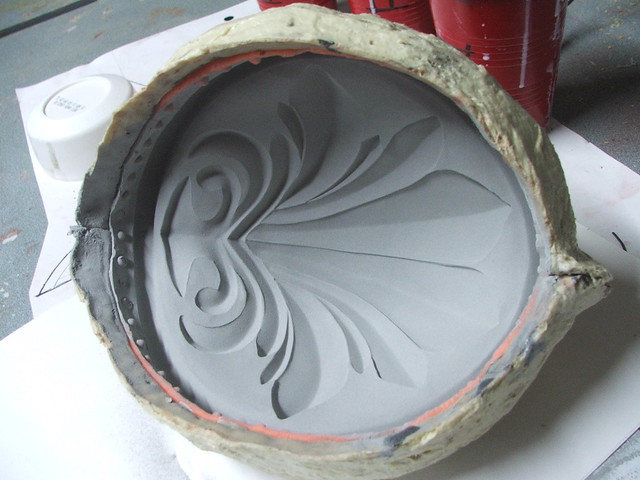
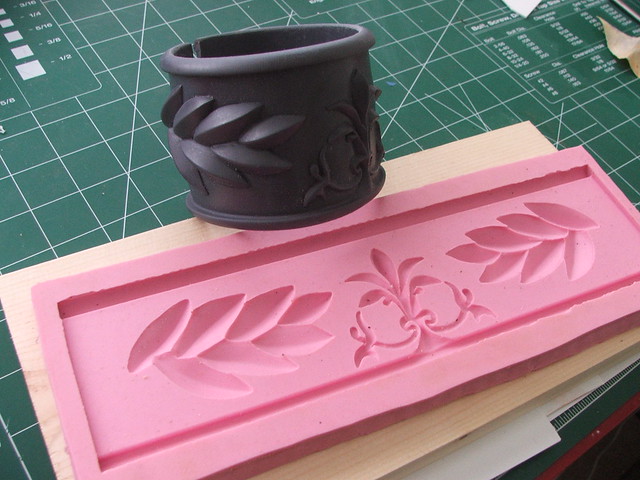
The pauldron molds were made with Rebound-25 silicone, while the arm cuff was done in Mold Max 30. The pauldron part was suspended on a PVC pipe for the brush coat first.
This was followed by thickened silicone, registration keys, and finally a jacket mold made from plasti-paste.
Look! A Hanar!
Originally, I had intended to make a front and back part to the piece, then join them and pour in resin to be slush cast. I was hoping this would make a nice, lightweight, hollow piece.

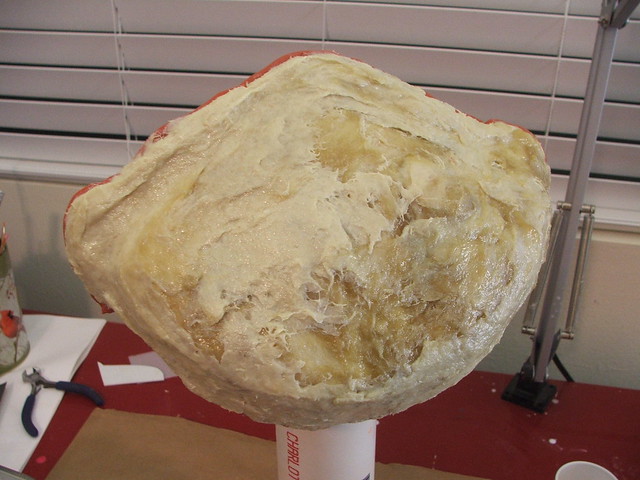
I was wrong. These were my first two attempts. I got better from the first to the second, but the piece is so thin that the resin wasn't flowing completely to all parts of the inner cavity. The first piece wasn't thick enough to hold its own shape, and the second one was so thin in some parts you could see through it.
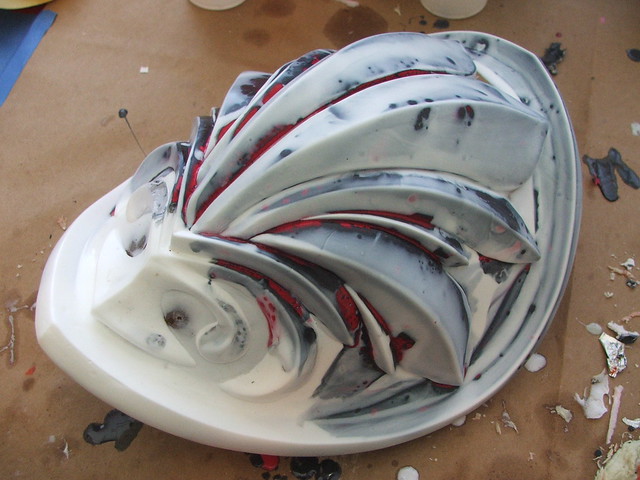
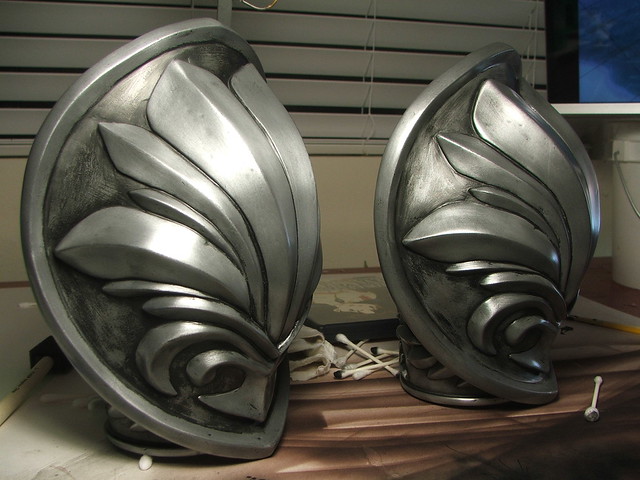
My third pass was done by removing the back part of the mold and slush casting the piece. MUCH better.
Progress?
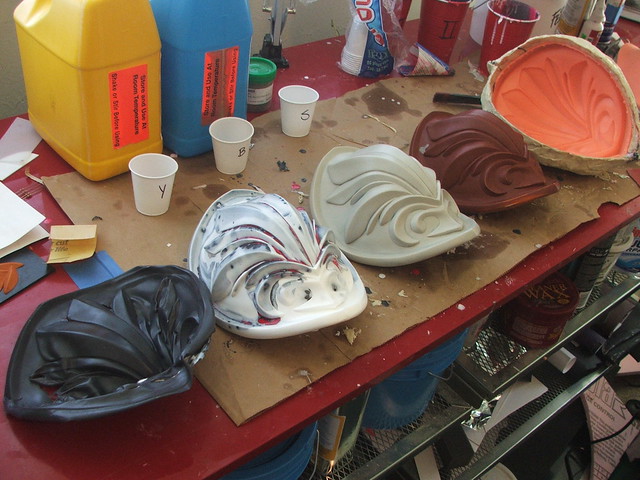
With the practice out of the way, I started on the final pulls. The mold was dusted with aluminum powder first, then I slush cast the pieces in Smoothcast 300, dyed black.

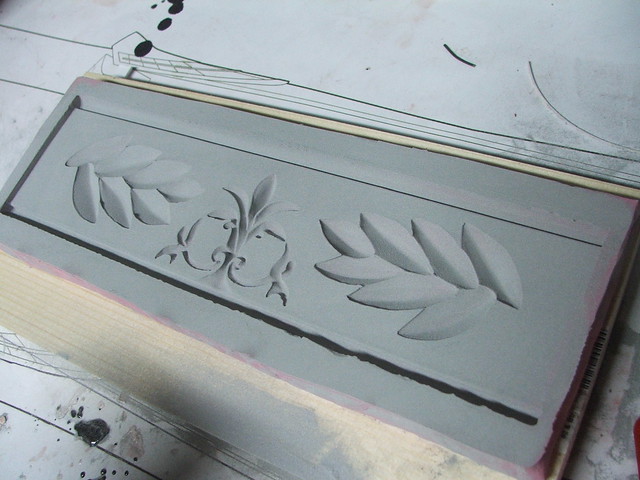
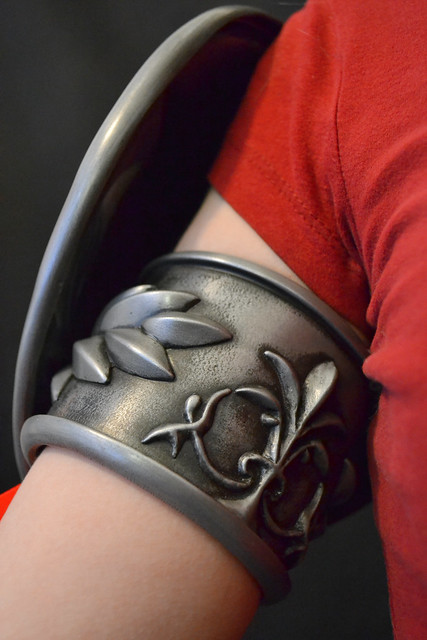
Before I pull the cover on that though, you might have noticed that I sculpted the arm cuff as a flat bar. This might seem odd as most people's arms aren't two-dimensional, but sculpting something on a curved surface gave me a headache just thinking about it. I had an idea when making this part; a bit of a gamble, but it really paid off in the end.
The mold was first done over the flat sculpt. Before pouring the resin, I made sure the mold rubber was completely level and on a flat surface.
When pouring this piece, I used the same aluminum powder and black dye as before.
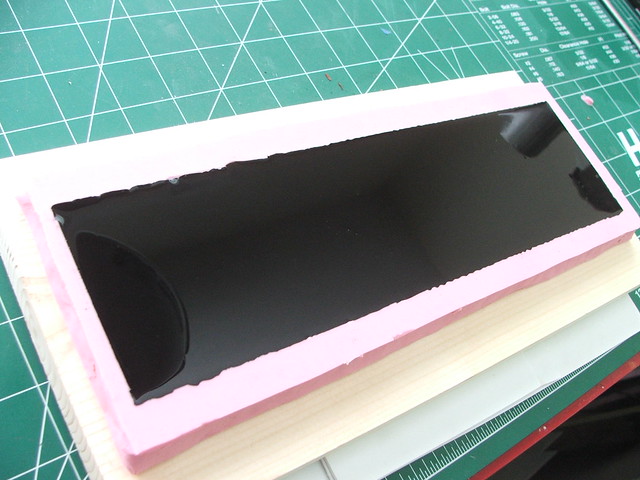
As resin cures, it starts to change color. At this point, its not 100% cured, but still rigid enough to maintain its shape. If you remove a pour from a mold too early, it can deform rather easily but still look similar to the desired shape. When the resin in the arm cuff mold started to change color, I picked up the rubber and wrapped it around a 3" steel pipe.
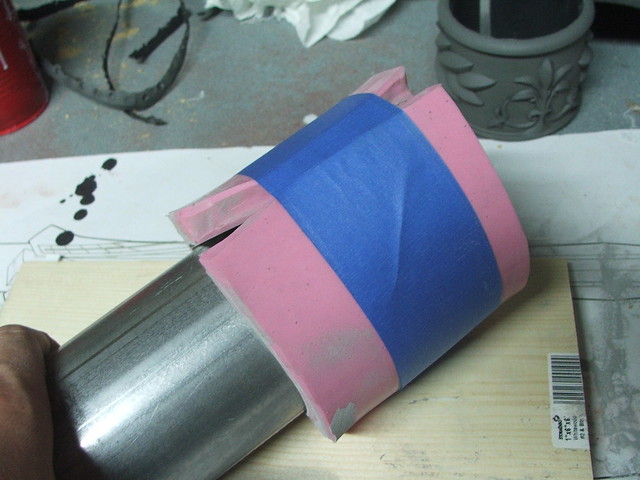
After about 30 minutes, the resin was fully cured and I was able to remove the piece - now perfectly cylindrical!
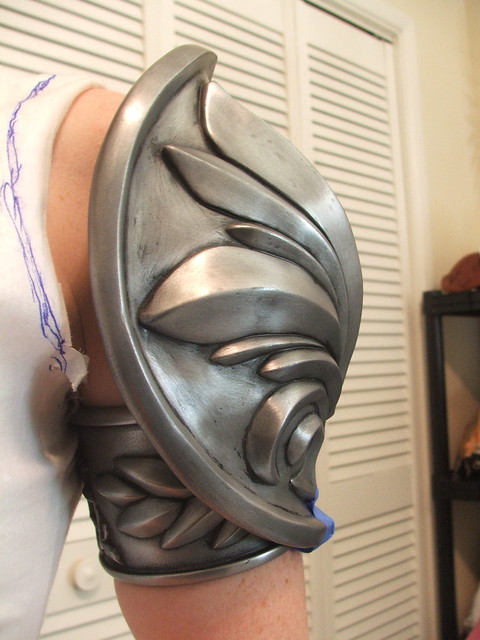
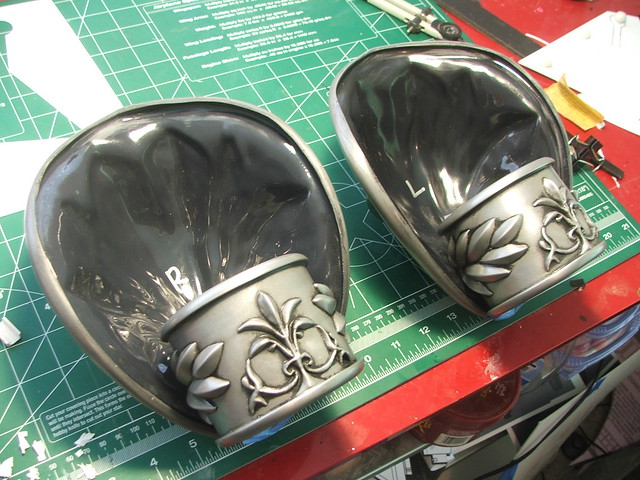
Here's the two pieces together after buffing the aluminum coating lightly with some steel wool.
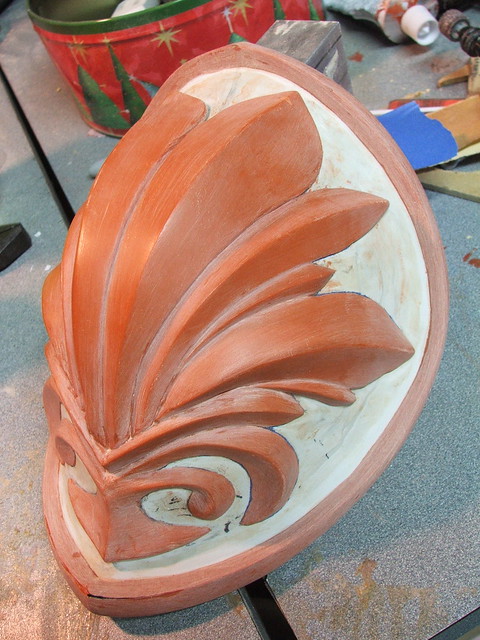
From here, I used shoe polish as a base coat of weathering.
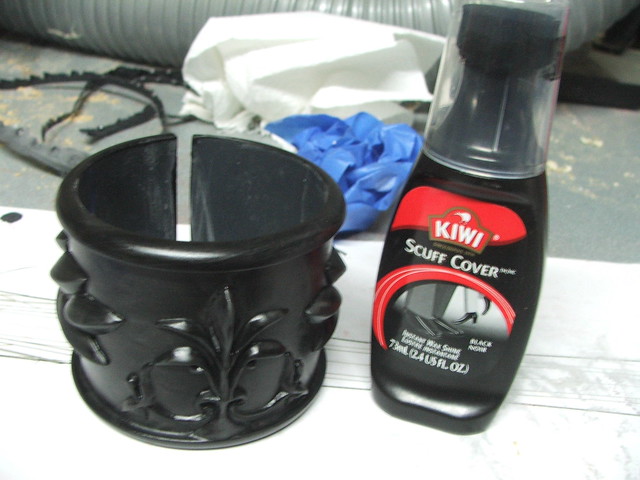
This was buffed off the higher parts to leave the underside dirty. After that, an airbrush was used with layers of dark brown and black to further knock back the recessed areas.

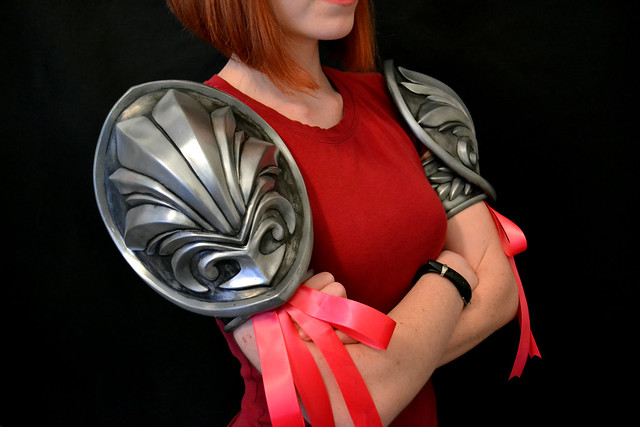
Apoxie Sculpt was used to level out the inside area of the pauldron, and the cuffs were epoxied in place.
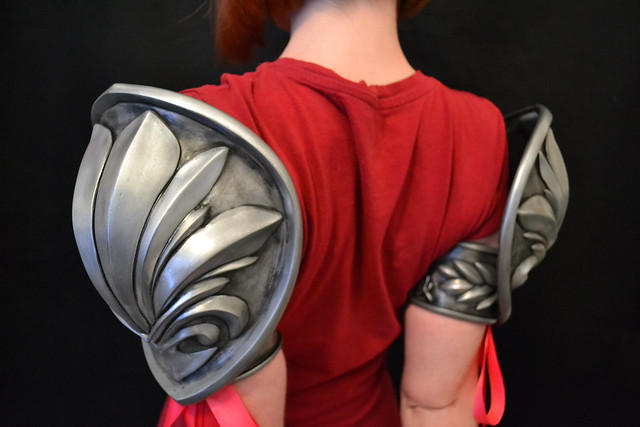
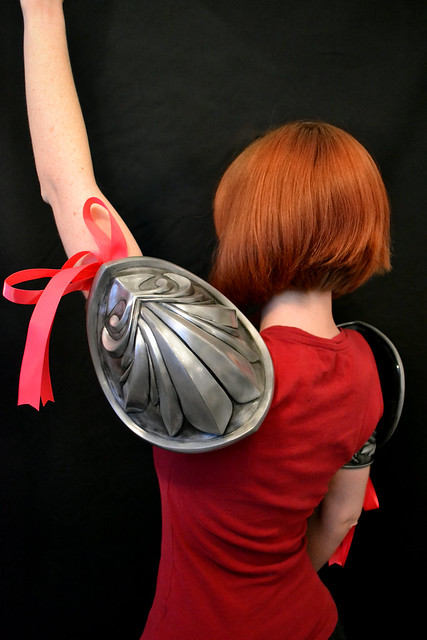
The finishing touch was a coat of rub-n-buff wax in "antique silver" and the *light red ribbons affixed to the middle of both pieces.

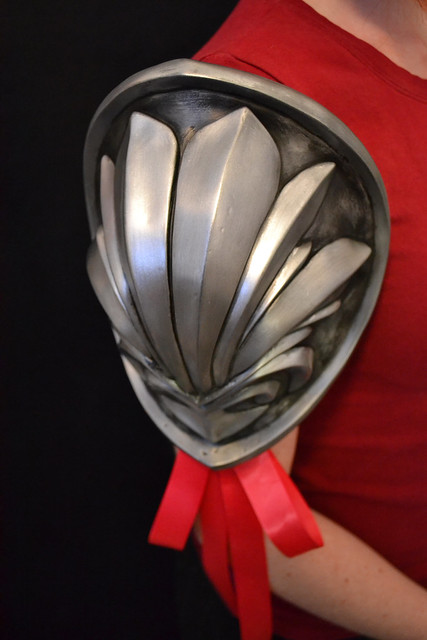
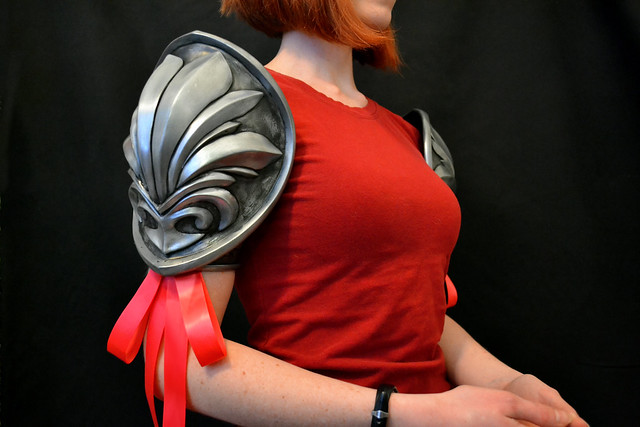
There are no straps that hold these in place. Each pauldron weighs just under 1lb, and since the arm cuffs are designed to be the same circumference as the wearer's arm, they stay in place via friction with only a small strip of 1/4" foam to take up any slack. They also do not affect the ability to move your arms in any direction, which is a LOT more than I can say for most videogame armor.
Posts detailing the build-up of Cassandra's sword and shield to come, and more pics of the build process for these can be found on my flickr page - thanks for reading!