Build Archive: Part 1 - Part 2 - Helmet Q&A
If you want to know the details, grab a drink and follow along. For those of you who prefer the "instant gratification" route however, indulge yourselves in the following. Want more without reading all the boring build notes? Scroll all the way to the bottom for more prettiness, or visit my Flickr page for higher-rez pics:
Want to learn how to make a daft punk helmet in 3 minutes? Don't blink.
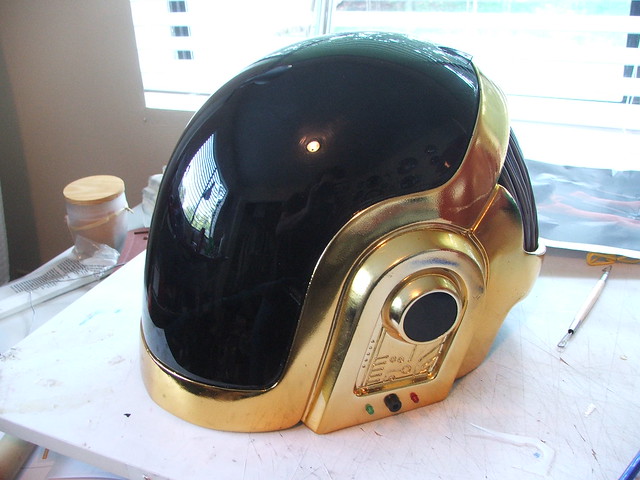
Now, for the build. We last discussed the golden bucket nearly a year ago. It was a last-minute test piece with a webbed visor and so-so chrome. The wiring color on the rear dome was incorrect, and the visor was tinted much too dark to see out of comfortably.
I set about pulling another copy.
This time the chroming task was handled by yet another shop - Creations N Chrome in Valencia, California. After an initial teething process in which we learned NOT to bake the helmets in an oven for them to dry, I was treated to one of the glossiest painted chrome finishes I've seen yet on my hand-sculpted form.

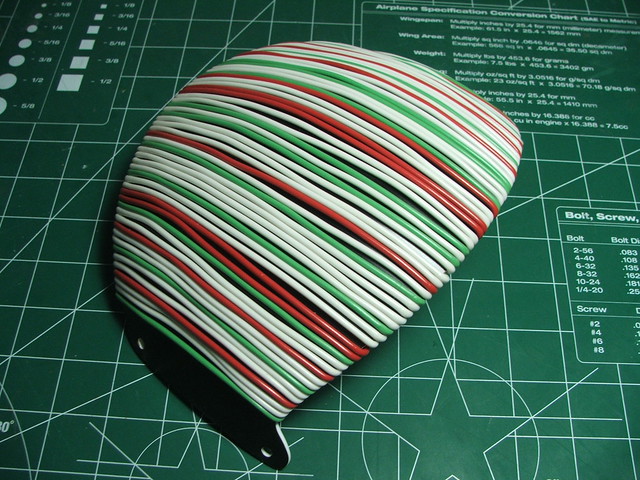
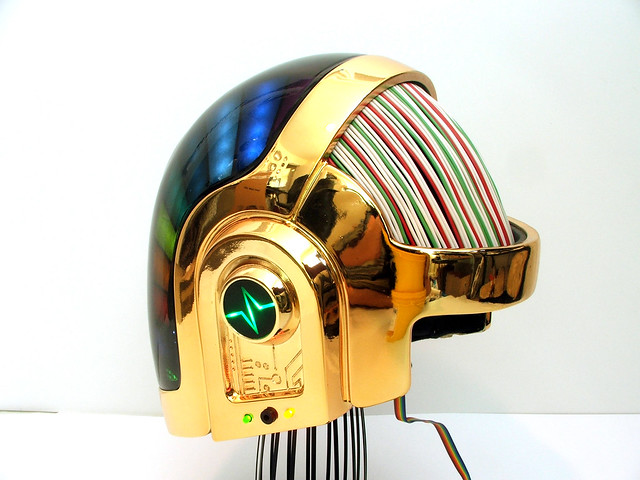
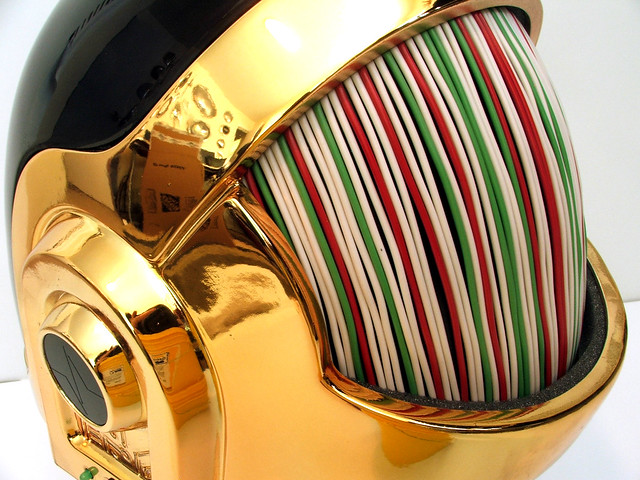
I also took this time to create a color-accurate wire dome for the rear of the helmet. Despite the holiday feel to the color scheme, its canon-accurate to Guy Manuel's actual piece. In it went.
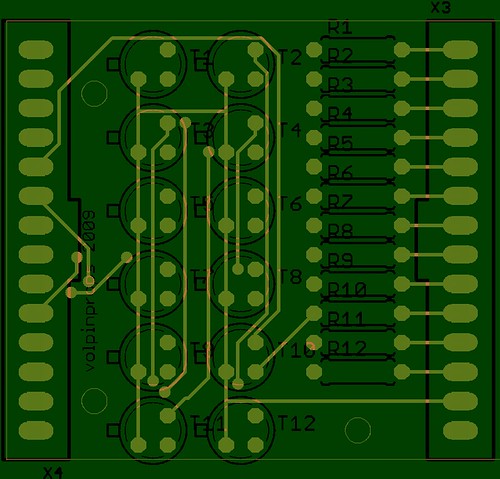
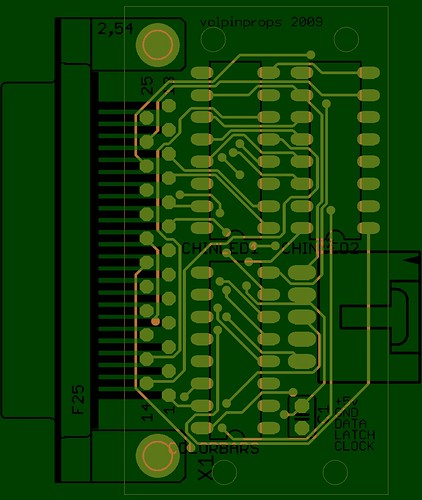
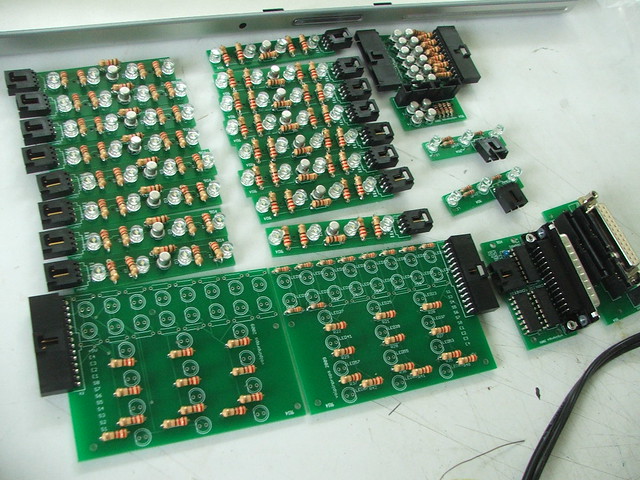
Yes, I promised you pretty lights. First, I had to teach myself to design circuit boards. After some research online, I found a program called Eagle from Cadsoft, and set about learning the interface. Many of my boards went through dozens of revisions as I found ways to make them smaller and more efficient. Here are a few shots of the final designs (top silkscreen and top copper only)

These were sent out to a company called batchPCB.com for printing. 5 weeks later, I had my boards! In the interim, I also lived on the Digi-Key website. All components except for LEDs were purchased through Digi-Key. LEDs came from Superbrightleds.com. I know it sounds like I'm hocking just about every single place I used here, but I'm bound to get emails about this eventually. Hopefully if I toss all the info out there, it'll help other builders when they give it a shot.
So, with boards and components finally together came the soldering.
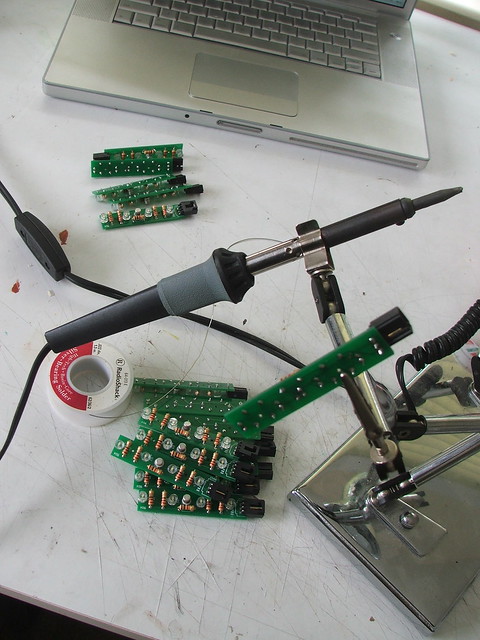
...and more soldering...

...and then some more.
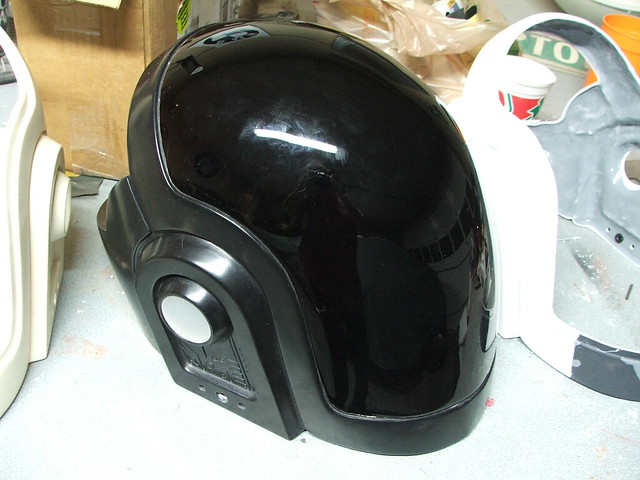
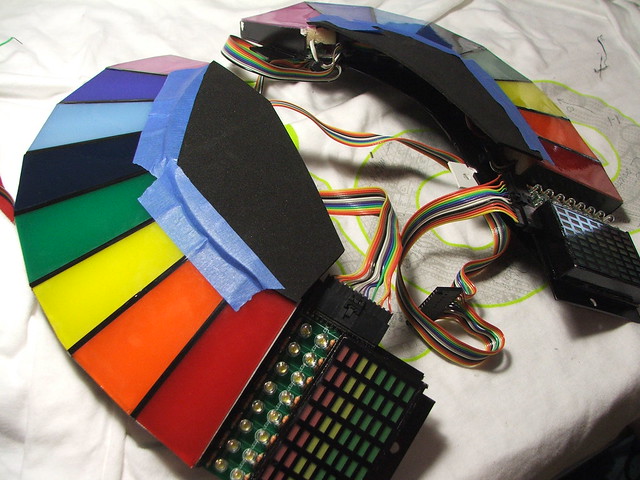
Once the boards were made, housings for the colorbars were built from styrene sheet.
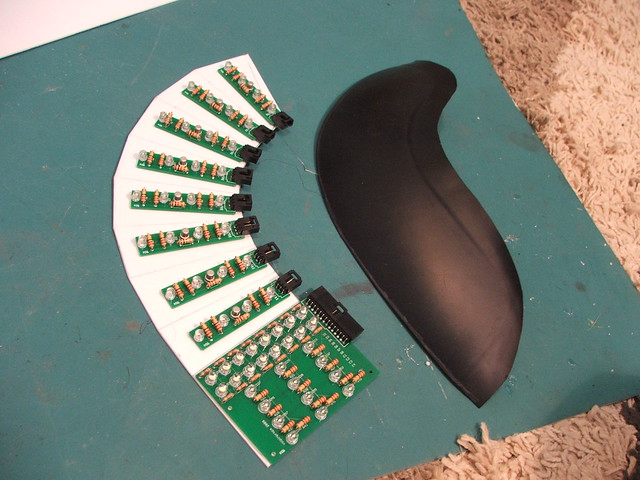
These were mounted to a vacuum-formed black styrene dome to make sure their shape lined up with the helmet.


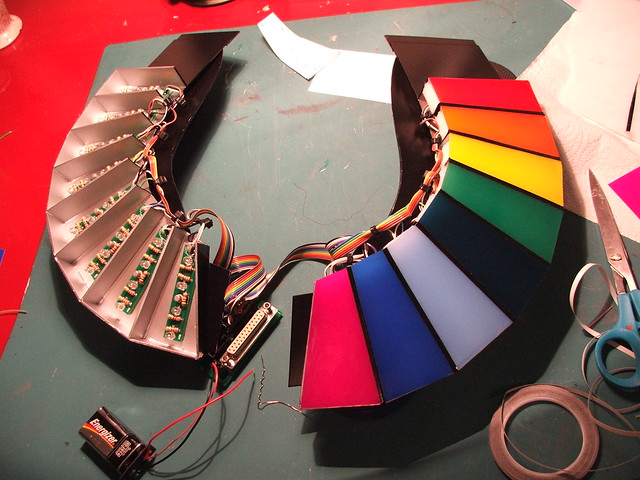
Having the housings built meant I could start building the wiring harness for all the lights. There is over a mile of wire wrapped around the inside of this dome.
To diffuse the light inside the housings, white foam pads were placed over the LEDs. These each had corresponding gel sheets that would eventually be glued over the LED boards and foam.

Here's the rainbow lighting rig being assembled.
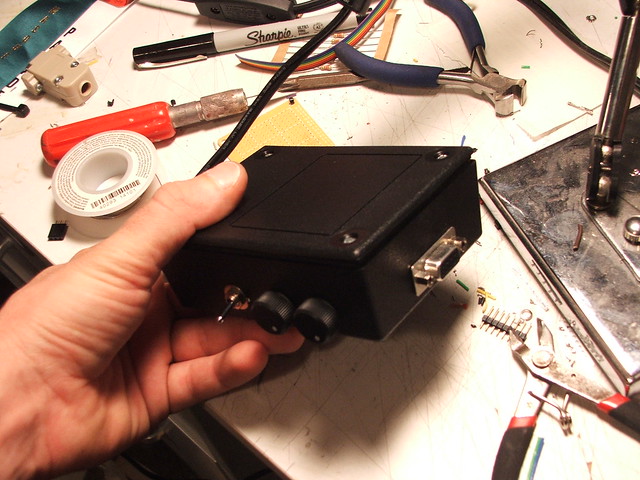
All of the signal and power would come from this black box, which houses the Arduino and AA batteries. A DB9 serial connector bridges the harness and the Arduino. There are three controls on the box - one switch that turns the lighting on and off, and 2 potentiometers which change the speed and pattern of the lights.
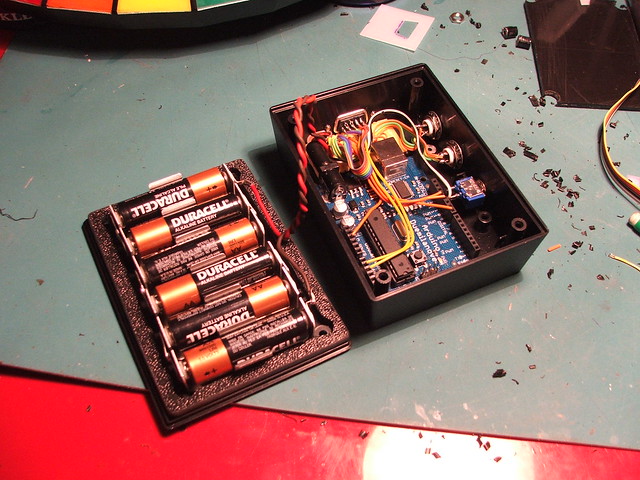
I have to give a MAJOR shout-out here to James Moss, who programmed the Arduino for me. I discovered pretty early on into this project that I had no mind for coding whatsoever, and set about finding someone who did. Thanks to YouTube, I ran across James' own Guy helmet build and asked him if he could program my lighting array. The results you see in the videos below are examples of his stunning work.
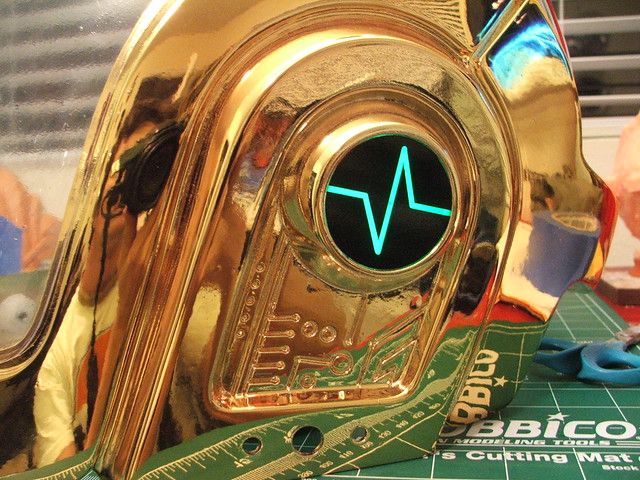
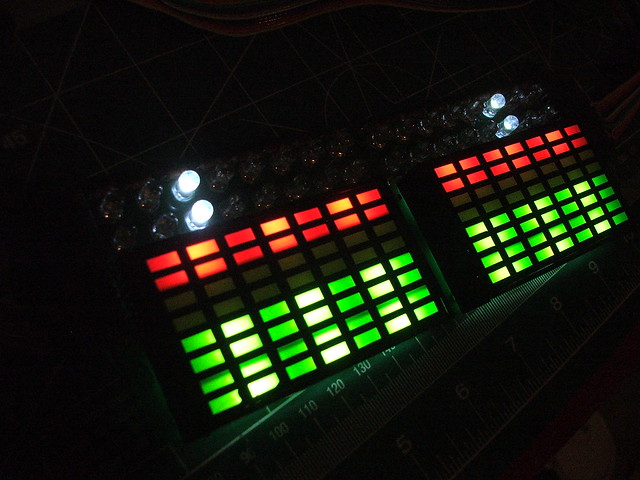
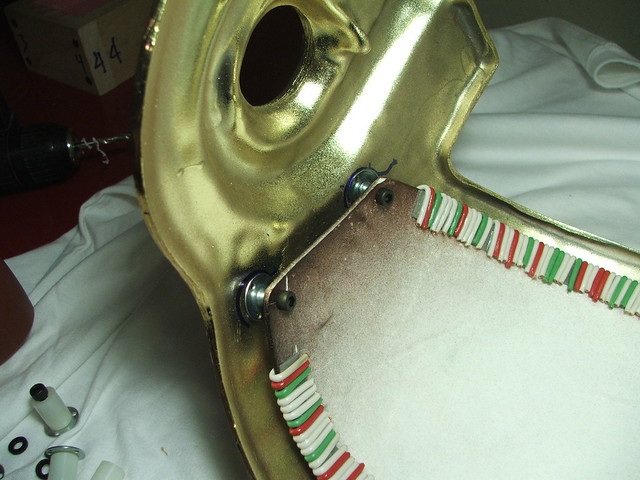
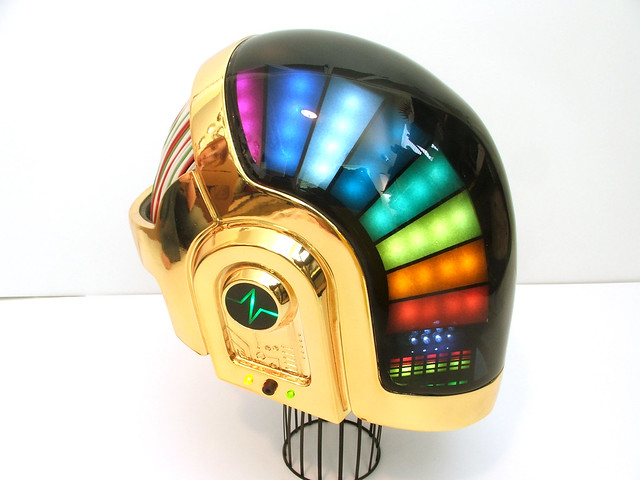
The last of the lighting was the color bars at the "chin" of the helmet, and the EKG meters in the ears. I sourced a local printer to laser-cut vinyl decals for me, and adhered these over translucent white acrylic to make masks for the LEDs.
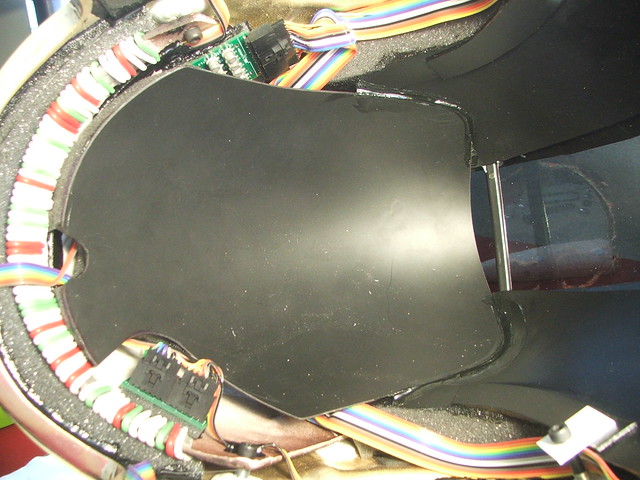
When mounting the lighting rig, I wanted to make sure no light escaped into the inside of the helmet. All of the light areas were blacked out with thin foam 3M weatherstrip adhesive to make sure they stayed put.

Both the lighting rig and the rear wire dome were affixed to the helmet using T-nuts and allen screws. The bases were glued in place with plumbing epoxy.
After the lighting rig was secured, I started routing wires and mounting the boards.

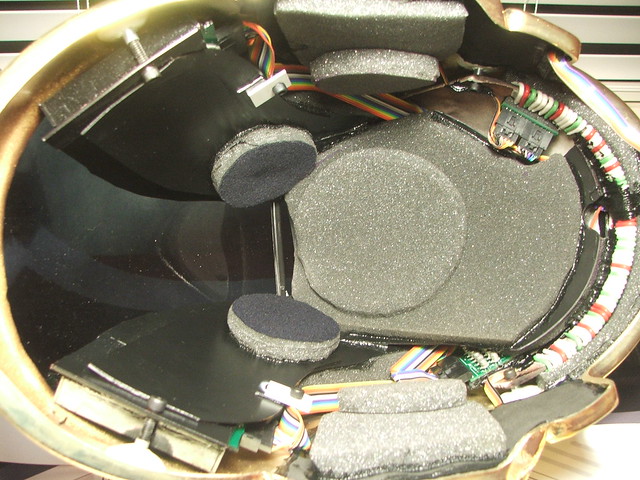
Not wanting these to get damaged, I used a scrap piece of formed styrene sheet to make a protective cover which would keep the boards from getting knocked around or broken.
On top of this and on the sides of the helmet, I added layers of foam padding to grip the wearer's head.
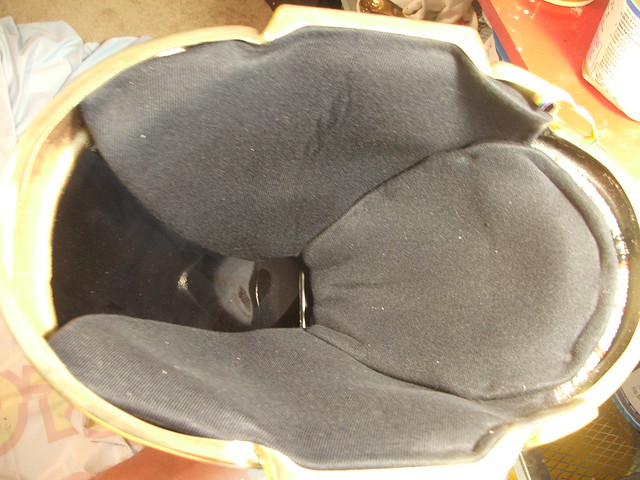
And finally, the inside was fully lined in automotive headliner fabric for comfort and style! Despite how it looks, visibility is actually quite good! Hearing anything with all this padding around your ears? Thats another story.
The first test-fire of the final piece:
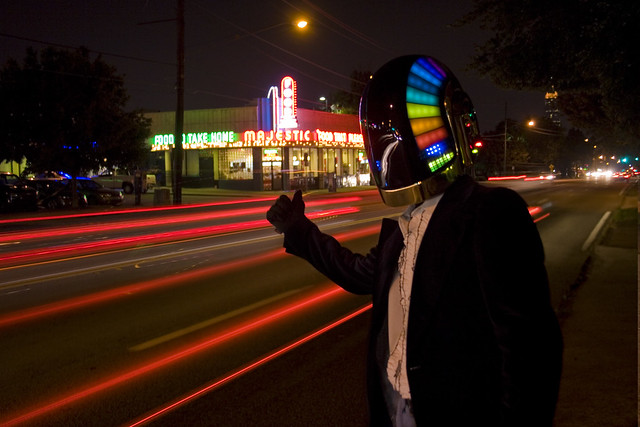
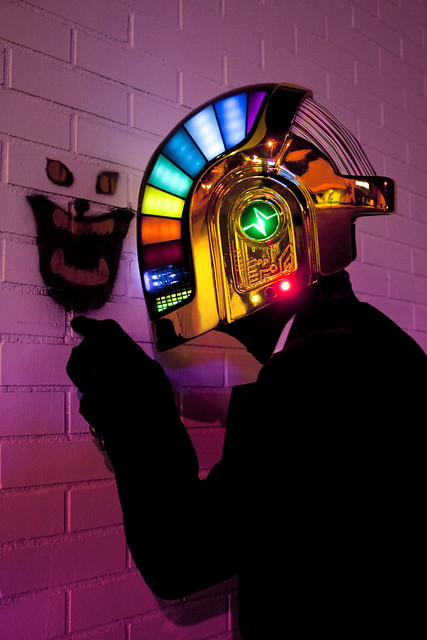
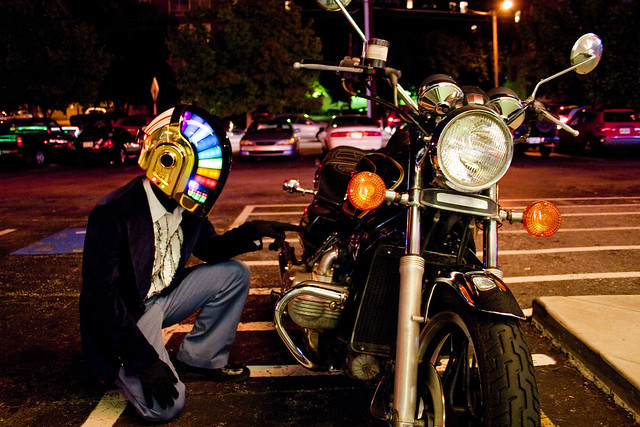
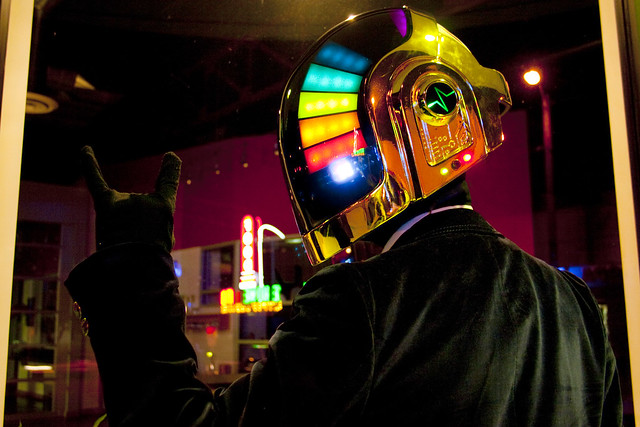
The final piece. Finished and it feels so good. If anyone is going to ComicCon 2010, you might see this thing in person!

Below are a few pictures taken by my friend Jennifer Barclay around Atlanta. I managed to cajole her into following me around in the ridiculous humidity, taking shots and answering all sorts of "what is that?!" questions. My last day with the helmet was a memorable one, and her shots are truly fantastic.


 This has been one hell of a ride, and easily the most monumental replica project I've ever undertaken. Higher resolution pics are available in my Flickr stream (up to 2272x1704 for you big-screen people!)
As always, thanks for reading!